53
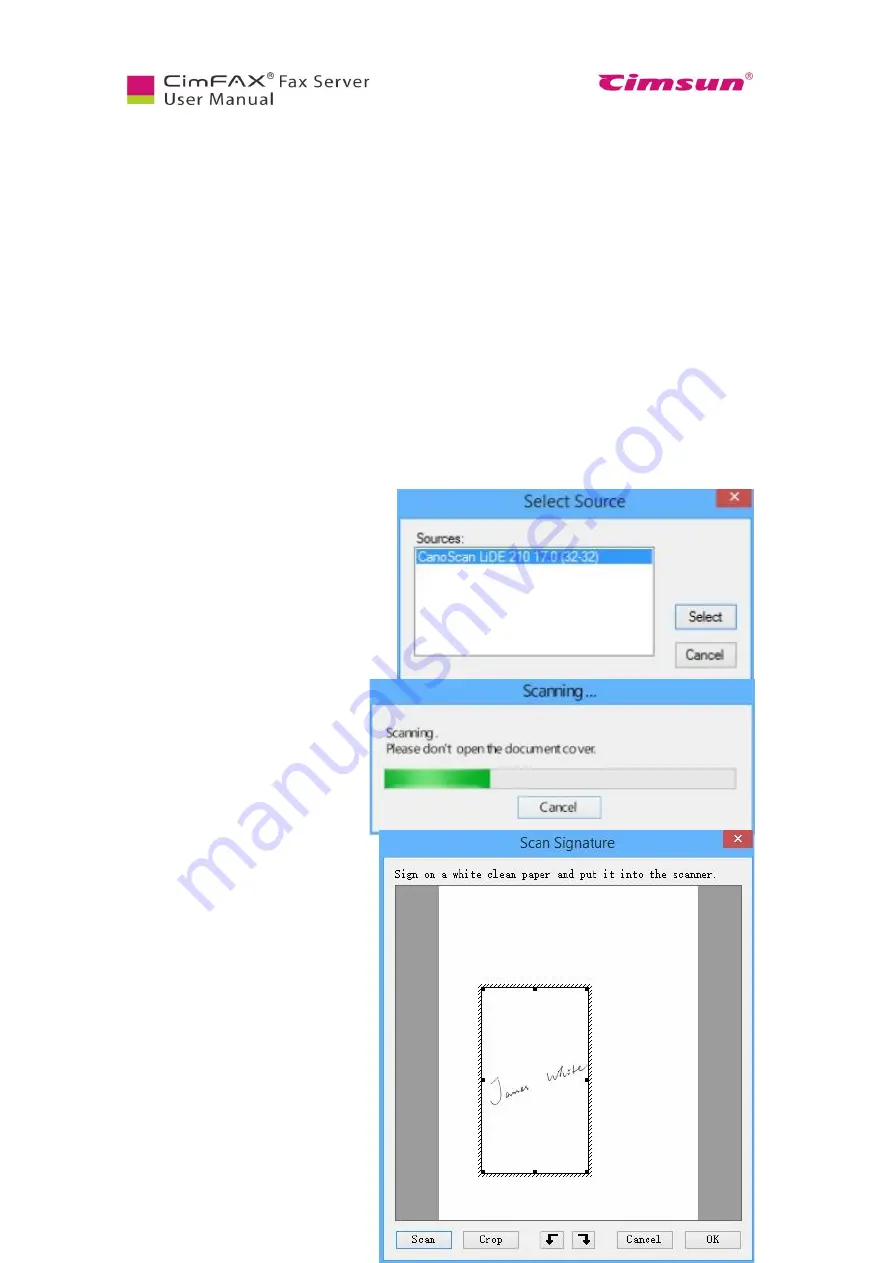
connected to your computer first and then sign your name or stamp on a white clean paper and put it in
your scanner. Click “Scan”.
Choose the model of your scanner in the
shown list and click “Select”.
The scanner starts to work and the
following progress screen appears.
Progress screen might differ due to
scanners’ model difference. Some
scanner may need some time for
warming up.
A scanning screen will. Drag the box
to the signature and click “Crop”.
Summary of Contents for CimFAX
Page 1: ...CimFAX Fax Server User Manual V5 0 ...
Page 27: ...21 4 Click Next or Browse to choose file location 5 Click Install ...
Page 28: ...22 6 Wait for file copy complete 7 Wait for the installation of CimFAX virtual printer ...
Page 30: ...24 ...
Page 37: ...31 11 Click Next Enter your name and password to complete the registration ...
Page 77: ...71 6 10 8 OCR options This function is not available any more ...
Page 81: ...75 7 Instructions for CimFAX on Mac ...
Page 95: ...89 ...
Page 104: ...98 Here are the screenshots of fax sending progress ...
Page 105: ...99 ...
Page 106: ...100 ...
Page 108: ...102 Click trash can icon to view deleted faxes ...
Page 111: ...105 8 Fax Mode ...


