51
6.3 Import Contacts
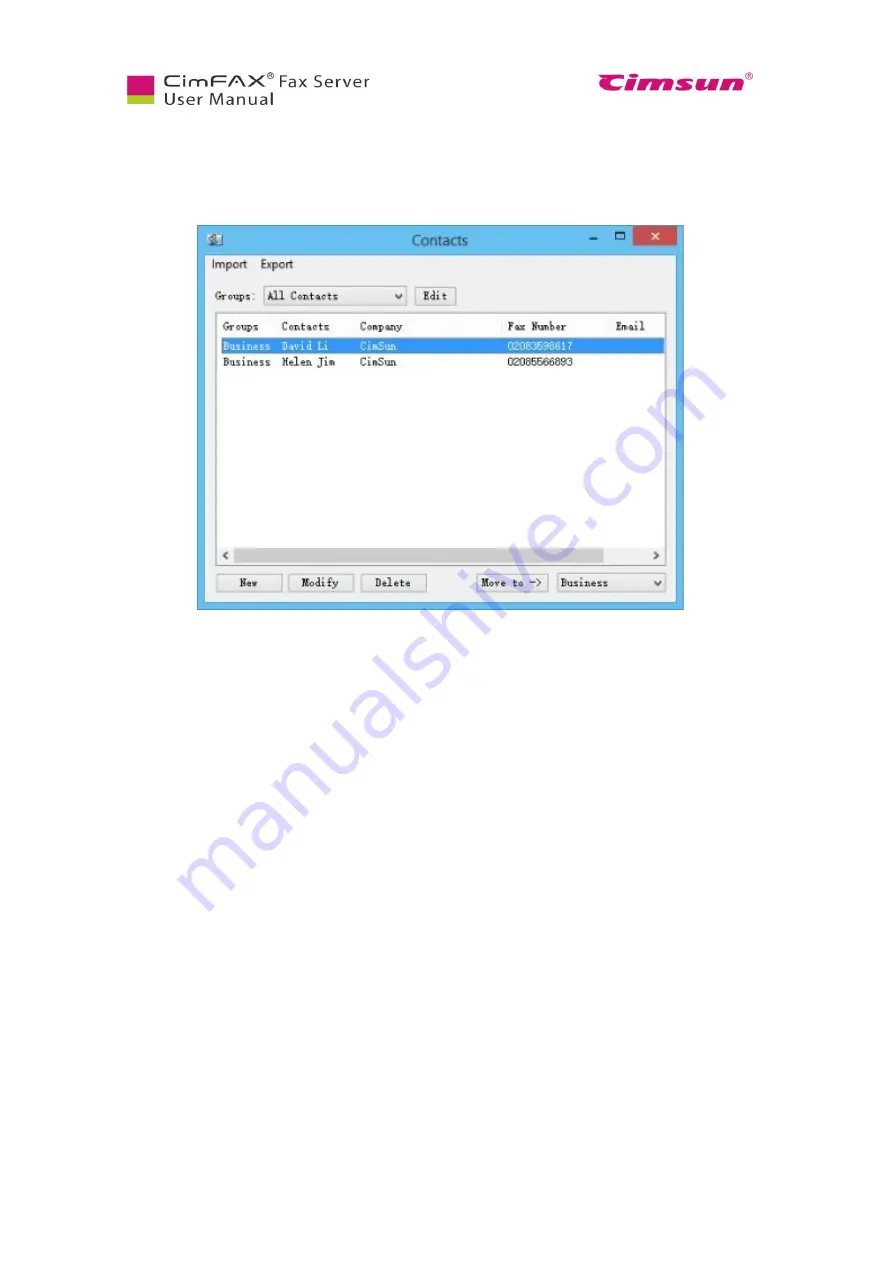
Click “Options” menu bar > “Contacts”. Contacts window will show.
In the Contacts window:
●
“Import”: add contacts from excel file (*.csv/*.xls/*.xlsx) and from name card file (*.vcf).
●
“Export”: export contacts in excel file (*.csv) or name card file (*.vcf).
●
“Groups”: a drop-down menu allows you to view information of a certain group of contacts.
●
Click “Edit” button to add, delete or rename groups.
●
Click “New” button to add new contacts.
●
Click “Modify” button to modify information of contacts selected.
●
Click “Delete” to delete contacts selected.
●
Click “Move to” to move contacts to the groups in the lower right drop-down box.
Summary of Contents for CimFAX
Page 1: ...CimFAX Fax Server User Manual V5 0 ...
Page 27: ...21 4 Click Next or Browse to choose file location 5 Click Install ...
Page 28: ...22 6 Wait for file copy complete 7 Wait for the installation of CimFAX virtual printer ...
Page 30: ...24 ...
Page 37: ...31 11 Click Next Enter your name and password to complete the registration ...
Page 77: ...71 6 10 8 OCR options This function is not available any more ...
Page 81: ...75 7 Instructions for CimFAX on Mac ...
Page 95: ...89 ...
Page 104: ...98 Here are the screenshots of fax sending progress ...
Page 105: ...99 ...
Page 106: ...100 ...
Page 108: ...102 Click trash can icon to view deleted faxes ...
Page 111: ...105 8 Fax Mode ...


