58
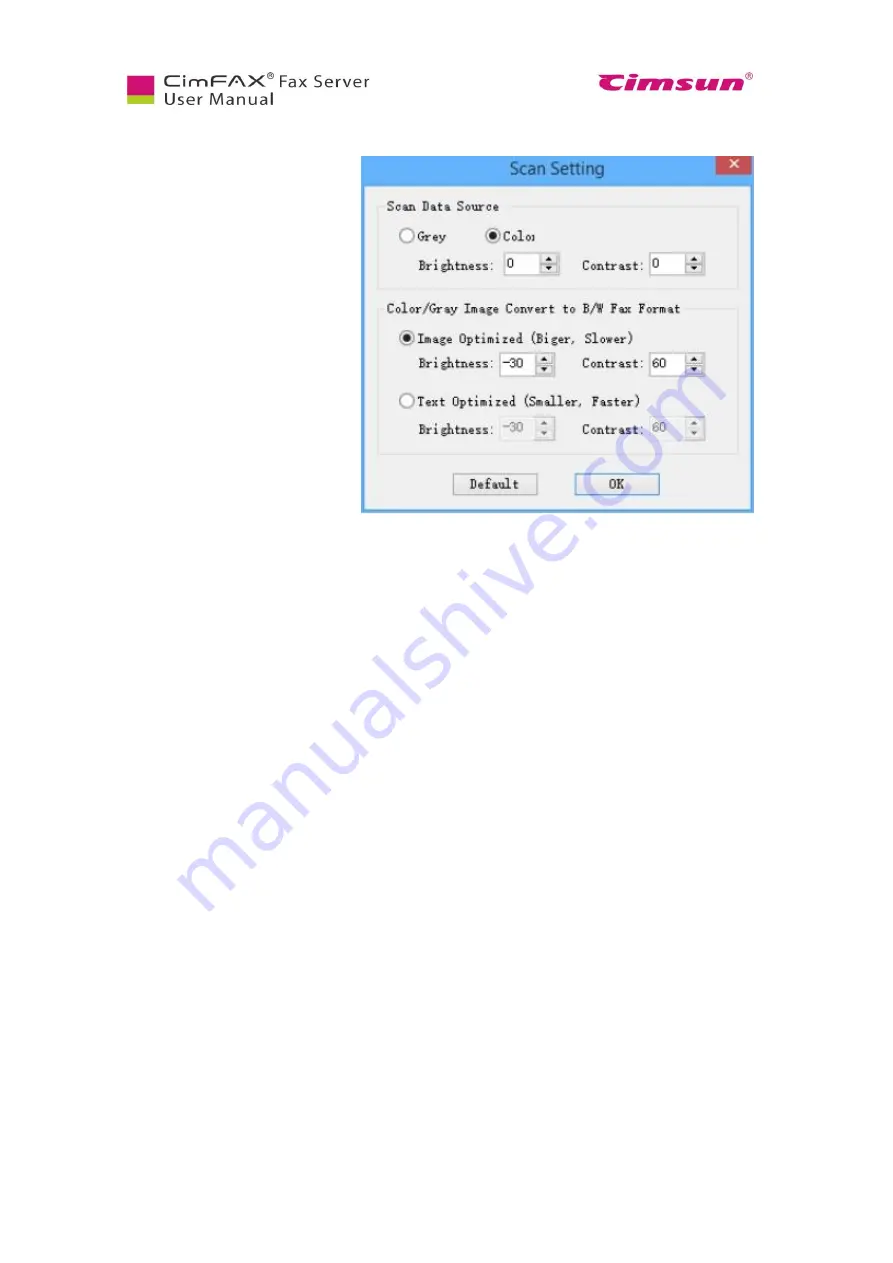
6.7 Scan Settings
Click “Options” menu bar > “Scan
Settings”.
Scans setting window will appear.
You can choose either “Gray” or
“Color” for “Scan Data Source”.
“Convert Color/Gray Image to B/W
Fax Format” includes two options:
●
Image
optimized
(Bigger,
slower)
●
Text Optimized
Brightness and contrast in the noted
options will differ due to quality
differences of original files. You
can scan with default brightness,
contrast, examine the scanning
effect, and then adjust the value of
brightness and contrast to get the
clearest scanned document.
Summary of Contents for CimFAX
Page 1: ...CimFAX Fax Server User Manual V5 0 ...
Page 27: ...21 4 Click Next or Browse to choose file location 5 Click Install ...
Page 28: ...22 6 Wait for file copy complete 7 Wait for the installation of CimFAX virtual printer ...
Page 30: ...24 ...
Page 37: ...31 11 Click Next Enter your name and password to complete the registration ...
Page 77: ...71 6 10 8 OCR options This function is not available any more ...
Page 81: ...75 7 Instructions for CimFAX on Mac ...
Page 95: ...89 ...
Page 104: ...98 Here are the screenshots of fax sending progress ...
Page 105: ...99 ...
Page 106: ...100 ...
Page 108: ...102 Click trash can icon to view deleted faxes ...
Page 111: ...105 8 Fax Mode ...


