179
5
Vie
w
er
Ref
erence
Basic Video Window Functions
●
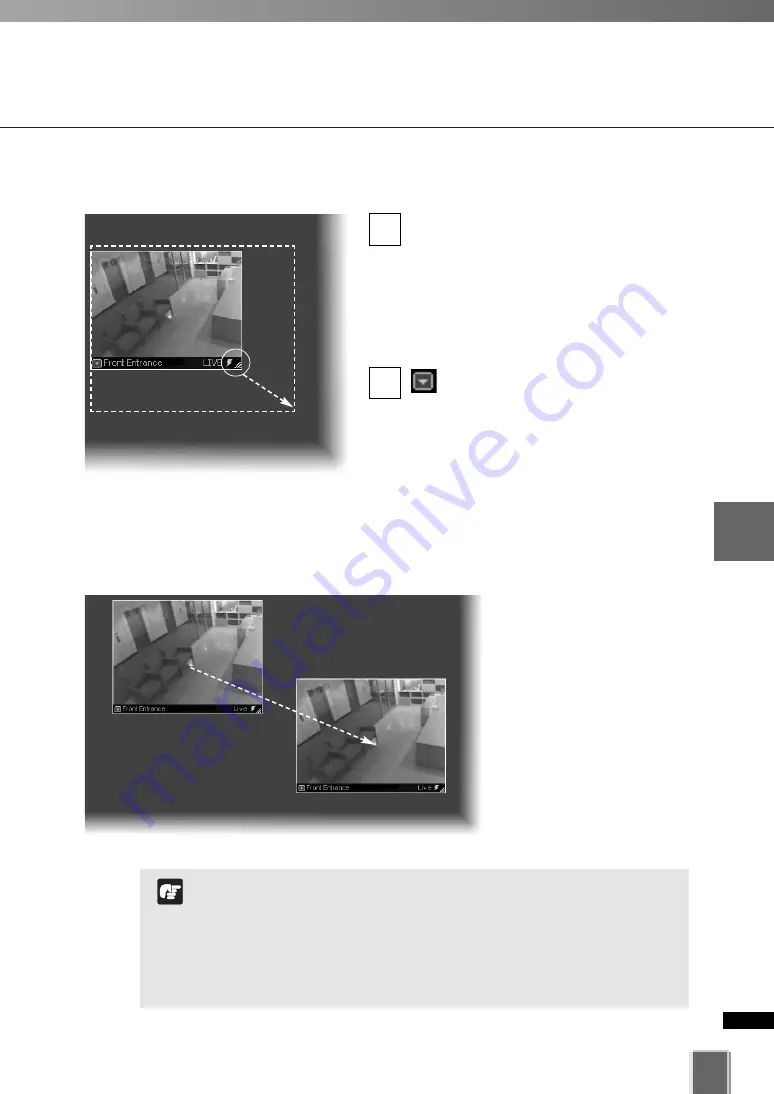
Re-size a Video Window
Click a Video Window to highlight it. An
arrow icon will appear in the lower right
corner. Click the arrow icon and drag
outwards. You can also click on the other
corners and drag to re-size the window.
Release the mouse button when you
have reached the desired size.
Alternatively, click the Video
Window menu button and select
Video Display Size. Select
Video
Receive Size
from the menu, and then
select
Small
,
Medium
,
Large
, or
Defaul
t
from the sub-menu.
A right-click action on the Video Window
will also bring up the same menu.
●
Move a Video Window
Click anywhere on a Video
Window and drag it to any
position in the Viewing Area.
2
1
For best performance on the Viewer, such as to view as many
Video Windows as possible, re-size (160x120, 320x240,
640x480) the Video Windows so they are a standard
resolution.
When Video Windows that are other than a standard
resolution are displayed, the load on the computer CPU will be
high and Viewer operations may take longer.
Note
Summary of Contents for VK-16
Page 12: ...12 ...
Page 13: ...Chapter 1 System Overview ...
Page 15: ...Chapter Overview 15 1 System Overview ...
Page 19: ...19 1 System Overview ...
Page 36: ...36 ...
Page 37: ...Chapter 2 Installation ...
Page 43: ...Chapter 3 Storage Server Configuration Reference ...
Page 69: ...Chapter 4 Registering Camera Server and Setting Recording Schedule ...
Page 144: ...144 ...
Page 145: ...Chapter 5 Viewer Reference ...
Page 147: ...147 5 Viewer Reference ...
Page 204: ...204 ...
Page 205: ...Chapter 6 Operation and Management ...
Page 212: ...212 ...
Page 213: ...Chapter 7 Backup Scheme ...
Page 228: ...228 ...
Page 229: ...Chapter 8 System Maintenance ...
Page 235: ...Chapter 9 Troubleshooting ...
Page 271: ...Appendix ...
Page 281: ...281 10 Appendix ...


