Job Accounting Feature
4-23
4
S
p
ecial Pr
int Options
4
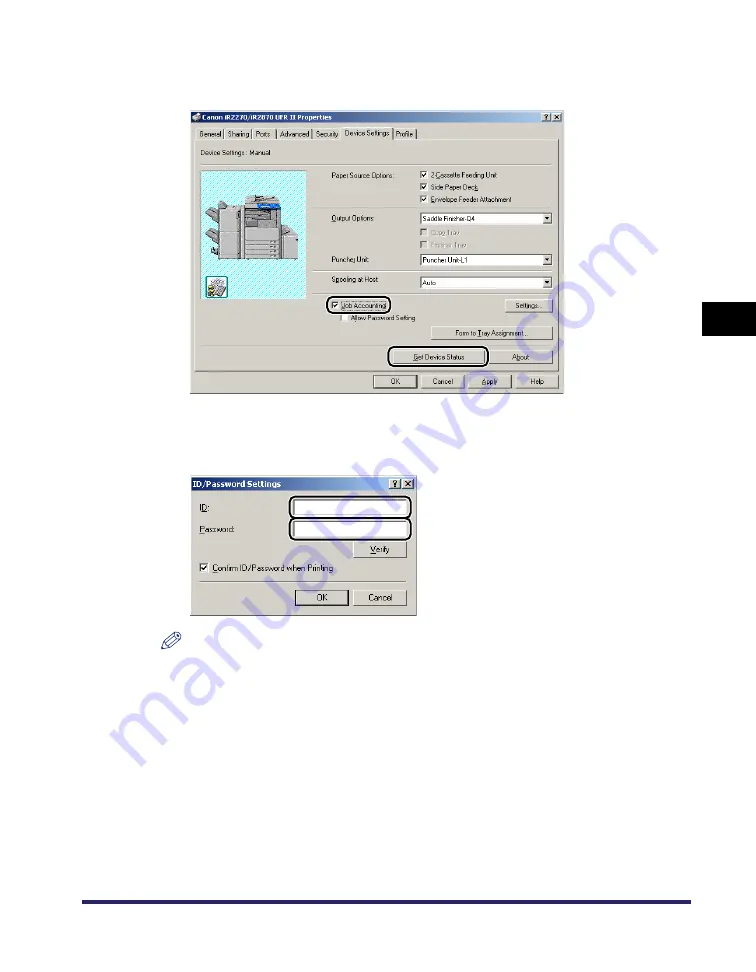
Click [Get Device Status] to confirm that [Job Accounting] is selected,
or manually select [Job Accounting].
5
Click [Settings] to open the [ID/Password Settings] dialog box
➞
enter
the ID and password.
NOTE
•
The ID and password can be changed when printing a document only if [Confirm ID/Password
when Printing] is selected in the [ID/Password Settings] dialog box.
•
For Windows 2000/XP/Server 2003, you can specify the password in the [ID/Password Settings]
dialog box only if [Allow Password Setting] is selected in the [Device Settings] sheet.
•
You can leave the password blank.
Summary of Contents for UFR II Driver
Page 2: ......
Page 3: ...UFR II Driver Guide 0 Ot ...
Page 4: ......
Page 5: ......
Page 14: ...xii ...
Page 17: ......
Page 68: ...Printing a Document 2 48 2 Getting Started ...
Page 77: ......
Page 110: ...Using Cover or Sheet Insertion Options 3 42 3 Basic Print Options 6 Click OK ...
Page 136: ......
Page 153: ......
Page 155: ......
Page 157: ......
Page 167: ......


