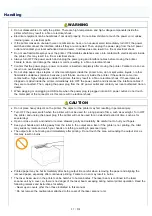
when inspecting the inside of the printer, do not touch the fixing unit and its surroundings, as this may result in
burns.
When removing jammed paper or when inspecting the inside of the machine, do not expose yourself to the heat
emitted from the fixing unit and its surroundings for a prolonged period of time. Doing so may result in low
temperature burns, even though you did not touch the fixing unit and its surroundings directly, as this may result in
burns.
If paper is jammed, remove the jammed paper so that any pieces of paper do not remain inside the printer
according to the displayed message. Also, do not put your hands forcibly into the parts other than those directed on
the screen. Failure to do so may result in burns or injuries.
When removing jammed paper or replacing a toner cartridge, be careful not to get any toner on your hands or
clothing, as this will dirty your hands or clothing. If toner gets on your hands or clothing, wash them immediately
with cold water. Washing with warm water sets the toner, making it impossible to remove the toner stains.
When removing jammed paper, be careful not to allow the toner on the paper to scatter. The toner may get into
your eyes or mouth. If toner gets into your eyes or mouth, wash them immediately with cold water and consult a
physician.
When loading paper or removing jammed paper, be careful not to cut your hands with the edges of the paper.
When removing a toner cartridge, remove the toner cartridge carefully so as to prevent the toner from scattering and
getting into your eyes or mouth. If toner gets into your eyes or mouth, wash them immediately with cold water and
consult a physician.
Do not attempt to disassemble the toner cartridge. The toner may scatter and get into your eyes or mouth. If toner
gets into your eyes or mouth, wash them immediately with cold water and consult a physician.
If toner leaks from the toner cartridge, be careful not to inhale the toner or allow it to come into direct contact with
your skin. If the toner comes into contact with your skin, wash with soap. If the skin becomes irritated or you inhale
the toner, consult a physician immediately.
㻠㻜㻌㻛㻌㻡㻝㻠
Summary of Contents for LBP7100Cn
Page 1: ......
Page 7: ...For Windows 8 Server 2012 Users 512 For Macintosh Users 513 Office Locations 514...
Page 21: ...7 Click Exit When the following screen appears you can remove the CD ROM...
Page 38: ...If the laser beam should escape and enter your eyes exposure may cause damage to your eyes...
Page 81: ......
Page 83: ...It takes approximately 60 seconds...
Page 88: ......
Page 105: ...0F40 02E Installing the Printer Driver Uninstalling the Printer Driver Driver Installation...
Page 119: ......
Page 121: ...2 Click Next Proceed to the Printer Information Screen...
Page 124: ......
Page 132: ...17 Click Exit When the following screen appears you can remove the CD ROM...
Page 153: ......
Page 174: ...3 Click OK For details on the basic printing procedure see Basic Printing Procedure...
Page 178: ...For details on the basic printing procedure see Basic Printing Procedure...
Page 180: ...Click OK For details on the basic printing procedure see Basic Printing Procedure...
Page 183: ...3 Click OK Then the Page Setup sheet reappears...
Page 187: ...Color 3 Click OK For details on the basic printing procedure see Basic Printing Procedure...
Page 196: ...3 Click OK For details on the basic printing procedure see Basic Printing Procedure...
Page 198: ...4 Click OK For details on the basic printing procedure see Basic Printing Procedure...
Page 204: ...Low...
Page 214: ...changed 4 Confirm the settings then click OK The printer folder reappears...
Page 249: ......
Page 255: ......
Page 277: ...WPA WPA2 PSK Settings Displays the WPA WPA2 PSK setting WEP Settings Displays the WEP setting...
Page 282: ...6 Click Close 7 Click Apply 8 Click OK NOTE...
Page 286: ......
Page 303: ...9 Click Finish...
Page 317: ...2 Click OK...
Page 319: ...4 Change the display language 1 Select a display language 2 Click OK...
Page 323: ......
Page 353: ......
Page 355: ...4 Click Edit 5 Configure the SNMPv1 protocol...
Page 362: ...4 Click Generate Key 5 Specify a key to be created...
Page 366: ...4 Click Register Key and Certificate 5 Click Install...
Page 372: ...8 Click Register...
Page 378: ......
Page 384: ...4 Click Initialize 5 Click OK to initialize the key and certificate CA certificate...
Page 389: ......
Page 392: ...2 Click IEEE 802 1X Settings 4 Click Edit 5 Select the Use IEEE 802 1X check box...
Page 393: ...6 Enter a login name 7 Select the Use TLS check box...
Page 397: ...4 Click Edit 5 Select the Use IEEE 802 1X check box...
Page 401: ......
Page 429: ...3 Click Next 4 Manually specify the port using Port Printer Information Screen...
Page 436: ...7 Disconnect the USB cable from the computer then restart Windows...


