Setting Up a Computer for Printing (Windows)
2-19
2
Using a
TCP/IP Netw
or
k
3
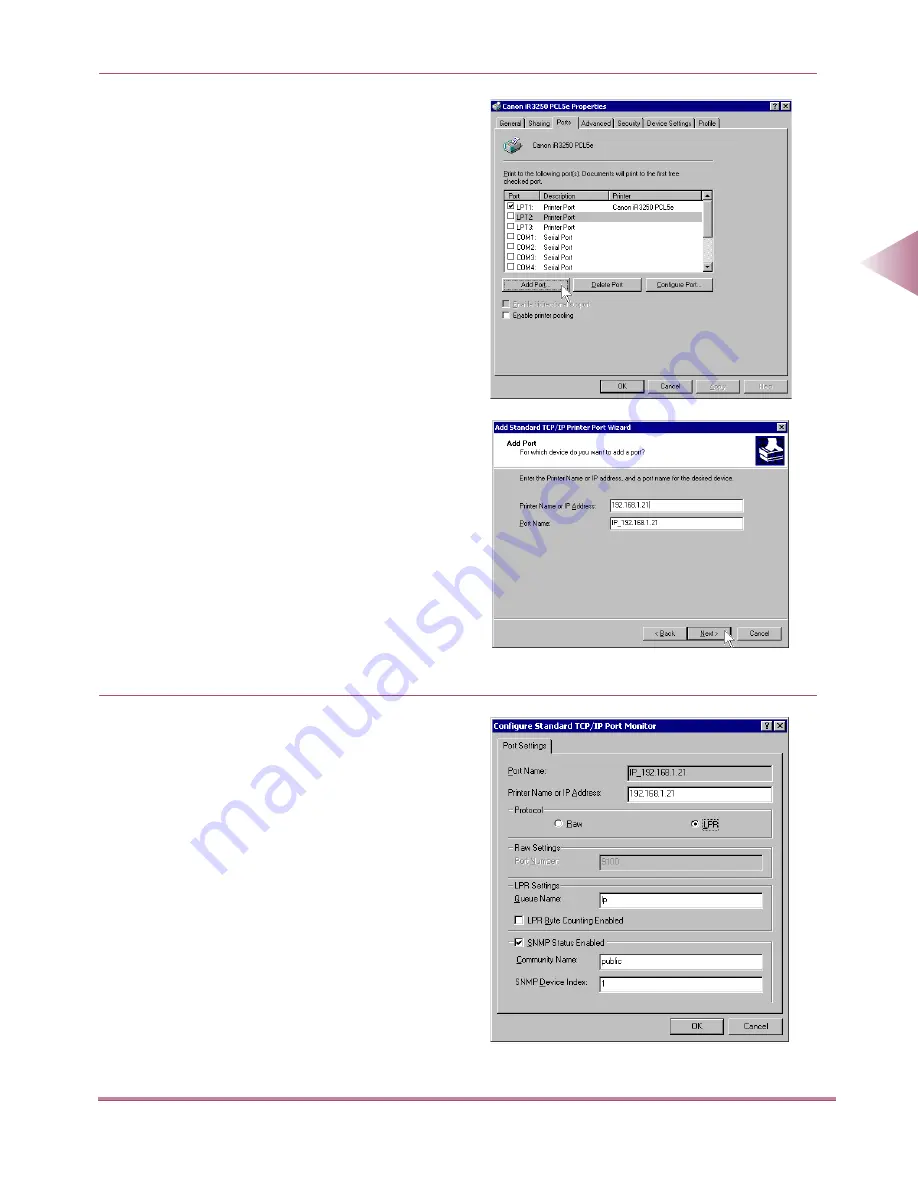
Set up the printing destination.
●
Click Ports tab to open the Ports sheet.
●
Click the Add Port... button to open the
Printer Ports dialog box.
●
From the Available Printer Ports Types
list box, select Standard TCP/IP Port,
and click the New Port... button.
●
The Add Standard TCP/IP Printer Port
Wizard will open. Click the Next button.
●
In the Printer Name or IP Address
space enter the printer IP address, and
click the Next button.
●
If the computer has confirmed that
there is a printer at the IP address you
entered, the Exit Add Standard TCP/IP
Printer Port Wizard window will open.
Click the Done button.
●
If you see a window called the Addi-
tional Port Information Required, follow
the instructions on the screen to search
again or select the device type Stan-
dard-Canon Network Printing Device
with P9100, and click the Next button to
exit the Wizard.
●
Click the Close button to close the
Printer Port dialog box.
4
If you are using LPD, it is necessary to
change the port configuration informa-
tion.
(This is not necessary if you are using
RAW.)
●
Click the Configure Port... button.
●
Under Protocol, select LPR, and under
LPR Settings set Queue Name to the
printer name, “Ip”, and then click the
OK button.
00̲MFPNG.book 19 ページ 2000年4月26日 水曜日 午後5時11分


