


73
Routine Maint
enanc
e
4
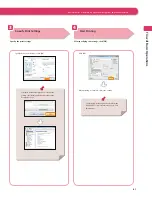
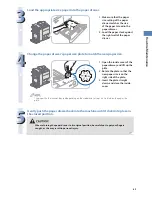
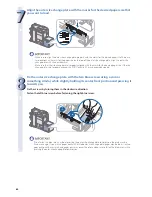
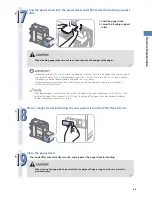
Place the Tab Feeding Attachment Kit-B1 aligning the mark for tab paper.
1 Place the Tab Feeding
Attachment Kit-B1 aligning
the mark for tab paper.
2 Slide the Tab Feeding
Attachment Kit-B1 to the
back of the paper drawer.
5
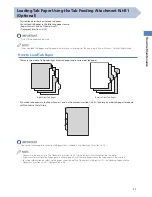
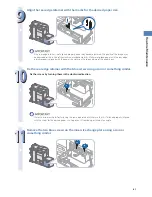
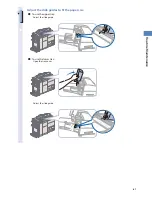
Place the Tab Feeding Attachment Kit-B1 aligning the mark for tab paper.
1 Load the tab paper face
down with the tabs facing
left.
Even out the edges of the paper
stack.
Load the paper stack against the
right wall of the paper drawer.
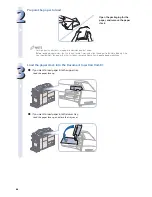
2 Gently push the paper
drawer back into the
machine until it clicks into
place in the closed position.
When returning the paper drawer to its original position, be careful not to get your fi ngers
caught, as this may result in personal injury.
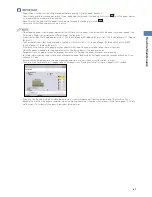
• Paper which has been rolled or curled must be straightened out prior to use.
• You will not be able to make copies or print if you load paper that exceeds the loading limit mark (.
) or
if the paper drawer is not completely pushed into the machine.
• Make sure that the height of the paper stack does not exceed the limit mark (
) at the back of the paper
drawer.
• Always check that the paper drawers are in place.
• Never place paper or any other items in the empty part of the drawer next to the paper stack. Doing so may
cause paper jams.
• When you are not loading tab paper, make sure to return the Tab Feeding Attachment Kit-B1 to its holder.
Using the Tab Feeding Attachment Kit-B1 for storing paper other than tab paper may cause a paper jam.
Summary of Contents for imagerunner advance 8205
Page 8: ...8 MEMO ...
Page 62: ...62 MEMO ...
Page 143: ...143 Troubleshooting Booklet Finisher N1 Optional p 194 Staple Finisher N1 Optional p 189 ...
Page 229: ...229 Troubleshooting MEMO ...
Page 263: ......


