


2. Installation
47
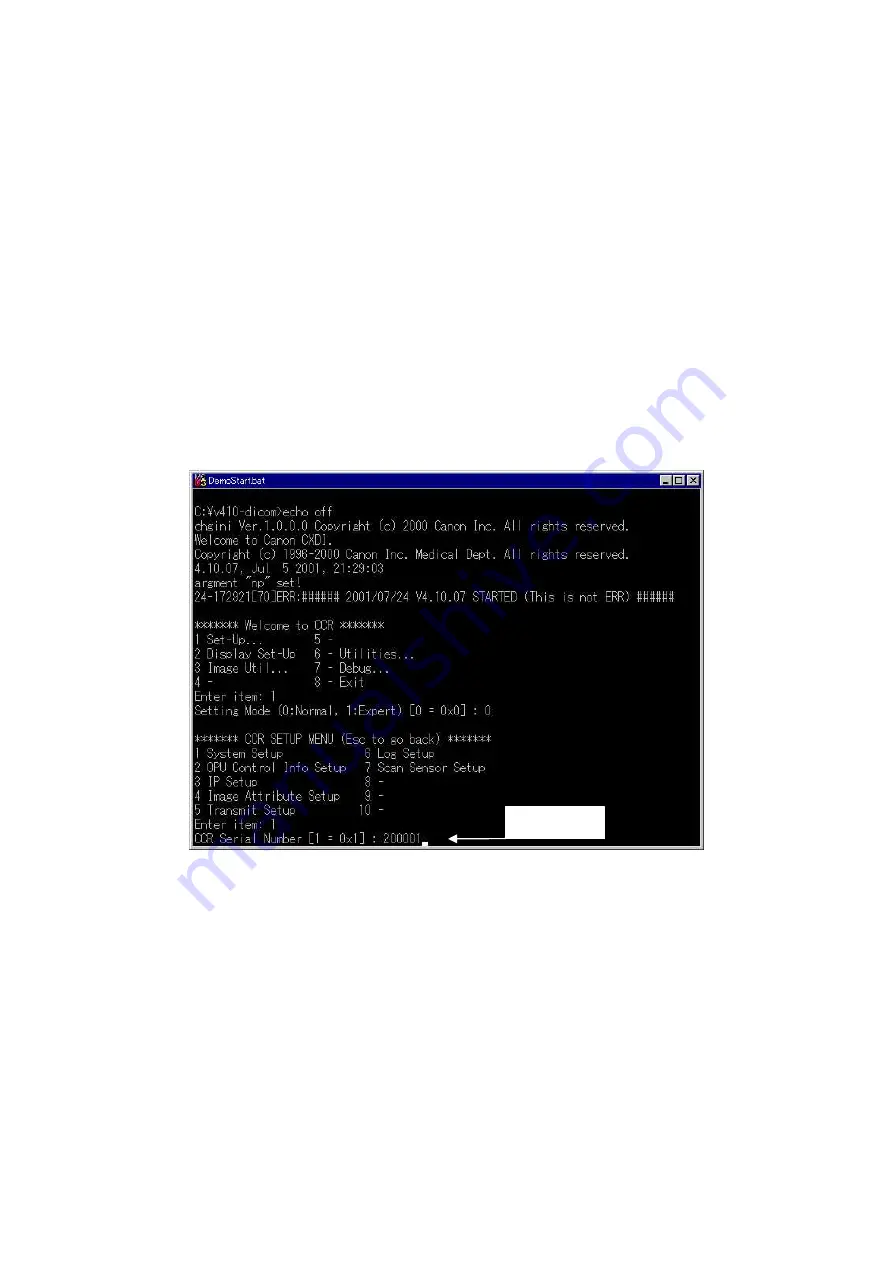
(7) Entering Control Computer Serial Number
1) Purpose
Set the product serial number (Control computer) to the “Device Serial Number” of the
“DICOM header”.
2) Procedure
2-1) Start up the CXDI system.
2-2) After the exposure screen appears on the operation unit, use the keyboard to enter
Debug mode. (Use [Alt] + [Tab].)
2-3) “Welcome to CCR” screen appears. Select the command “1. Set-Up…”
2-4) The “Setting Mode (0: Normal, 1: Expert) [0=0
×
0]:” is prompted. Select “0: Normal”
2-5) “CCR SETUP MENU” appears. Select the command ”1. System Setup”.
2-6) “CCR Serial Number [0=0
×
0] : ” appears. Enter the six-digit number indicated on the
naming label of the control computer unit. Press [Enter] key until “CCR SETUP
MENU” appears. [Fig 1]
[Fig 1]
2-7) Press [Esc] key after “CCR SETUP MENU” appears to return to “Welcome to CCR”
screen.
2-8) Select “8-Exit”to exit CXDI software.
2-9) This returns you to the Windows NT desktop. Restart the CXDI software, and perform
the procedure from steps 2) to 5). Check that the serial number for the “CCR Serial
Number” item was entered correctly in step 6).
Enter here
Summary of Contents for CXDI-60G
Page 23: ...2 Installation 7 2 CXDI System II assembly package Accessories box Power box ...
Page 115: ...2 Installation Manual 99 2 Power Box Mass 3 7 Kg Unit mm Dimension tolerance 1 Scale 1 N ...
Page 161: ...4a Canon Inc PWB 60 X RAY 1 2 SCHEMATIC DIAGRAM Rev 01 ...
Page 162: ...4b Canon Inc PWB 60 X RAY 2 2 SCHEMATIC DIAGRAM Rev 01 ...


