Canon CX-G2400 User Manual Download Page 35

30

Chapter 1  Basic Operation
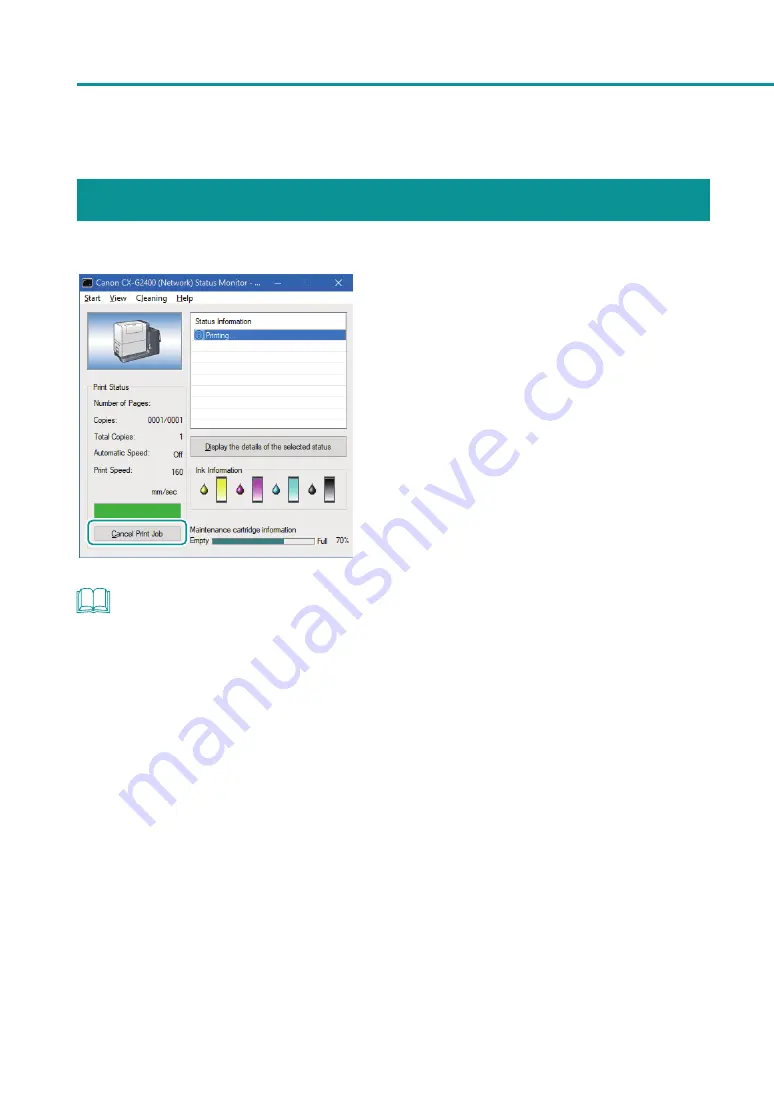
Cancel Printing

To cancel printing, click [ Cancel Print Job] on the status monitor.

NOTE

• Stop Printing Temporarily 

To stop printing temporarily, press the Pause key on the operation panel.

•  Besides the status monitor, you can cancel printing from the Print Queue window (a window in which print data 

order is registered). For more details, refer to Microsoft Windows product documentation.

Summary of Contents for CX-G2400

Page 1: ...CX G2400 COLOR CARD PRINTER User s Guide CANON FINETECH NISCA INC 2017 4Y1 8613 010 ...

Page 2: ...y and Adjusting Color 55 Changing Print Quality Setting 55 Printing with the Color Correction Method Changed 57 Printing in Black and White 58 Print the Gradation Smoothly 59 Setting the Sharpness 61 Adjusting the Color Balance 63 Adjusting the Density 65 Adjusting the Brightness or Contrast 67 Carrying out Overlay Printing 70 Printing a Form to a File 71 Carrying out Overlay Printing 73 Setting P...

Page 3: ...range 148 Status Lamp Is Flashing Orange 150 Power Does not Turn on 151 Printing Does not Start Complete 151 Paper Does not Feed Properly 154 Improving the Print Quality 155 Paper Is Jammed 159 List of Error Messages Warning Messages 165 Error Message 166 Warning Message 172 5 Appendix Moving the Printer 176 Moving the Printer Indoors 176 Shipping the Printer 179 Uninstall Printer Driver 185 About...

Page 4: ...ation of an operation or contains additional explanations for a procedure Reading these notes is highly recommended Indicates an operation that must not be performed Read these items carefully and make sure not to perform the described operations Sample Screens The sample CX G2400 printer driver screens displayed in this manual were created with Windows 10 Trademarks Canon and the Canon logo are r...

Page 5: ...y omissions or mistakes in this manual We can accept no responsibility for loss or damages resulting from the use of this printer or its software please accept this before you use the printer Legal Notice Legal Limitations on the Usage of Your Product and the Use of Images It is illegal to reproduce currency bills negotiable securities and other documents prohibited by law Reproduction of such ite...

Page 6: ... Operation This chapter describes basic things to remember before using this product Names and Functions of Components 2 Turning the Printer On Off 7 Loading the Paper 13 How to Print 24 Configuring Print Settings 31 ...

Page 7: ...paper guides 4 Ink Tank Cover Open this cover when replacing ink tanks 5 Paper Switch Lever Switch the lever position according to the thickness of the paper to be set 6 USB Connector Connect a USB cable to this connector 7 LAN Connector Connect a LAN cable to this connector 8 Auxiliary Tray Open the tray to set paper During use keep the tray closed When long sheets of paper paper length of 157 mm...

Page 8: ...ed when repairing the printer or registering the warranty 12 Power Socket Connect the supplied AC adapter to this socket IMPORTANT While the printer is operating do not open the ink tank cover or the transport unit lever It could cause a printer failure Internal View 1 1 Maintenance Cartridge Ink used to clean printhead is collected in this cartridge ...

Page 9: ...jection Slot Printed paper is ejected through this slot 3 Transport Belt Transports paper here Clean the transport area when stained with paper dust and ink P 136 4 Paper Guide This guide holds the paper down to keep it from floating Normally set the lever to the MM position for use If the guide is stained with paper dust or ink clean it P 130 ...

Page 10: ...ing cleaning etc Lit orange An operator call error has occurred Blink orange A service call error has occurred Off Instructions and print data cannot be received from the computer offline mode 3 Ink Lamps Bk C M Y Each lamp lights up or blinks when the corresponding ink tank is out of ink or short of ink Lit The ink tank is out of ink or faulty Blink The ink tank is low Off The ink tank is full 4 ...

Page 11: ...his key stops printing temporarily Pressing this key again resumes printing 6 Tray Key Use this key to move the feeder lift tray upward downward NOTE When the printer is in the sleep mode the Status lamp Ink Lamps and Maintenance Cartridge Lamp will remain off regardless of the statuses of the printer ink tanks and maintenance cartridge ...

Page 12: ... Off Turning the Printer On 1 Press the Power key The status lamp will blink green and then light up NOTE About the Sleep Timer P 9 The printer will automatically enter sleep mode if time elapses without printing By default the time is set to 4 minutes ...

Page 13: ... Status lamp is off press and hold the Power key for at least 1 second When the Power lamp stops blinking the printer is turned off IMPORTANT When unplugging the power cord after turning the printer off make sure the Power lamp is off If the printer will not be used for a long period of time disconnect the power cord AC adapter and interface cable NOTE About the Off Timer P 11 After switching to s...

Page 14: ...s automatically switched back from the sleep state to the online state in the following cases When the Power key is pressed When print data is received When cleaning etc is performed 1 Make sure the printer is in the online state the Status lamp is lit green If the printer is in the offline state the Status lamp is off press the Power key to switch the printer back to the online state 2 Open the p...

Page 15: ...3 Switch the printer to the sleep state 1 2 1 Click the Utility tab 2 Click Sleep A confirmation message appears 3 3 Confirm the message and then click Yes The Power lamp blinks slowly and the printer is switched to the sleep state ...

Page 16: ...contact your system administrator appears For more details see Administrative privileges required for certain features P 40 When printing is in progress or an error has occurred you cannot change the set time NOTE By default the sleep timer is set to 4 minutes and the off timer is set to 240 minutes 4 hours For the off timer set how much time must elapse after switching to sleep mode before the pr...

Page 17: ...etting time of the sleep timer The time can be set in minutes within the range from 1 to 60 min 4 Enter the setting time of the off timer The time can be set in minutes within the range from 1 to 720 min If the off timer is not necessary uncheck the Enable off timer setting check box 5 Click Send A confirmation message appears 6 6 Confirm the message and then click Yes ...

Page 18: ... place of purchase for paper specifications and availability 1 Make sure the Power lamp is lit If the Power lamp is off press the Power key to turn on the printer P 7 2 Set the paper switch lever Extra Thick Paper Plastic Card Paper Set the lever to the appropriate position according to the paper to be printed on Plastic card or extra thick paper Set it to Plastic Card Extra Thick Paper Paper othe...

Page 19: ...der lift tray is already lowered proceed to step 4 1 Press the Tray key Wait for the feeder lift tray to stop CAUTION Do not touch the feeder lift tray when it is moving Do not insert your hand or place objects below the tray Doing so can cause an injury or malfunction ...

Page 20: ... being fed at once printing surface printing surface Fig 1 0 2 mm 0 0 08 inch Fig 2 2 Check the paper curl As shown in the figure if the paper is placed with the printing surface facing up and the paper is curled upward Fig 1 fix the curl so that the paper is flat If the paper is curled downward Fig 2 flatten the paper so that the curl does not exceed 2 mm 0 08 inch Paper that is curled upward can...

Page 21: ...hrough the card do not touch the printing surface with your fingers Flip through the two short edges of the card thoroughly If you have difficulty flipping through the cards flip through small numbers of cards at a time Loading the card after flipping through it prevent multiple cards from being fed at once IMPORTANT Depending on the operating environment paper jams or printing surface rubbing may...

Page 22: ...ase note if the screw its turned too much it will come off 3 Load the paper so that the furthest edge touches the back of the feeder lift tray Align the paper neatly before loading If the paper has front and back sides the side that you want to print on must face up If the side guides are too narrow pull them outward and then load the paper ...

Page 23: ...r longer You do not need to close the auxiliary tray IMPORTANT Align the edges before loading Not doing so can cause paper jams Check that the height of the paper stack is not exceeding the load limit mark Paper length of 91 3 58 inch mm or less business card etc Can be set up to the load limit mark arrow B Paper length of 157 mm 6 18 inch or longer Can be set up to the load limit mark line C B C ...

Page 24: ...oading paper close the auxiliary tray When loading longer paper paper length of 157 mm 6 18 inch or longer there is no need to close the auxiliary tray When printing on longer paper paper length of 157 mm 6 18 inch or longer remove the printed paper frequently Continuing to print without removing the printed paper can cause paper jams or printing failure 6 Raise the feeder lift tray 1 Press the TR...

Page 25: ...sic Operation 7 Check the paper guide positions 1 Remove the stacker if it is used 2 Raise the transport unit lever and pull the transport unit out 3 Pull the transport unit out with both hands as shown in the figure ...

Page 26: ...55 4 As shown in the figure check that the paper guides are set to the MM position While holding the paper guides D and E with your fingers adjust them to the paper width indexes F and G For example the figure on the left shows adjustment to guide position MM IMPORTANT When performing micro margin printing be sure to set the paper guides to the MM position Otherwise the transport belt paper guides...

Page 27: ...ns CAUTION When returning the transport unit back inside the printer be careful not to get your fingers caught between the transport unit and the inside of the printer 6 Push the transport unit lever until it clicks Connection part 7 When using the stacker install it back to the correct position Insert the connection part of the stacker straight into the slot of the printer ...

Page 28: ...If you change to paper of different type or size change the printer driver setting Printing on paper of a wrong size could make the stain on the transport belt paper guides or other areas If the stain occurs clean the transport unit P 130 Store the transport unit in the printer Install the stacker on a platform such as a table on which the printer is installed Be sure to insert the connection part...

Page 29: ...ter when the computer returns from a resting or sleep state to an operating state Selecting Never in the Microsoft Windows Power Saver or Power Option settings will prevent the computer from entering a sleep state Follow the procedure below to open the Windows Power Saver or Power Option settings Windows 10 Selecting Control Panel Control Panel Power Options For Windows 8 1 Windows 7 Selecting Con...

Page 30: ... 0 03 inch wider than the actual width Transport direction Paper width 51 0mm 58 0mm 2 01 inch 2 28 inch Document paper width Paper width 0 7mm 0 03inch 0 35mm 0 01inch 0 35mm 0 01inch Document paper length When the 81 0 mm 91 0 mm 3 19 inch 3 58 inch Set the paper length 1 1 mm 0 04 inch longer than the actual length Paper length 81 0mm 91 0mm 3 19 inch 3 58inch Document paper length Paper length...

Page 31: ... length 1 7mm 0 07inch 0 85mm 0 04inch 0 85mm 0 04inch Transport direction 2 To the paper size create a document IMPORTANT Printing does not take place in the region outside the printing area which is by default 0 3 mm 0 01 inch smaller on all sides than the actual paper size 3 Open the document you want to print and then the Print dialog box Select Print from the Files menu or the toolbar of the ...

Page 32: ...position To prevent this message from being displayed check the Do not show this message again check box and then click OK To allow this message to be displayed again you need to reinstall the printer driver For the printer driver installation procedure refer to the Getting Started Guide IMPORTANT The mark in front of the paper size indicates the following Select the paper size appropriate for the...

Page 33: ...re If the printer is turned off while it is operating for example the power plug or AC adapter is disconnected or a blackout occurs do not draw out the transport unit immediately Turn the printer on again before performing any operation Drawing out the transport unit forcibly without turning the printer on again could cause a machine failure If the application software and printer driver have the ...

Page 34: ... The total number of copies which have been printed by the current job is displayed Automatic Speed Whether the automatic speed function is turned ON or OFF is displayed Print Speed The currently set print speed is displayed Displaying Help Topics Displaying help topics from the Settings screen of the printer driver allows you to read descriptions of functions and setting procedure To read detaile...

Page 35: ...onitor NOTE Stop Printing Temporarily To stop printing temporarily press the Pause key on the operation panel Besides the status monitor you can cancel printing from the Print Queue window a window in which print data order is registered For more details refer to Microsoft Windows product documentation ...

Page 36: ...window from the Devices and Printers folder P 32 The settings are effective for all documents Opening the Properties window P 32 Display the Utility tab to perform printer maintenance or change printer settings Opening the Printer Driver Setup Window from the Application Software NOTE The procedure may be different depending on the application software you use For more details refer to the Instruc...

Page 37: ...inter icon and then select Printing Preferences The printer driver setup window appears IMPORTANT The settings that can be configured on the Utility tab of the printer properties window are different from those that can be configured on the Utility tab of the printing preferences window P 39 Opening the Printer Properties Window 1 Right click on start and then select Control Panel Hardware and Sou...

Page 38: ...the printer properties window Print settings are located in the General tab and the Utility tab of the printer properties window Refer to Windows product documentation for information related to Windows functions The settings that can be configured on the Utility tab of the printer properties window are different from those that can be configured on the Utility tab of the printing preferences wind...

Page 39: ...Preview window showing the current settings The current paper size and print orientation are shown Upper pane Paper Size 3 Lower pane Orientation 6 3 Paper Size Select the size of the paper to use for printing from the pull down menu Clicking Custom Paper Size allows to set the paper size as desired P 42 2 Favorites P 78 Register frequently used paper so it can be conveniently selected from the pu...

Page 40: ...ion software such as Notepad 7 Defaults Clicking this button restores the default settings on the Page Setup tab 8 Version Information Check the information about the version and copyright of the printer driver by clicking this button On the displayed screen clicking Obtain Printer Information displays the information of the currently connected printer NOTE When a paper type associated with Profil...

Page 41: ... color correction 4 Monochrome Print P 58 Select this check box to make black and white prints 5 Detailed Settings Clicking this button displays the Detailed Settings dialog box Use this dialog box to adjust advanced color settings 2 Print Quality P 55 Using Resolution and Half tone printing can be executed with your desired print quality 6 Defaults Clicking this button restores the default settin...

Page 42: ...verlay printing can be set in the Overlay Settings tab of the Printing Preferences Window 1 2 1 Overlay P 70 Check this check box when overlay printing is performed 2 Defaults Clicking this button restores the default settings on the Overlay Settings tab ...

Page 43: ...rder Specify the order of printing To print from the first page select Ascend To print from the last page select Descend 5 Print Speed P 75 Checking this box allows you to set the print speed 3 1st Print Priority Mode P 75 Selecting this check box accelerates printing on the first sheet of paper 6 Defaults Clicking this button restores the default settings on the Advanced Settings tab NOTE The set...

Page 44: ...P 111 Clicking this button cleans the print head stronger than Light Cleaning 3 Print Head Position Adjustment P 113 Clicking this button adjusts the print head position 7 Start Status Monitor P 92 Clicking this button displays the status monitor 4 Output Setting Value P 126 Clicking this button outputs the current settings of this printer 8 Special Settings P 82 Configure special settings of this...

Page 45: ...en configuring settings in the Utility tab the printer must be powered and connected to the computer Administrative privileges required for certain features Administrative privileges over this printer are required when configuring settings marked with on the Utility tab of the printer properties window If a user without administrative privileges over this printer attempts to configure settings the...

Page 46: ...Size 42 Setting Micro Margin Printing 47 Changing Print Quality and Adjusting Color 55 Carrying out Overlay Printing 70 Setting Paper Feed Speed 75 Registering Print Settings You Use Frequently 78 Changing Special Settings 82 Registering Paper Type 86 ...

Page 47: ...per sizes can be registered Customize This setting is effective only for the document that is currently open The procedure for registering the size of a unique paper for example paper_A as a custom paper size is described below 1 Open the printer driver setup window Open the printer driver setup window from the Devices and Printers folder P 32 When setting the customize Open the printer driver set...

Page 48: ...me of new paper in the Name text box Enter up to 15 characters Spaces and tabs cannot be used When setting the customize The paper name cannot be changed 2 Select a display unit 3 Select a paper from the Paper Form pull down menu Paper Paper of thickness 0 21 mm 0 37 mm 8 27 mil 14 6 mil Card20 30mil Paper of thickness 0 76mm 29 9 mil Plastic card ...

Page 49: ... For the ranges of settable values see Ranges of Custom Paper Sizes P 46 5 To perform micro margin printing check the Micro Margin check box Check the Round Corner check box to perform micro margin printing on round corner paper 6 Click Register A confirmation message appears 7 7 Click Yes 8 8 Click OK ...

Page 50: ...ing of micro margin printing refer to Setting Micro Margin Printing P 47 4 Complete registration of the paper size Click OK in the printer driver setup window Printing will take place according to the specified paper size NOTE Deleting the Registered Custom Paper Size Select the paper size you want to delete from Paper Size List and then click Delete Preregistered paper settings marked with can no...

Page 51: ...ch 3 58 inch 157 0 mm 172 0 mm 6 18 inch 6 77 inch Top margin 1 5 mm Paper length 1 0 Bottom margin mm 0 06 inch Paper length 0 04 Bottom margin inch Bottom margin 1 5 mm Paper length 1 0 Top margin mm 0 06 inch Paper length 0 04 Top margin inch Left margin 2 0 mm Paper width 1 0 Right margin mm 0 08 inch Paper width 0 04 Right margin inch Right margin 2 0 mm Paper width 1 0 Left margin mm 0 08 in...

Page 52: ...ust the print position 2 1 3 1 Click the Advanced Settings tab 2 Set the Micro Margin Print Position Adjustment values Vertical Set this when the printing is offset vertically The more negative the value the more the upward shift in the image The more positive the value the more the downward shift Horizontal Set this when the printing is offset horizontally The more negative the value the more the...

Page 53: ...dscape 180 degree Rotation ON Top Bottom Right Left Vertical Horizontal Transport direction Top Bottom Right Left Vertical Horizontal Transport direction The print position adjustment range varies depending on the paper length as follows Paper length 81 0 mm 91 0 mm 3 19 inch 3 58 inch Paper length 157 0 mm 172 0 mm 6 18 inch 6 77 inch Vertical 0 55 mm 0 55 mm 0 85 mm 0 85 mm Horizontal 0 35 mm 0 ...

Page 54: ...rlap Trimming around Print 0 3mm 0 01inch 0 3mm 0 01inch 0 3mm 0 01inch 0 3mm 0 01inch IMPORTANT Administrative privileges over this printer are required to configure settings of this printer If a user without administrative privileges proceeds with configuration of settings a message You do not have rights to printer management Please contact your system administrator appears For more details see...

Page 55: ... Margin Adjustment 4 For round corner paper adjust the round corner size 1 2 1 Enter the round corner radius The radius can be adjusted in the range of 0 0 mm to 5 0 mm in 0 1 mm steps By default the radius is set to 3 2 mm The same value is used on all four corners Elliptical arc cannot be specified 2 Click Send ...

Page 56: ...ick Yes IMPORTANT Printing on paper of a wrong round corner size could stain the transport belt If stain occurs clean the transport belt P 136 5 Print check patterns 1 1 Click Print Check Pattern A confirmation message appears 2 2 Click Yes ...

Page 57: ... patterns 6 Look at the micro margin check pattern and check the adjustment value 3 2 1 0 1 2 3 The current trimming position is 0 0 0 mm For example if you want to adjust the trimming position to the 1 position of the pattern read it to mean 0 1 mm The quadrants at the four corners are the trimming positions for round corners ...

Page 58: ...steps However the adjustment range may be limited depending on the current setting The more negative the value the more the outward shift The more positive the value the more the inward shift The more negative the value the more the outward shift The more positive the value the more the inward shift 2 Click Send 3 3 Click Yes 8 Print adjustment patterns again 1 1 Click Print Check Pattern A confir...

Page 59: ... 1 1 Click Close A confirmation message appears 2 2 Click Yes IMPORTANT Printing does not take place in the region outside the trimming position Therefore characters and images at the edges of the paper may not fit in the paper Adjust the trimming position in small increments as you check the position with the check pattern Setting the trimming position to the extreme negative value may stain the ...

Page 60: ...s best suited for the final print 1 Open the printer driver setup window P 31 2 Select a resolution 1 2 1 Click the Color tab 2 Select Input resolution 1200dpi or Input resolution 600dpi Input resolution 1200dpi Longer print times but higher print quality occurs when printing with the Input Resolution 1200 dpi setting Input resolution 600dpi Faster print times but lower print quality occurs when p...

Page 61: ...ion This method is suitable for printing photos and graphics requiring subtle gradation NOTE When Error Diffusion is selected a longer time is required to process data as compared with Dither therefore the printing speed may decrease 4 Complete the setting procedure Click OK in the printer driver setup window When printing begins the document will be printed using the selected print quality ...

Page 62: ...olor adjustment is made for this printer Disable Image processing is performed at the highest speed without color correction Select this method to give priority to the printing speed 3 Complete the setting procedure Click OK in the printer driver setup window When printing begins the document will be printed using the selected color correction method NOTE Color correction can not be selected when ...

Page 63: ...ade only black ink is used 1 Open the printer driver setup window P 31 2 Configure the settings for black and white printing 1 2 1 Click the Color tab 2 Check the Monochrome Print check box 3 Complete the setting procedure Click OK in the printer driver setup window When printing begins the document will be printed in black and white ...

Page 64: ...e uneven color gradients in the printout 1 Open the printer driver setup window P 31 2 Select a color correction method from the Color Correction pull down menu and then choose the Detailed Settings dialog box 1 3 2 1 Click the Color tab 2 Select Driver Correction from the Color Correction pull down menu 3 Click Detailed Settings ...

Page 65: ...dure Click OK in the printer driver setup window When printing begins the gradation of the document will be printed smoothly NOTE Print the gradation smoothly can not be selected when Color Correction is set to Disable Print the gradation smoothly can not be selected when a paper type associated with Profile the start character is is selected ...

Page 66: ... the Sharpness You can improve contours edge definition and reduce blurriness in an image by adjusting the sharpness 1 Open the printer driver setup window P 31 2 Display the Detailed Settings dialog box 1 2 1 Click the Color tab 2 Click Detailed Settings ...

Page 67: ...dium and 3 Large The sharpness level increases or decreases when the number increases or decreases When 0 None is selected no adjustment is made to sharpness 2 Click OK 4 Complete the setting procedure Click OK in the printer driver setup window When printing begins the document will be printed at the selected sharpness level ...

Page 68: ...Adjusting the Color Balance You can adjust the color balance for printed colors cyan magenta yellow and black 1 Open the printer driver setup window P 31 2 Display the Detailed Settings dialog box 1 2 1 Click the Color tab 2 Click Detailed Settings ...

Page 69: ...r becomes lighter The more you move the slider to the right the color becomes darker Color balance values can be directly entered into the entry box located to the left of the slider bars 2 Click OK 4 Complete the setting procedure Click OK in the printer driver setup window When start printing the document will be printed at the adjusted color balance NOTE When the Monochrome Print box is checked...

Page 70: ...djusting the Density The overall density of the printout can be adjusted if you are dissatisfied with the results 1 Open the printer driver setup window P 31 2 Open the Detailed Settings dialog box 1 2 1 Click the Color tab 2 Click Detailed Settings ...

Page 71: ...decreases the density Moving the slider to the right increases the density A density value can be directly entered into the entry box located to the left of the slider bar 2 Click OK 4 Complete the setting procedure Click OK in the printer driver setup window When printing begins the document will be printed at the adjusted density NOTE Density can not be adjusted when the Monochrome Print check b...

Page 72: ... portions are not clearly distinguished from the light portions of the printed result adjustment can be made 1 Open the printer driver setup window P 31 2 Select a color correction method from the Color Correction pull down menu and then display the Detailed Settings dialog box 1 3 2 1 Click the Color tab 2 Select Driver Correction from the Color Correction pull down menu 3 Click Detailed Settings...

Page 73: ...r is the default position 0 The slider can be moved between 50 to 50 Moving the slider to the left decreases the contrast Moving the slider to the right increases the contrast A contrast value can be directly entered in the entry box located to the left of the slider bar To distinguish clearly between the light portion and dark portion increase the contrast To increase the number of intermediate c...

Page 74: ... begins the document will be printed at the adjusted brightness and contrast NOTE Brightness can not be selected when Color Correction is set to Disable Brightness can not be selected when a paper type associated with Profile the start character is is selected Contrast can not be adjusted when the Monochrome Print check box is selected ...

Page 75: ...mation from the variable data Data using a template containing a lot of images can be printed without transferring large capacity image data to the printer multiple times allowing the data to be printed quickly Overlay printing process Step 1 Print fixed data image template etc to the printer to create a form file P 71 Print Create A form file of2 will be created in the specified folder Fixed data...

Page 76: ...d as a form file using the application software used to create the data 2 Display the printer driver setup window from the application software P 31 3 Create a form file 1 2 3 4 1 Click the Overlay Settings tab 2 Check the Overlay check box 3 Select Print the form to the file 4 Click Reference The file path name can be directly entered the File Name entry box ...

Page 77: ...more pages of print data are created as form files they are stored as one file IMPORTANT When carrying out overlay printing in the server client environment observe the following setting precautions Store the form file of2 in a shared folder that can be referenced by both the server and client The file name to be entered in the File Name storage location of form file of2 entry box must be a path n...

Page 78: ...e the data 2 Display the printer driver setup window from the application software P 31 3 Configure the settings for overlay printing 1 3 4 2 1 Click the Overlay Settings tab 2 Check the Overlay check box 3 Select Overlay Printing 4 Click Reference You can directly enter the file path name in the File Name entry box 6 5 5 Specify a form file Select the file with an extension of2 6 Click Open ...

Page 79: ...s where they overlap colors of the form file and documents are mixed When normal overlay printing is performed Print the overlay with simple setting box is not checked neither the form file nor document is printed in the portions where they overlap Accordingly the document is printed just like the original image 4 Print Click Print in the Print dialog box The document is printed over the form data...

Page 80: ...rint Priority Mode depending on the operating environment or the type of print data the printing may take longer than usual 1st Print Priority Mode not checked or a blank sheet may be ejected When the Enable advanced printing features check box is not checked on the Advanced tab displayed on the printer properties window the effect of checking the 1st Print Priority Mode check box is reduced 1 Ope...

Page 81: ...up window Adjusting the Paper Feed Speed 1 Open the printer driver setup window P 31 2 Adjust the paper feed speed 1 2 1 Click the Advanced Settings tab 2 Adjust the print speed Adjust the print speed by moving the slide bar If the Automatic Speed box is checked uncheck it The slide bar becomes effective ...

Page 82: ... automatically changes to an appropriate one according to the print data transmission status The printing speed automatically changes to 160 mm sec 120 mm sec or 80 mm sec The printing speed at each transport speed is as follows Transport speed 160mm sec 120mm sec 80mm sec Printing speed Business Card 50 sheet min Business Card 37 sheet min Business Card 25 sheet min ...

Page 83: ...e registered in Favorites When the Settings screen of the printer driver is displayed from the application software it is not possible to register or delete settings in from Favorites To do so display the Settings screen of the printer driver from the Devices and Printers folder of Windows 1 Open the printer driver setup window from the Devices and Printers folder P 32 2 On the Page Setup tab Colo...

Page 84: ... Favorites 2 Click Register Delete The Register Delete Favorites dialog box appears 3 4 3 Enter a desired name in the Setting File Name entry box and then confirm the Setting Contents Up to 16 characters can be entered Spaces and tabs are not allowed Entry in the Setting File Name entry box is mandatory 4 Click Register A confirmation message appears ...

Page 85: ...hen click Change Name After changing the name click Register Deleting a Favorite To delete a registered favorite select if from the Registered Settings List and then click Delete Confirming a Registered Favorite Settings Clicking Check Settings on the Page Setup tab allows you to confirm the print settings registered in Favorites Clicking Copy in the dialog box allows you to copy the print setting...

Page 86: ...Diffusion Color Correction Driver Correction Monochrome Print Off Print the gradation smoothly Off Sharpness 0 None Color Balance Bk C M Y All 0 Brightness Normal Density 0 Contrast 0 Overlay Settings Overlay Off Print Mode Preview Comment Print the overlay with simple setting Advanced Settings Print Order Ascend 1st Print Priority Mode Off Micro Margin Print Position Adjustment Vertical 0 00 Micr...

Page 87: ...enheit the amount of ink pre fire on the paper is increased for printing Therefore when used in a location where the room temperature easily fluctuates the mode automatically switches according to room temperature when printing resulting in uneven print quality Use this mode when you want to keep printing quality consistent By default this check box is not selected This function consumes more in t...

Page 88: ...the properties window of the printer P 32 2 Display the Special Settings dialog box 2 1 1 Click the Utility tab 2 Click Special Settings 3 Change settings as needed The special settings of the connected printer online status are displayed ...

Page 89: ...the computer cannot communicate with the printer offline status the special settings that the computer received in the last communication when the printer was in the online status are displayed 4 Send the changed special settings 1 1 Click Send A confirmation message appears 2 2 Click Yes The updated special settings are sent to the printer ...

Page 90: ...85 Changing Special Settings 5 Finish updating the special settings 1 1 Click Close ...

Page 91: ...ation of settings a message You do not have rights to printer management Please contact your system administrator appears For more details see Administrative privileges required for certain features P 40 When increasing ink jetting amount for printing Because this mode uses more ink than in usual printing it may bleed through the paper stain the edges or back of the paper or the transport area Do ...

Page 92: ... can be entered cannot be used as the start character of the paper type name 3 Set ink jetting amounts for respective colors Moving the slider to the left decreases the ink jetting amount and moving the slider to the right increases the ink jetting amount Determine the ink jetting amounts optimum for the selected type of paper after conducting the print test several times 4 Click Register A confir...

Page 93: ...k Yes The paper types are registered in Paper Type Names NOTE A confirmation message will be displayed when registering a new media type that will increase the ink jetting amount Review the message and then click Yes 6 6 Click Close ...

Page 94: ...89 Registering Paper Type 4 Complete a test print to check the print result NOTE Deleting a paper type To delete a registered paper type select if from the Paper Type Names and then click Delete ...

Page 95: ...90 Chapter 2 Printing ...

Page 96: ...equired to use the printer in good condition Checking the Printer Status 92 Replacing the Ink Tank 95 Replacing the Maintenance Cartridge 102 Cleaning the Print Head 109 Adjusting Print Head Position 113 Checking the Setting Values 126 Cleaning the Printer 128 ...

Page 97: ...e and ready to print Displayed when the printer is offline Background is gray Displayed when a warning has been issued Background is yellow A warning message is displayed with the printer status printing can be completed when a warning is issued Troubleshoot the problem as required Displayed when an error has been issued Background is red An error message is displayed with the printer status print...

Page 98: ... Status Information The Status Information indicates the status of the printer by displaying the following four icons and messages Information Warning message P 165 Operator Call Error message P 166 Service Call Error message P 171 How to Start and Display the Status Monitor 1 Open the Start menu and select the desired start option 1 Select one of the followings Start During Printing The Status Mo...

Page 99: ...s Monitor window on the taskbar Start at Task Tray Create an icon for the open Status Monitor window and store the icon in the task tray A dot symbol marks the currently selected item NOTE To start the status monitor click Start Status Monitor on the Utility tab When an error occurs the status monitor pops up automatically To always display the window on top click Always Show On Top The Status Mon...

Page 100: ...e paid for even within the maintenance contract period or warranty period Replace each ink tank as quickly as possible Do not leave the printer for a long period with any ink tanks removed Do not store ink tanks in high temperature areas Store ink tanks in a place not subjected to direct sunlight In order to maintain high quality install each ink tank in the printer before expiration of the instal...

Page 101: ...dicated by the ink lamp Indication by Ink lamp The Ink lamp lights up when the corresponding ink tank needs to be replaced Indication on the status monitor An error message XXXX ink empty appears on the status monitor XXXX Black Cyan Magenta or Yellow ...

Page 102: ...k to remove it Do not remove two or more ink tanks at the same time When replacing two or more ink tanks be sure to replace the tanks one by one IMPORTANT Handle the ink tank carefully so that your clothes and the area around the printer are not stained with ink Dispose the used ink tank according local laws and regulations A ...

Page 103: ...e orange protective cap as shown in the figure When removing the protective cap be sure to hold the ink tank as illustrated to avoid getting ink on your fingers Dispose the removed protective cap according to local laws and regulations IMPORTANT Do not press on the sides of the ink tank as ink could come out ...

Page 104: ...ly opening Ink could not be supplied properly Do not shake the ink tank with the ink supply opening down Ink leaking from the ink supply opening could stain your clothes or the area around the printer Be careful to ensure that ink adhered on the removed protective cap does not get on your clothes or the area surrounding the printer ...

Page 105: ...onding label 2 Press on the top of the ink tank until the ink tank clicks into place IMPORTANT Install each ink tank in the printer according to the color indicated on the label If any ink tank is installed in a wrong position the printer cannot print In addition ink colors could be mixed resulting in poor print quality The printer cannot print until all ink tanks are properly installed 6 Close th...

Page 106: ... to have a new ink tank ready Off The ink tank is full The pictures of ink tanks shown on the status monitor stand for yellow Y magenta M cyan C and black Bk ink tanks from left IMPORTANT For details on how to purchase a new ink tank contact your place of purchase After a warning message XXXX ink low XXXX Black Cyan Magenta or Yellow is displayed the number of print head cleaning increases and the...

Page 107: ...fety keep the used maintenance cartridge out of the reach of children If a child licks or swallows ink consult a physician immediately IMPORTANT Do not leave the printer for a long time with the maintenance cartridge removed Do not insert or remove the maintenance cartridge except when replacing it Put the used maintenance cartridge in the attached plastic bag zip the plastic bag closed completely...

Page 108: ...Maintenance Cartridge 1 Take out a new maintenance cartridge from the box 2 Pull out the transport unit from the printer 1 Remove the stacker if it is used 2 Raise the transport unit lever and pull the transport unit out ...

Page 109: ...it does not fall Do not put your hands into inside of the printer Failures or physical injury could result Further your hands or clothing may get dirty with ink adhered inside of the printer IMPORTANT When pulling the transport unit out of the printer or inserting it in the printer be careful not to hit it strongly against the table or shelf The surface of the table or shelf could be damaged ...

Page 110: ...intenance cartridge in the plastic bag A new maintenance cartridge comes with a plastic bag to put the used maintenance cartridge in 3 Zip the plastic bag closed completely IMPORTANT Do not shake or strongly press on the maintenance cartridge or hold it with the ink inlet down Ink leaking from the ink inlet could stain your clothes or the area around you ...

Page 111: ... the transport unit in the printer 1 Slowly insert the transport unit as far as it will go As you do this be careful not to touch the paper guides doing so will change their positions CAUTION When inserting the transport unit be careful not to get your fingers caught between the transport unit and the main body of the printer ...

Page 112: ...ack to the correct position Insert the connection part of the stacker straight into the slot of the printer IMPORTANT Do not store the used maintenance cartridge with the ink inlet down Ink leaking from the ink inlet could stain your clothes or the area around you Dispose the used maintenance cartridge according to local laws and regulations ...

Page 113: ... by Maintenance Cartridge lamp Display on status monitor Status Lit The maintenance cartridge is full and must be replaced Blink The maintenance cartridge has limited free space Free space About 10 It is recommended to have a new maintenance cartridge ready Off The maintenance cartridge has free space IMPORTANT For details on how to purchase a new maintenance cartridge contact your place of purcha...

Page 114: ...ccurred cleaning cannot be performed When cleaning is in progress do not carry out any other operation Since cleaning consumes inks clean only when necessary Note that strong cleaning consumes more ink than normal cleaning light cleaning Normal Cleaning Light Cleaning 1 Open the printer driver setup window P 31 2 Begin light cleaning of the print head 2 1 1 Click the Utility tab 2 Click Light Clea...

Page 115: ...ther operation It takes about 4 minutes to finish the cleaning NOTE If the symptom persists even after completion of light cleaning perform strong cleaning P 111 Cleaning during Printing You can stop printing temporarily to perform cleaning 1 Press the Pause key 2 Select Light Cleaning or Strong Cleaning from the Cleaning menu on the status monitor ...

Page 116: ... light cleaning perform strong cleaning IMPORTANT Since strong cleaning consumes more ink than normal cleaning light cleaning clean only when necessary 1 Open the printer driver setup window P 31 2 Perform strong cleaning 2 1 1 Click the Utility tab 2 Click Strong Cleaning A confirmation message appears ...

Page 117: ...re faint The nozzels that correspond to the check boxes selected will be cleaned 4 Click Send 5 5 Review the displayed message and then click Yes Strong cleaning begins When cleaning is in progress do not carry out any other operation It takes about 8 minutes to finish the cleaning NOTE If strong cleaning does not unclog the print head replacement of the print head may be required Contact your pla...

Page 118: ...s over this printer are required to configure printer settings If a user without administrative privileges proceeds with configuration of settings a message You do not have rights to printer management Please contact your system administrator appears For more details see Adjusting the Reference Position P 117 Print head position cannot be adjusted when printing is in progress or an error has occur...

Page 119: ...ustment dialog box 2 1 1 Click the Utility tab 2 Click Print Head Position Adjustment NOTE Clicking The details of the adjustment method are here in the Print Head Position Adjustment dialog box will display the help screen showing the print head adjustment method ...

Page 120: ...er is not operating and then click Print A confirmation message will appear 2 2 Review the displayed message and then click Yes Printing of adjustment patterns will begin 3 3 If adjustment patterns have been printed normally click Yes If you select No adjustment patterns will be printed again ...

Page 121: ...int head position adjustment pattern landscape for measuring the print head deviation in the direction perpendicular to the transport direction and a black frame for checking the reference position of each ink 28 24 20 16 12 8 4 0 28 24 20 16 12 8 4 32 32 28 24 20 16 12 8 4 0 28 24 20 16 12 8 4 32 32 28 24 20 16 12 8 4 0 28 24 20 16 12 8 4 32 32 Transport direction Y K C Printer S N XXXXXXXXXX XXX...

Page 122: ...ition P 117 2 Click Proceed to Step 3 NOTE Adjusting the Reference Position When the reference position is correct the top line of the black frame is located 1 5 mm 0 06 inch below the upper edge of the paper and the left line of the black frame is located 2 0 mm 0 08 inch away from the left edge of the paper Adjust the reference position only when it is deviated significantly Vertical adjustment ...

Page 123: ...fy the adjustment value between and shown on the slider scale To retry from Step 1 printing of adjustment patterns click Return to Step 1 7 Step 3 Adjust the print head position for black Adjust the print head position for black while looking at the adjustment pattern K 28 24 20 16 12 8 4 0 28 24 20 16 12 8 4 4 1 Read the vertical adjustment value in the adjustment pattern K The adjustment value i...

Page 124: ...tment value in the adjustment pattern K The adjustment value is found at the top of the magenta and black lines which appear to be smoothly connected without steps For example in the pattern shown on the left the adjustment value is 4 4 4 Click the button X and then specify the vertical adjustment value ...

Page 125: ...from Step 2 adjustment of the reference position click Return to Step 2 8 Step 4 Adjust the print head position for cyan and yellow Adjust the print head position for cyan while looking at the adjustment pattern C and adjust the print head position for yellow while looking at the adjustment pattern Y 28 24 20 16 12 8 4 0 28 24 20 16 12 8 4 4 1 Adjust the print head position for cyan Read the verti...

Page 126: ...e 28 24 20 12 16 4 8 0 28 24 20 16 12 8 4 4 3 Read the horizontal adjustment value on the adjustment pattern C The adjustment value is found at the top of the magenta and cyan lines which appear to be smoothly connected without steps For example in the pattern shown on the left the adjustment value is 4 ...

Page 127: ...y the vertical and horizontal adjustment values NOTE To specify the adjustment value move the slider or enter a value directly in the entry box interlocked with the slider The vertical adjustment range is from 32 to 32 and the horizontal adjustment range is from 25 to 25 However the adjustment range may be limited depending on the current settings Specify the adjustment value between and shown on ...

Page 128: ...123 Adjusting Print Head Position 9 Step 5 Send the adjustment values to the printer 1 1 Click Send A confirmation message will appear 2 2 Click Yes The print head position is adjusted 3 3 Click OK ...

Page 129: ...ment patterns begins 3 3 When adjustment patterns have been printed normally click Yes If you select No printing patterns will be printed again 11Check the adjustment patterns after the adjustment of the head position Make sure the lines of each color are smoothly connected at 0 on the adjustment patterns If the lines appear to be out of alignment stepped readjustment is required ...

Page 130: ...125 Adjusting Print Head Position 12Complete the print head position adjustment procedure 1 1 Click Close A confirmation message will appear 2 2 Click Yes ...

Page 131: ...estination IMPORTANT The setting information cannot be printed when printing is in progress or an error has occurred 1 When printing the setting information check that paper is set in the printer 2 Open the printer driver setup window P 31 3 Output the current settings 2 1 1 Click the Utility tab 2 Click Output Setting Value The Output Setting Value dialog box appears ...

Page 132: ... u b n e t M a s k D e f a u l t G a t e w a y I n k L e v e l D e t e c t i o n M o d e B l a c k I n k T a n k C y a n I n k T a n k M a g e n t a I n k T a n k Y e l l o w I n k T a n k X mm X mm X mm X mm OFF OFF OFF OFF X min X min OFF X X X X Enabled Enabled Enabled Enabled Enabled To p B o t t o m L e f t R i g h t L e n g t h 8 1 0 9 1 0 m m L e n g t h 1 5 7 0 1 7 2 0 m m L e n g t h 8 1 ...

Page 133: ...c parts inside the printer a fire or electric shock could result Cleaning the exterior of the printer To preserve the print quality periodically clean the exterior of the printer CAUTION Prior to cleaning the printer be sure to turn if off and unplug the power cord 1 Turn off the printer P 8 IMPORTANT While the Power lamp is lit or blinking do not remove the power plug from the outlet A printer fa...

Page 134: ...129 Cleaning the Printer 3 Wipe the exterior clean with a damp cloth wrung out thoroughly 4 Connect the power cord and interface cable ...

Page 135: ...per cannot be fed properly the transport unit may be stained Clean the transport unit periodically Cleaning the periphery of the transport path 1 Pull the transport unit out of the printer 1 Remove the stacker if it is used 2 Raise the transport unit lever and pull the transport unit out ...

Page 136: ... does not fall down Do not put your hands into inside of the printer Failures or physical injury could result Further your hands or clothing may get dirty with ink adhered inside of the printer IMPORTANT When pulling the transport unit out of the printer or inserting it in the printer be careful not to hit it strongly against the table or shelf The surface of the table or shelf could be damaged ...

Page 137: ...ral areas of the transport path Clean the transport belt by rotating the belt one fourth of the way at a time For details on cleaning the transport belt see Cleaning the Transport Belt P 136 2 Open the paper retainer A 3 Wipe the ink stain and paper dust off of the back side of the paper retainer B and roller C Clean the roller while rotating it A B C ...

Page 138: ...133 Cleaning the Printer 4 Wipe ink and paper dust off the sensors D and E To clean the sensors C and D pass a cloth under them D E ...

Page 139: ...er towel or tissue enters inside of the printer a printer failure could result When cleaning be careful not to damage the transport path film F 3 Set the transport unit in the printer 1 Slowly insert the transport unit as far as it will go As you do this be careful not to touch the paper guides doing so will change their positions F ...

Page 140: ... not to get your fingers caught between the transport unit and the inside body of the printer 2 Push the transport unit lever until it clicks Connection part 3 When using the stacker install it back to the correct position Insert the connection part of the stacker straight into the slot of the printer ...

Page 141: ... You do not have rights to printer management Please contact your system administrator appears For more details see Administrative privileges required for certain features P 40 When printing is in progress or an error has occurred Belt Cleaning Mode cannot be executed 1 Open the properties window of the printer P 32 2 Perform belt cleaning 2 1 1 Click the Utility tab 2 Click Belt Cleaning Mode A c...

Page 142: ...ng the Printer A screen showing the cleaning procedure will appear 3 Pull the transport unit out of the printer 1 Remove the stacker if it is used 2 Raise the transport unit lever and pull the transport unit out ...

Page 143: ... it does not fall down Do not put your hands inside of the printer Failures or physical injury could result Further your hands or clothing may get dirty with ink adhered inside of the printer IMPORTANT When pulling the transport unit out of the printer or inserting it in the printer be careful not to hit it strongly against the table or shelf The surface of the table or shelf could be damaged ...

Page 144: ...er retainer with a dry lint free cloth 1 Open the paper retainer A 2 Wipe the stain and paper dust off of the transport belt 3 Wipe the ink stain and paper dust off of the back side of the paper retainer B and roller C Clean the roller while rotating it A B C ...

Page 145: ...er towel or tissue enters inside of the printer a printer failure could result When cleaning be careful not to damage the transport path film F 5 Set the transport unit in the printer 1 Slowly insert the transport unit as far as it will go As you do this be careful not to touch the paper guides doing so will change their positions F ...

Page 146: ...he printer 2 Push the transport unit lever until it clicks When the transport belt rotates the progress bar moves Check that the progress bar has moved and then begin the next cleaning step The figure on the left shows that the first cleaning step has been completed 6 Repeat steps 3 to 5 four times After repeating four times a completion message will appear ...

Page 147: ...tenance 7 Complete the belt cleaning procedure 1 1 Click OK 8 When using the stacker install it back to the correct position Connection part Insert the connection part of the stacker straight into the slot of the printer ...

Page 148: ...ler may be stained Clean the pick up roller periodically IMPORTANT While the Power lamp is lit or blinking do not remove the power plug from the outlet A printer failure could result 1 Lower the feeder lift tray If the feeder lift tray is already lowered proceed to step2 1 Press the Tray key Wait for the feeder lift tray to stop ...

Page 149: ...144 Chapter 3 Maintenance 2 Remove the paper from the printer 1 Open the auxiliary tray 2 Remove the paper ...

Page 150: ...he Power lamp is lit or blinking do not remove the power plug from the outlet A printer failure could result 4 Disconnect the power cord and interface cable 5 Wipe the pick up rollers clean with a damp cotton swab etc Carefully wipe the stain off the pick up rollers A A ...

Page 151: ...146 Chapter 3 Maintenance IMPORTANT When cleaning be sure not to get the cotton swab or your finger caught in the sensor lever B 6 Connect the power cord and interface cable B ...

Page 152: ...Chapter 4 Troubleshooting For Troubleshooting Operations 148 List of Error Messages Warning Messages 165 ...

Page 153: ...place of purchase Status Lamp Lights up Orange When an error occurs in the printer that requires attention the Status Lamp on the Operation Panel will light up orange operator call error The error details and actions required can be confirmed with the Status Monitor After selecting the message in Status Information click Display the details of the selected status Alternatively double click the mes...

Page 154: ...rning Messages P 165 When error messages are displayed the printer will automatically go offline Depending on the type of error even after handling the error there are cases where it will not go online automatically In this case press the pause key and bring it online If multiple errors occur simultaneously the errors will be shown in order from the importance Handle all of the errors ...

Page 155: ...atus Lamp of the Operation Panel will flash orange service call error Handle accordingly 1 Turn off the printer P 8 2 After the Power Lamp goes off turn the power on again P 7 3 If an error occurs after turning the printer on again contact your place of purchase and provide them with the error number 4 digits displayed on the Status Monitor ...

Page 156: ...printer correctly with the interface cable Is the correct printer selected Select the printer to be used with the Printing dialog box Are you printing a large image If the Status Lamp green is flashing the data is still being processed Stand by Are you printing for long periods of time When printing for a long period of time the print head temperature will rise To protect the head printing operati...

Page 157: ...ibed below For Windows 10 Right click on start and then select Control Panel Hardware and Sound Devices and printers For Windows 8 1 From the Desktop charms select Settings Control Panel Hardware and Sound Devices and Printers For Windows 7 Select the Start menu Devices and Printers 2 Right click the printer icon and select Printer Properties The properties window will appear 3 Click on the Ports ...

Page 158: ... For Windows 8 1 From the Desktop charms select Settings and enter cmd For Windows 7 Enter cmd in the Search programs and files of the Start menu 2 In the window started enter ipconfig all 3 After confirming the IP address close the screen Once you have confirmed the IP addresses if the printer and computer are not on the same network change the printer s IP address according to the following step...

Page 159: ...at the printer uses for communication are set as follows Use these settings as references Port number Protocol 50000 TCP 50001 TCP UDP 50002 UDP Paper Does not Feed Properly Points to Confirm Solution Is the dedicated paper being used Use dedicated paper Do not use paper other than dedicated paper It can cause paper jams and malfunctions Is the paper switch lever set properly Check that the paper ...

Page 160: ...Check the maximum number of sheets P 18 Improving the Print Quality Condition Solution Streaks appear on the print Confirm that the paper set size shape and type matches the paper size shape and type configured by the application software or printer driver Set the resolution to Input resolution 1200dpi prioritize image quality and then print P 55 If you are using the printer at low temperature Roo...

Page 161: ...ve several printers check that you have not changed the printer and transport unit combinations Because accurate adjustments are made between each printer and its transport unit it is not possible to use a transport unit of another printer The halftone representation is coarse Open Color tab of the printer driver and set the Half tone to Error Diffusion P 55 The area around characters or the layer...

Page 162: ... wavy and rubbing marks are left on the paper Confirm that the paper set size shape and type matches the paper size shape and type configured by the application software or printer driver Flatten the paper so that the curl If the paper cannot be flattened adjust the paper guides to the paper width and then print P 50 The color printed differs from the color on screen Open Color tab of the printer ...

Page 163: ...guides to the paper width and then print P 50 The sheets may be stacked before the printed surface is dry Open Utility tab of the printer driver and enable Print Hold Mode in Special Settings This will stop the paper at the ejection slot one sheet at a time P 82 The margin of the final print is too small or large Configure the paper size set by the application software or printer driver as follows...

Page 164: ... the steps below to remove the paper jam IMPORTANT Use the dedicated paper When paper that is not compatible is used blurring or bleeding may occur and it may adversely affect the printer causing a malfunction If the paper leading edge is folded or the paper is curled paper jams may occur 1 Check the transport unit 1 Remove the stacker if it is used 2 Raise the transport unit lever and pull the tr...

Page 165: ...both hands so it does not fall Do not put your hands inside the printer Failures or physical injury could result Ink adhered inside of the printer could stain clothes or hands IMPORTANT When pulling the transport unit out of the printer or inserting it in the printer be careful not to hit it strongly against the table or shelf The surface of the table or shelf could be damaged ...

Page 166: ...shooting Operations 4 Remove the jammed paper from the transport unit Check that the paper is not jammed further in the transport unit If paper is jammed remove it 2 Check the feeder slot If paper is jammed remove it ...

Page 167: ...n the sensor lever A 3 Set the transport unit in the printer 1 Slowly insert the transport unit as far as it will go As you do this be careful not to touch the paper guides doing so will change their positions 2 Push the transport unit lever until it clicks To cancel the printing click on Cancel Print Job on the Status Monitor A ...

Page 168: ...er width micro margin printing is not possible MM G 58 MM 51 54 55 1 While holding the paper guide A with your fingers adjust it to G of the index C When setting paper guide B to a position other than MM adjust paper guide A to G of the index C 2 While holding the paper guide B with your fingers adjust it to the paper width index D For example the figure on the left shows adjustment to guide posit...

Page 169: ...o the position shown in Table 1 Guide positions of paper Table 1 Guide positions of paper Paper name Guide position mm Business Card 55 0 x 91 0 mm 2 17 inch 3 58 inch 54 55 Card CR80 Plastic 54 0 x 85 6 mm 2 13 inch 3 37 inch 54 55 Card CR80 Paper 54 0 x 85 6 mm 2 13 inch 3 37 inch 54 55 Business Card US 51 0 x 89 0 mm 2 01 inch 3 50 inch 51 The paper guides cannot be used for paper whose width i...

Page 170: ...f error even after handling the error there are cases where it will not go online automatically In this case press the pause key and return the printer to online state If multiple errors occur simultaneously the errors will be shown in order from the importance If the Status Monitor is minimized or is in the task tray Status Monitor window will be displayed when an error occurs After selecting the...

Page 171: ... XXXX ink tank setting error XXXX is black cyan magenta or yellow The ink tank is not inserted properly Set the ink tank again P 95 XXXX ink tank abnormality XXXX is black cyan magenta or yellow The ink tank is not recognized Either the ink tank is abnormal or an unsupported ink tank is installed Replace with new ink tank P 95 Maintenance cartridge full The maintenance cartridge s ink is full Repl...

Page 172: ...nfirm that the paper set size and shape matches the paper size and shape configured by the application software or printer driver There is a possibility that the transport unit s sensor is dirty Clean the transport unit P 130 Confirm the printer driver s version and the firmware s version If the printer driver and the firmware used are not the latest version download the latest version from the we...

Page 173: ...ets is less than the specified amount and the top surface of the paper stack is lower than the paper loading limit mark If there is paper in the feeder slot remove it Paper left on the feeder slot 6202 Paper is jammed in the feeder slot Remove the paper jam from the feeder slot Feeder tray error The feeder lift tray does not lower Confirm that is no foreign matter under the paper lift tray Paper s...

Page 174: ... in the Status Monitor and cancel printing and recreate the form data Overlay data error Error with overlay printing data Confirm the cable connection and retry printing Print head position error Problem with either the transport unit or print head Remove the transport unit and confirm that no foreign matter is on the insides Open the ink tank cover and confirm there is no foreign matter around th...

Page 175: ...rk utility P 200 If the printer is shared start Windows Task Manager and confirm that Canon XXXX Status Monitor Service where XXXX is the model name is registered in the Service tab If it is not registered follow the steps below to register the service 1 Start CD ROM 2 Click Install the printer driver 3 Select Server Client Registration and then click OK Confirm the port settings P 152 Unknown err...

Page 176: ...el detection will be disabled and the disabling action will be logged IMPORTANT Printing with the ink level detection function disabled may damage the printer or cause errors We cannot be held responsible for malfunctions as a result of refilling the ink or installing unsupported ink tanks Once the ink level detection function is disabled the ink level function cannot be restored for that ink tank...

Page 177: ...pen the Advanced Settings tab of the printer driver and check the option Automatic Speed for Print Speed Set the print speed to something slower than the current setting Temperature humidity sensor not connected The temperature humidity sensor needs to be replaced Take note of the message displayed and contact your place of purchase The battery for the clock has ran out The clock s RTC battery nee...

Page 178: ...ning Message Warning Content Handling Unknown warning An unknown warning was returned Update the printer drivers and firmware to the latest versions If the same error occurs again take note of the message displayed and contact your place of purchase ...

Page 179: ...174 Chapter 4 Troubleshooting ...

Page 180: ...Chapter 5 Appendix Moving the Printer 176 Uninstall Printer Driver 185 About Network Utility 187 ...

Page 181: ...pping the printer In addition do not hold the printer by the feeder lift tray or stacker doing so may break the tray or stacker and cause the printer to drop This may lead to injury Always hold the printer level and carry it slowly If ink is spilled inside the printer while moving it this could cause a fire or serious electrical shock or damage the printer IMPORTANT Administrative privileges over ...

Page 182: ... not leak during movement 2 1 1 Click the Utility tab 2 Click Moving The Printer A confirmation message will appear 3 3 Click Yes Ink bleeding starts Do not operate the printer until after the message indicating that the removal of ink is completed appears IMPORTANT During execution of Moving The Printer review the following precautions Do not turn off the printer Do not open close the ink tank co...

Page 183: ...Check that execution of Moving The Printer is completed 1 1 Click OK 4 Turn off the printer P 8 IMPORTANT When the Power lamp is lit or blinking do not remove the power plug from the outlet A printer failure could result 5 Disconnect the power cord and interface cable 6 Move the printer IMPORTANT Do not move the printer with the ink tank cover open or with the transport unit drawn out They could b...

Page 184: ...ter with both hands to avoid dropping the printer In addition do not hold the printer by the feeder lift tray or stacker doing so may break the tray or stacker and cause the printer to drop This may lead to injury Always hold the printer level and carry it slowly If ink is spilled inside the printer while moving it this could cause a fire or serious electrical shock or damage the printer IMPORTANT...

Page 185: ...rties window of the printer P 32 2 Execute Shipping The Printer Remove ink from the ink flow passage so that ink does not leak during transportation 2 1 1 Click the Utility tab 2 Click Shipping The Printer A confirmation message will appear 3 3 Click Yes Execute Shipping The Printer Do not operate the printer before the specified message appears in step3 IMPORTANT During execution of Shipping The ...

Page 186: ...e appears remove ink tanks 1 Open the ink tank cover 2 Remove all ink tanks Install the orange protective caps to the ink tanks 3 Close the ink tank cover Closing the ink tank cover will automatically start bleeding ink Do not operate the printer before the specified message appears in step 4 IMPORTANT During execution of Shipping The Printer observe the following precautions Do not turn the print...

Page 187: ...s up with the color indicated on the label 3 Close the ink tank cover Closing the ink tank cover will automatically start bleeding ink Do not operate the printer until after the message indicating that removal of ink is completed appears 5 Check that Shipping The Printer is completed 1 1 Click OK 6 Turn off the printer P 8 IMPORTANT When the Power lamp is lit or blinking do not remove the power pl...

Page 188: ... not available pack the printer in a secure box with protective materials After packing the printer do not lift the box or place the box with its upper or side surface down Ink could leak during transportation When transporting the printer ask the carrier to affix FRAGILE HANDLE WITH CARE and THIS SIDE UP labels with the bottom of the box down 10After installing the printer at the destination conn...

Page 189: ...184 Chapter 5 Appendix Do not open close the ink tank cover and transport unit lever Do not operate any other component of the printer ...

Page 190: ...2400 Printer Driver Uninstall Windows 8 1 1 Move the mouse pointer to the lower right corner or upper right corner of the window to show the Charms bar and click Start 2 On the Start screen move the mouse pointer and click the down arrow that appears at the bottom left of the screen 3 From All apps Canon CX G2400 Canon CX G2400 Printer Driver Uninstall Windows 7 From Start menu select All Programs...

Page 191: ...ill appear 3 3 Click Yes Restart Windows NOTE If No is selected always restart your computer before installing the printer driver again If the network utility is installed a screen such as the following will be displayed To continue uninstalling follow the instructions on the screen ...

Page 192: ... and click the down arrow that appears at the bottom left of the screen 3 From All apps Canon CX G2400 Network IF Utility Windows 7 From Start menu select All Programs Canon CX G2400 Network IF Utility The network utility will be launched After searching for a printer the main screen will be displayed NOTE Searching for the Printer When the network utility is launched it will automatically search ...

Page 193: ...twork IMPORTANT Regarding the Network Configuration Password Changing the printer s network configuration requires a password The default password is admin To prevent people other than the network administrator from configuration it is recommended to change the default password at the time of purchase P 190 Configure the Installation Site Configure the installation site for this printer 1 Select t...

Page 194: ... password 2 Click OK 4 Configure the Installation Site 1 2 1 Enter the printer s installation site into Location When changing the configuration limit it to 15 characters single byte alphanumeric characters and some symbols For details refer to help 2 Click OK ...

Page 195: ...ended to change the default password at the time of purchase so that only the network administrator can change the settings 1 Select the printer to configure from the main screen 2 From the Settings menu click Printer settings Or click on the toolbar 3 Enter Password 1 2 1 Enter the password The default password is admin 2 Click OK ...

Page 196: ...er a new password Enter a password that is up to eight characters single byte alphanumeric characters 3 To confirm reenter the new password 4 Click OK Setting IP Address 1 Select the printer to set an IP address from the main screen 2 From the Settings menu click Printer settings Or click on the toolbar ...

Page 197: ...Select one of the followings Get IP address automatically If there is a DHCP server on the network the printer s IP address will be acquired automatically Specify IP Address Manually set the printer s IP address The IP address subnet mask and default gateway show the currently configured information To change it re enter 3 Click OK ...

Page 198: ...hey will use the printer log file as a point of reference to help troubleshoot Steps on how to access and save your printers log file are described below 1 Select the printer to configure from the main screen 2 From the Settings menu click on Printer settings Or click on the toolbar 3 Enter Password 1 2 1 Enter the password 2 Click OK ...

Page 199: ... 3 Click Save 4 Click OK Saving the Computer s Log File Save the log file log of network communication between this printer and the computer Follow the steps below when instructed by dealer Normally this is unnecessary 1 Select the printer to configure from the main screen 2 From the Settings menu click on Printer settings Or click on the toolbar ...

Page 200: ...tility 3 Enter Password 1 2 1 Enter the password 2 Click OK 4 Configure the location for saving the log file 1 2 4 3 1 Click on the Log Settings tab 2 Check the option PC Log 3 Designate the destination to save 4 Click OK ...

Page 201: ...s Or click on the toolbar The LAN s communication status will be displayed To update to the latest information click Refresh 3 Click OK after confirming Configuring Access Restrictions for the Printer Configure so that only computers with the designated MAC address can connect to this printer 1 Select the printer to configure from the main screen 2 From the Settings menu click MAC address filter ...

Page 202: ... Click Add The MAC address will be added A maximum of 32 addresses can be configured To remove a MAC addresses that was added Select a MAC address to delete from the list and click Delete 4 Click OK IMPORTANT When the MAC address set had been wrong the computer will not be able to connect to this printer If you are unable to cancel the setting contact the administrator of the printer ...

Page 203: ...from the main screen 2 From the Setting menu click Restore the factory default value 3 Enter Password 1 2 1 Enter the password 2 Click OK A confirmation message will be displayed 4 Click OK IMPORTANT After executing Restore Factory Default Settings the password necessary for configuring the printer s network will also be initialized The default password is admin ...

Page 204: ...r the IP address to be searched for can be specified 1 From the Environmental settings menu click Utility environmental settings Or click on the toolbar 2 Specify the IP address to search for 1 2 3 1 Check the option Specify IP Address to Search 2 Enter the IP address 3 Click Add The IP address will be added Up to 16 IP addresses can be specified To remove an added IP addresses Select from the lis...

Page 205: ...isplay Clicking Restore default will restore the content of the Display Items tab to its defaults 4 Click OK Extending Network Time Out Value If you want to avoid resending print data due to the printer timing out or fix errors due to network delays Bidirectional communication error extend the network time out value 1 From the Environmental settings menu click Time out setting ...

Page 206: ...201 About Network Utility 2 Configure Time Out Value Extension 1 2 1 Check the Extend Time Out value check box 2 Click OK ...

Page 207: ...eed 1000BASE T 100BASE TX 10BASE T Ethernet Operating noise Approx 58 dB A or less Installation environment Temperature 15 to 30 degrees Celsius 59 to 86 degrees Fahrenheit Humidity 10 to 80 no condensation Power supply AC adapter used AC100 240 V 50 60 Hz Power consumption Maximum power consumption Approx 150 W Sleep mode Approx 5 6 W or less Dimensions W x D x H 391 mm x 180 mm x 279 mm 15 4 inc...

Page 208: ...ess Sheets 0 21 mm 0 76 mm 8 27 mil 29 9 mil Thick plastic card About 0 7 mm 27 5 mil Thin plastic card About 0 4 mm 15 7 mil Tray capacity Business Card 250 sheets thickness 0 245 mm 9 64 mil or less Extra thick paper Card 100 sheets thickness 0 76 mm 29 9 mil Plastic Card 100 sheets Card Length 157 mm 6 18 inch or more thickness 0 245 mm 9 64 mil 50 sheets Stacking capacity Stacker used Business...

Page 209: ...ult Settings 81 Density 66 E Ejection Slot 4 F Favorites 34 78 Feeder Lift Tray 2 H Half ton 56 I ink information 101 Ink Lamp 5 101 Ink Pre fire On The Paper 82 Ink Tank Cover 2 IP Address 191 L LAN Connector 2 Light Cleaning 39 109 Low Temperature Print Mode 82 M Maintenance Cartridge 3 Maintenance cartridge information 108 Maintenance Cartridge Lamp 5 108 Micro Margin Adjustment 40 50 Micro Mar...

Page 210: ...Quality 36 Print Speed 38 76 R Rating Plate 3 Reduce smudge on media edge 82 Replacing the Maintenance Cartridge 102 Resolution 55 S Service Call Error 171 Sharpness 62 Shipping The Printer 40 180 Side Guide 2 Sleep 10 39 Sleep Timer Setting 12 39 Special Settings 39 83 Start Status Monitor 39 Status Information 93 Status Lamp 5 Status Monitor 92 Strong Cleaning 39 111 T Transport Belt 4 136 Trans...

Reviews: