7. ADJUSTMENT
HE-800B
89
7-4. Adjusting the needle and hook timing
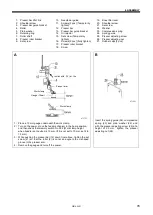
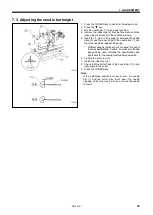
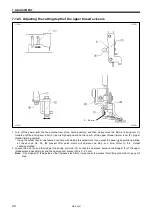
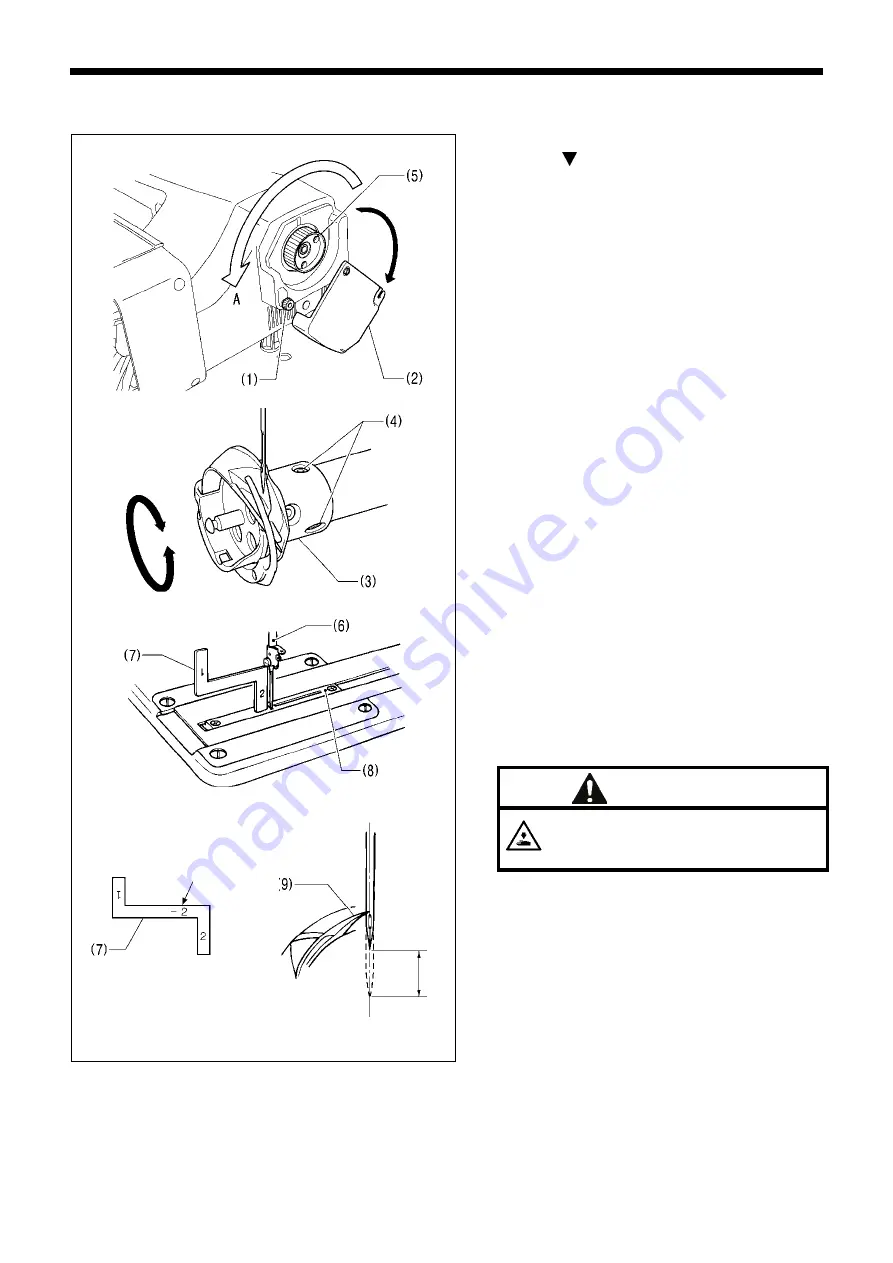
1. Press the THREAD key to switch to threading mode.
2. Press the key.
3. Gently tilt back the machine head.
4. Loosen the knob screw (1), and then fully open the
slide cover (2).
5. Loosen the two screws (4) of the rotary hook joint (3).
6. Turn the pulley (5) in the regular direction of rotation
(A: toward the front) so that the needle bar (6) just
begins to rise from its lowest position.
7. Insert the “2” part of the gauge (7) between the needle
plate (8) and the lower edge of the needle bar (6), and
then align the rotary hook tip (9) with the center of the
needle when the needle bar (6) contacts the gauge
(7).
* Different gauges (optional part) are used for each of
the two specifications -2 and -3, so make sure that the
gauge being used matches the specifications and
application for the sewing machine being adjusted.
8. Tighten the two set screws (4) of the rotary hook joint
(3).
9. Close the slide cover (2), and then tighten the screw
(1) to secure it.
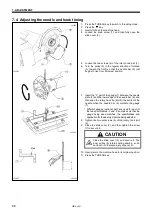
CAUTION
Close the slide cover (2) and secure it. The
inner pulley (5) rotates during sewing, so do
not touch it, otherwise injury may occur.
10. Gently return the machine head to its original position.
11. Press the THREAD key.
4880M
4883M
4882M
Mark
4881M
4879M
Summary of Contents for HE-800B
Page 7: ...v HE 800B Oil tank accessory 4732M 4731M 4730M ...
Page 75: ...6 ASSEMBLY HE 800B 66 D E 0688D 0690D ...
Page 126: ...9 ELECTRIC MECHANISM HE 800B 117 Power PCB Cutter PCB LCD panel PCB 0831D 0768D 0769D ...
Page 133: ...9 ELECTRIC MECHANISM HE 800B 124 0851D ...
Page 134: ...9 ELECTRIC MECHANISM HE 800B 125 0852D ...
Page 135: ...9 ELECTRIC MECHANISM HE 800B 126 0853D ...
Page 177: ...MEMO 168 HE 800B ...
Page 178: ...SERVICE MANUAL 2014 Brother Industries Ltd All Rights Reserved HE 800B I3061003D 2014 03 D 1 ...

