7. ADJUSTMENT
HE-800B
88
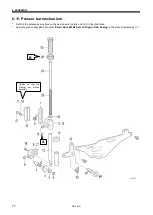
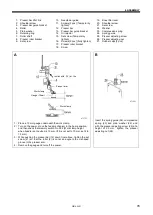
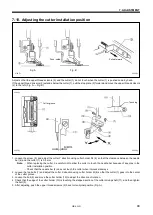
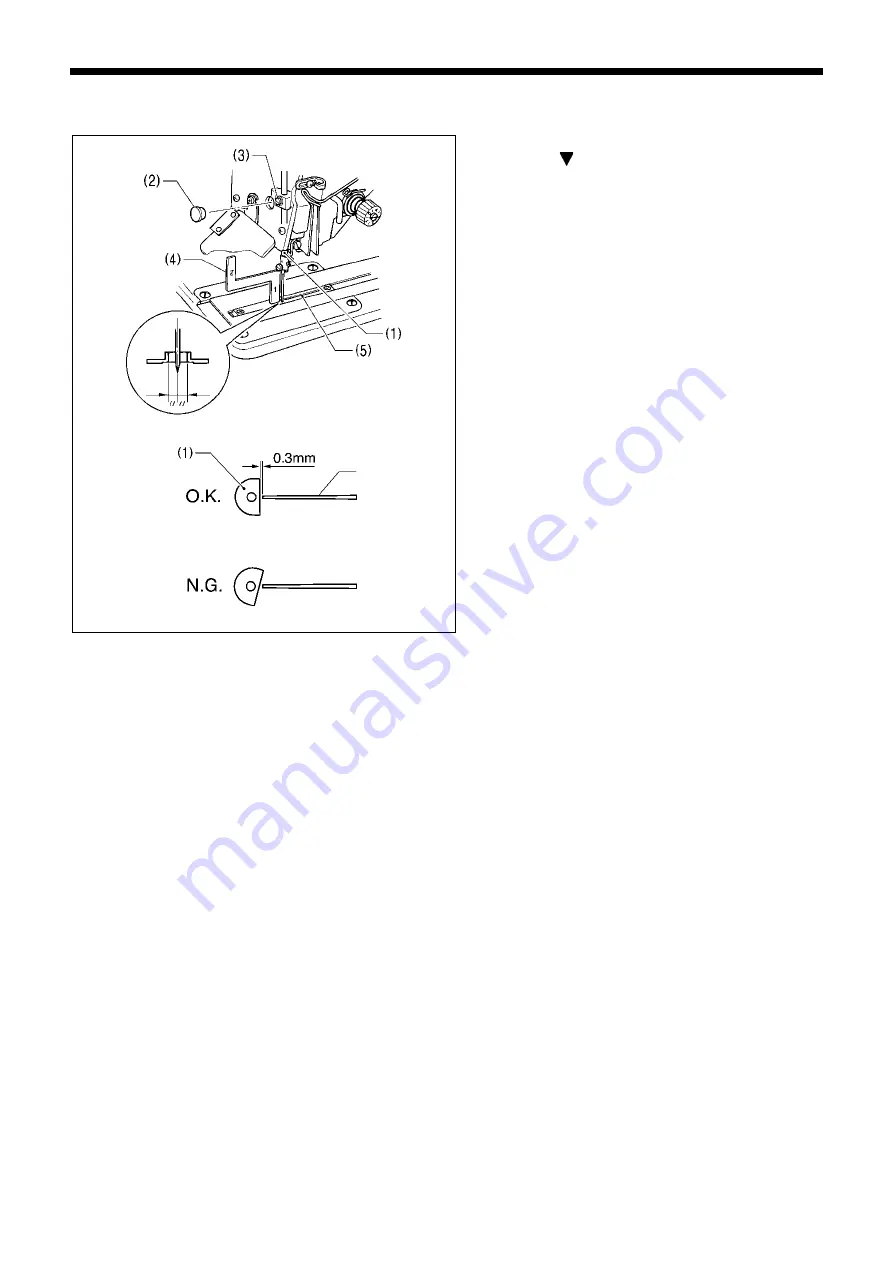
7-3. Adjusting the needle bar height
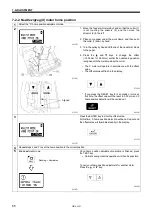
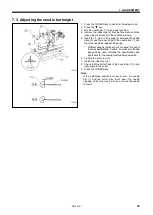
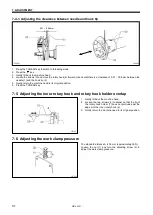
1. Press the THREAD key to switch to threading mode.
2. Press the key.
3. Set the needle bar (1) to its lowest position.
4. Remove the rubber cap (2) from the face plate, and then
loosen the set screw (3) of the needle bar clamp.
5. Insert the “1” part of the gauge (4) between the needle
plate (5) and the lower edge of the needle bar (1), and
touch the needle bar against the gauge.
* Different gauges (optional part) are used for each of
the two specifications -2 and -3, so make sure that the
gauge being used matches the specifications and
application for the sewing machine being adjusted.
6. Tighten the set screw (3).
7. Install the rubber cap (2).
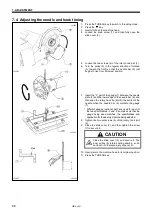
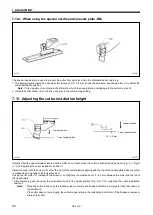
8. Check that the cutter flank of the needle bar (1) is at a
right angle to the cutter.
9. Press the THREAD key.
Note:
If the installation positions are not correct, the needle
bar (1) and the cutter may touch when the needle
zigzags, which may result in noise or cause the needle
to break.
4878M
Cutter
4290Q
Summary of Contents for HE-800B
Page 7: ...v HE 800B Oil tank accessory 4732M 4731M 4730M ...
Page 75: ...6 ASSEMBLY HE 800B 66 D E 0688D 0690D ...
Page 126: ...9 ELECTRIC MECHANISM HE 800B 117 Power PCB Cutter PCB LCD panel PCB 0831D 0768D 0769D ...
Page 133: ...9 ELECTRIC MECHANISM HE 800B 124 0851D ...
Page 134: ...9 ELECTRIC MECHANISM HE 800B 125 0852D ...
Page 135: ...9 ELECTRIC MECHANISM HE 800B 126 0853D ...
Page 177: ...MEMO 168 HE 800B ...
Page 178: ...SERVICE MANUAL 2014 Brother Industries Ltd All Rights Reserved HE 800B I3061003D 2014 03 D 1 ...

