19
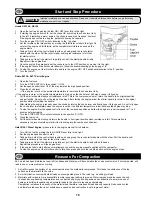
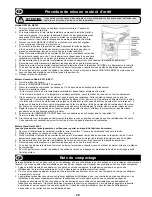
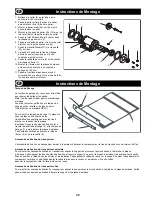
• Take the compactor to where it is required.
If using the ‘Detachable’ transport attachment to wheel the unit, tilt the compactor forward to raise the transport wheels off the
ground. Swing the transporter frame back, then across to disconnect it from the rear of the compactor. Place the transporter
frame somewhere safe until next required. For machines with the ‘Fixed’ transporter tilt the machine forward, pull the
transporter rearwards and upwards, lower the machine to the
fl
oor and latch the transporter into the ‘up’ position.
Where it is necessary to use lifting equipment to position the compactor, make sure the lifting equipment has a WLL (Working
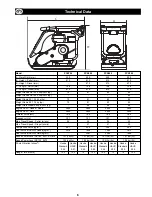
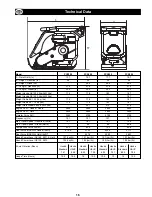
Load Limit) suitable for the compactors weight (see speci
fi
cation chart on page 4 or the machine numberplate). Attach
suitable chains or slings ONLY to the lifting point on the top of the compactor.
• If the compactor is
fi
tted with the water spray system and the application requires its use, check that the water outlet valve is
closed,
then
fi
ll the water bottle with clean water.
• Having carried out the checks listed in the ‘pre start’ section, you may start the engine.
The Belle Group ‘PCx’ range of compactors are
fi
tted with a centrifugal clutch, this allows the engine to run at idle without
driving the vibrator.
As the engine speed is increased the clutch will engage and will drive the vibrator.
For correct operation, the engine speed should be set to maximum.
• Set the throttle to maximum and use the control handle to steer or turn the compactor.
The vibrator will not only cause the baseplate to vibrate but will also cause it to travel forward. During normal operation you
should not have to push the compactor but allow it to travel at its own pace. The speed of travel will be determined by the
condition of the surface being compacted.
If the surface to be compacted is on a slope, great care must be taken when controlling the compactor’s direction of travel. If
necessary, use a suitable rope attached to the compactor at a low point on the chassis, to allow a helper to take part of the
compactor’s weight. Work up and down a slope not across.
• Work the compactor over the surface in an organised pattern until the required compaction has been achieved.
Where there are a number of different layers to be compacted on top of each other, compact each layer individually.
• To stop the compactor vibrating, set the throttle to idle.
Operating The Compactor
Applications
Applications/materials fall into three categories:
1. Cohesive materials (less than 20% granular) e.g clay, silt & heavy soils.
2. Granular materials (more than 20% granular) e.g hard core, sand & light soils.
3. Bituminous materials e.g asphalt (tarmac), cold lay (bitumin emulsion products).
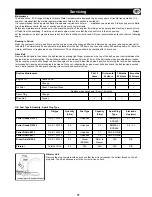
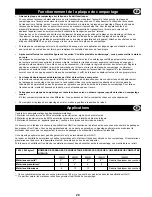
The chart shows the HAUC speci
fi
cations for layer depth and number of passes for Dual Force’ plates. If standard machines are used,
optimum compaction can not be guaranteed, however, if layer depths are reduced and number of passes increased, results can be
improved.
Moisture content of cohesive & granular materials is critical to effective compaction. If granular material is too dry it will
fl
ow around the
plate instead of compacting. If the moisture content is too high the material may dry out after compaction and shrinkage will occur.
1400 -1800 kg/m2
COMPACTION PASSESS REQUIRED PER LAYER OF COMPACTED THICKNESS UP TO.
40MM
60MM
80MM
100MM
150MM
Cohesive Materials
**
2** 4** 5** 6** Reduce
Layer
Thickness
Granular Materials
2*
3*
4*
5 9
Bituminous
6
10
12
Reduce
Layer
Thickness
* Usually placed in 100mm minimum layer so not speci
fi
ed by HAUC.
** The nature of cohesive materials makes plate compaction dif
fi
cult. Optimum compaction is not guaranteed and not
recommended by HAUC.

