R5906150 /05
XDL
66
2.
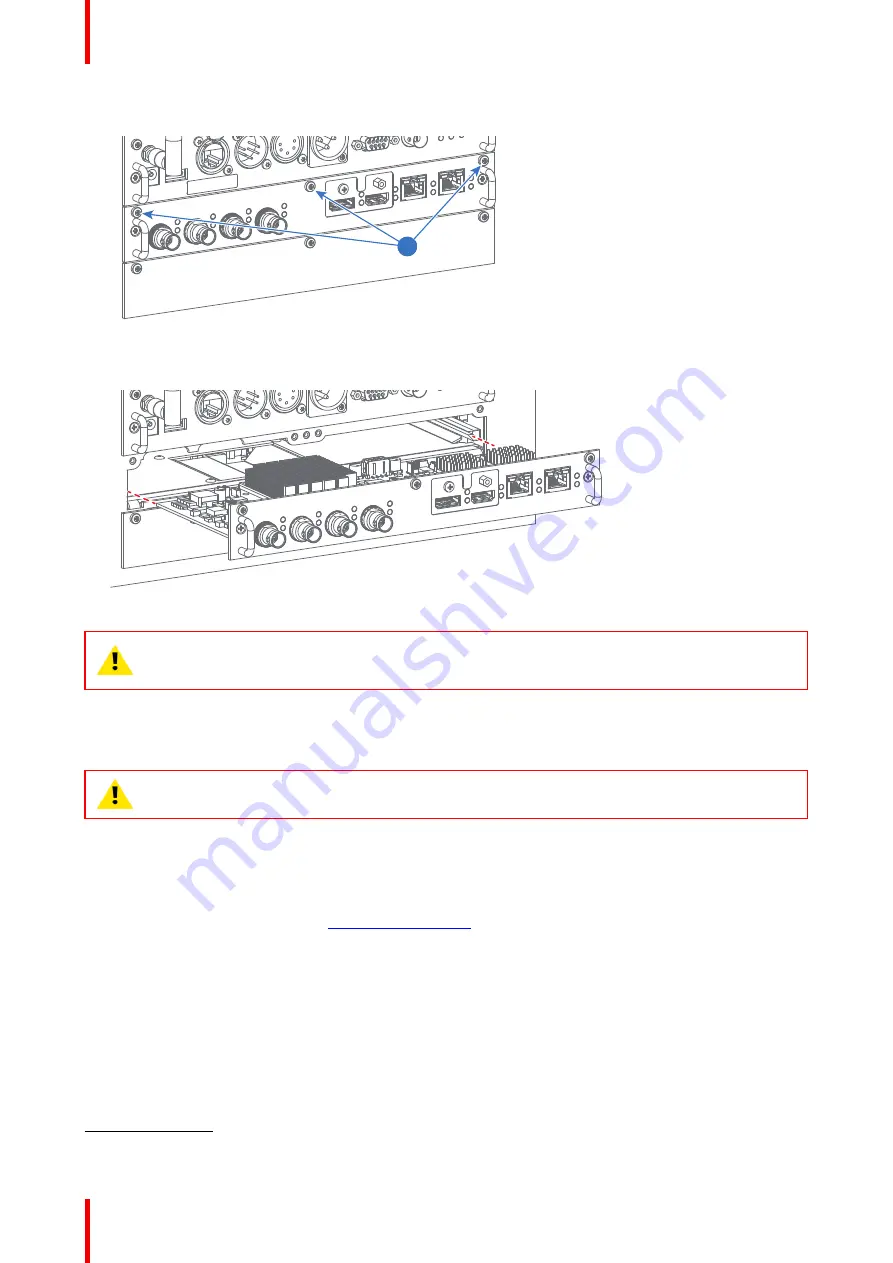
Release the 3 captive screws of the input module (4).
4
4
Image 5
–
34
3.
Pull out the input module of the Input & Communication module using the handles.
Image 5
–
35
CAUTION:
Ensure that unused input slots of the Input & Communication Unit are always covered
with a dummy front plate. After removing one of the input modules, immediately replace with an
other one or install a dummy front plate on the unused input slot.
5.20 Software update
CAUTION:
Do not power off or unplug the projector while the software update is ongoing.
How to update the software
1.
Power on the projector. Wait until the
Power on/off
button is lit white or blue.
2.
Download and install the latest version of Projector Toolset for Pulse. The program can be downloaded for
free from Barco's website, (URL:
http://www.barco.com
). Click on
myBarco
and log in to get access to
secured information. Registration is necessary.
If you are not yet registered, click on
New to myBarco
and follow the instructions. With the created login
and password, it is possible to log in where you can download the software.
3.
Download the latest firmware (format .fw) from Barco's website in the same way as for Projector Toolset.
4.
Start Projector Toolset and make a connection with the projector. For more information, see the
“
Projector
Toolset
”
user guide.
5.
Select tab
Update settings
.
4.
Depending on the production date of the projector, the captive screws can either be Phillips screws or Torx screws. Refer to the tools
list to see what tool you may require.
Summary of Contents for XDL
Page 1: ...ENABLING BRIGHT OUTCOMES Installation Manual XDL...
Page 30: ...R5906150 05 XDL 30 Installation process...
Page 74: ...R5906150 05 XDL 74 Pulse SFP input use cases...
Page 79: ...79 R5906150 05 XDL Dimensions A...
Page 82: ...R5906150 05 XDL 82 Glossary...
Page 86: ...R5906150 05 XDL 86 Index...
Page 87: ......


