Using the Optional Cap Frame
263
7
—————————————————————————————————————————————————————————————————————————————————————
6
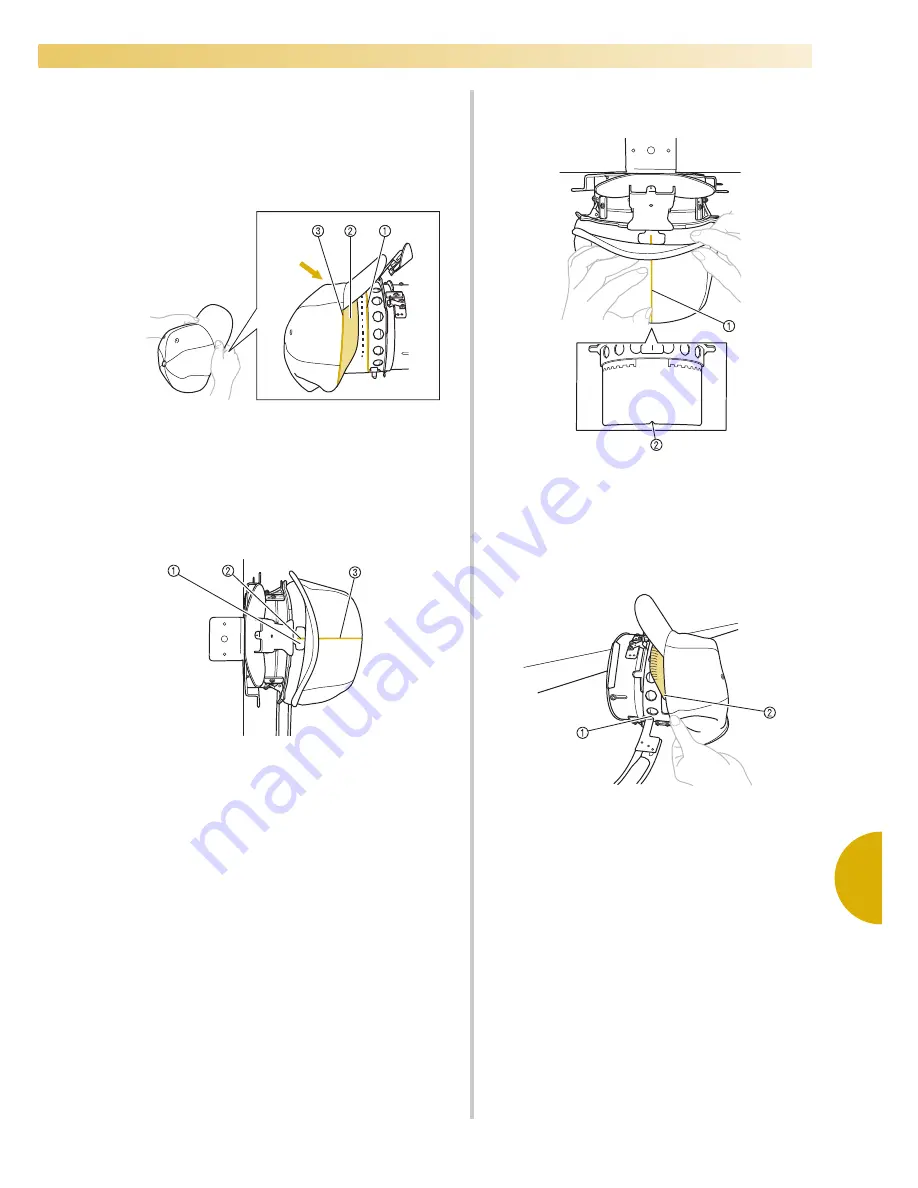
Lift out the sweat guard on the inside of the
cap, and then place the cap over the cap
frame.
Using both hands, hold both sides of the cap,
and then align the edge of the lower frame
with the base of the brim.
1
Edge of the lower frame
2
Sweat guard
3
Base of the brim
At the same time, align the center line of the
cap with the centerline of the sweat guard
holder on the cap frame, and then slide the
sweat guard under the sweat guard holder.
1
Sweat guard holder
2
Center line of sweat guard holder
3
Center line of cap
7
Align the center line of the cap with the
notch in the mounting jig.
1
Center line of cap
2
Notch in mounting jig
8
Before closing the clamping frame, push the
ends of the sweat guard into the cap to move
them away from the hinge and latch of the
clamping frame.
1
Hinge of clamping frame
2
Fold the sweat guard as shown.
• Neatly folding the sweat guard before
closing the clamping frame helps prevent
wrinkles in the cap.
Summary of Contents for Enterprise BNT10L
Page 1: ......
Page 150: ...EMBROIDERING SETTINGS 148...
Page 216: ...SELECTING EDITING SAVING PATTERNS 214...
Page 302: ...APPENDIX 300 If any of the following messages appear consult your nearest Baby Lock retailer...
Page 303: ...Troubleshooting 301 7...
Page 308: ...APPENDIX 306...
Page 312: ...English 884 T11 XF0036 001 Printed in Taiwan...


