OTHER BASIC PROCEDURES
—————————————————————————————————————————————————————————————————
104
6
Touch .
7
Touch .
8
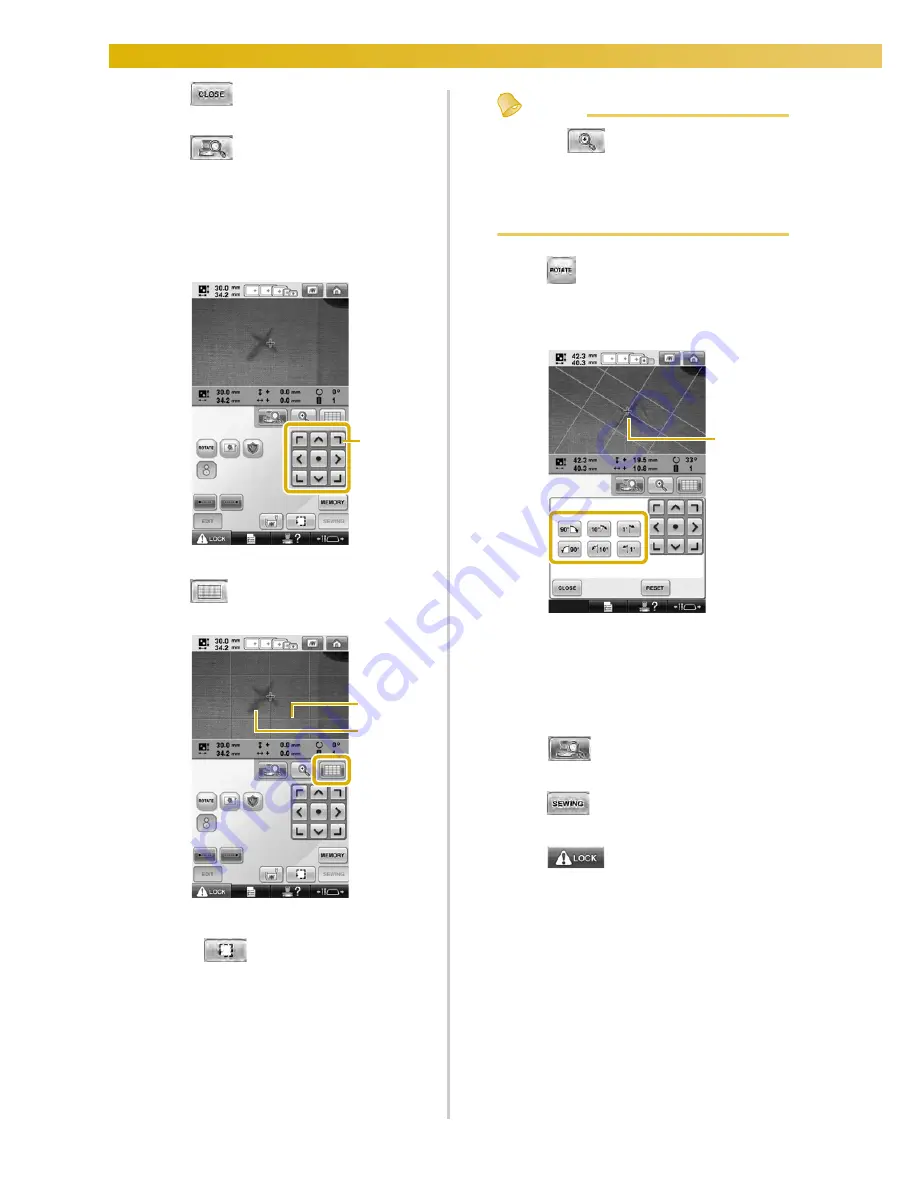
Touch the positioning keys to move the
embroidery frame until the cross-shaped
chalk mark drawn on the fabric is displayed
in the camera view window.
1
Positioning keys
9
Touch
to display the grid lines.
1
Grid lines
2
Chalk mark on the fabric
• Touch
to check the embroidering
position.
Memo
●
Touch
to enlarge the camera view.
By enlarging the camera view, you can
make a close adjustment for the center
point of the pattern moving the
embroidery frame little by little.
0
Touch
and adjust the orientation of the
pattern until the grid lines are parallel with
the chalk mark drawn on the fabric. (Refer
to “Adjusting the angle” on page 100.)
1
Center point of the pattern
• Touch the positioning keys to move the
embroidery frame until the center point of
the pattern in the camera view window is
aligned with the chalk mark drawn on the
fabric.
a
Touch
to return to the previous
screen.
b
Touch .
c
Touch
, and then press the start/
stop button to start embroidering.
1
1
2
1
Summary of Contents for Enterprise BNT10L
Page 1: ......
Page 150: ...EMBROIDERING SETTINGS 148...
Page 216: ...SELECTING EDITING SAVING PATTERNS 214...
Page 302: ...APPENDIX 300 If any of the following messages appear consult your nearest Baby Lock retailer...
Page 303: ...Troubleshooting 301 7...
Page 308: ...APPENDIX 306...
Page 312: ...English 884 T11 XF0036 001 Printed in Taiwan...


