Using the Optional Cap Frame
261
7
—————————————————————————————————————————————————————————————————————————————————————
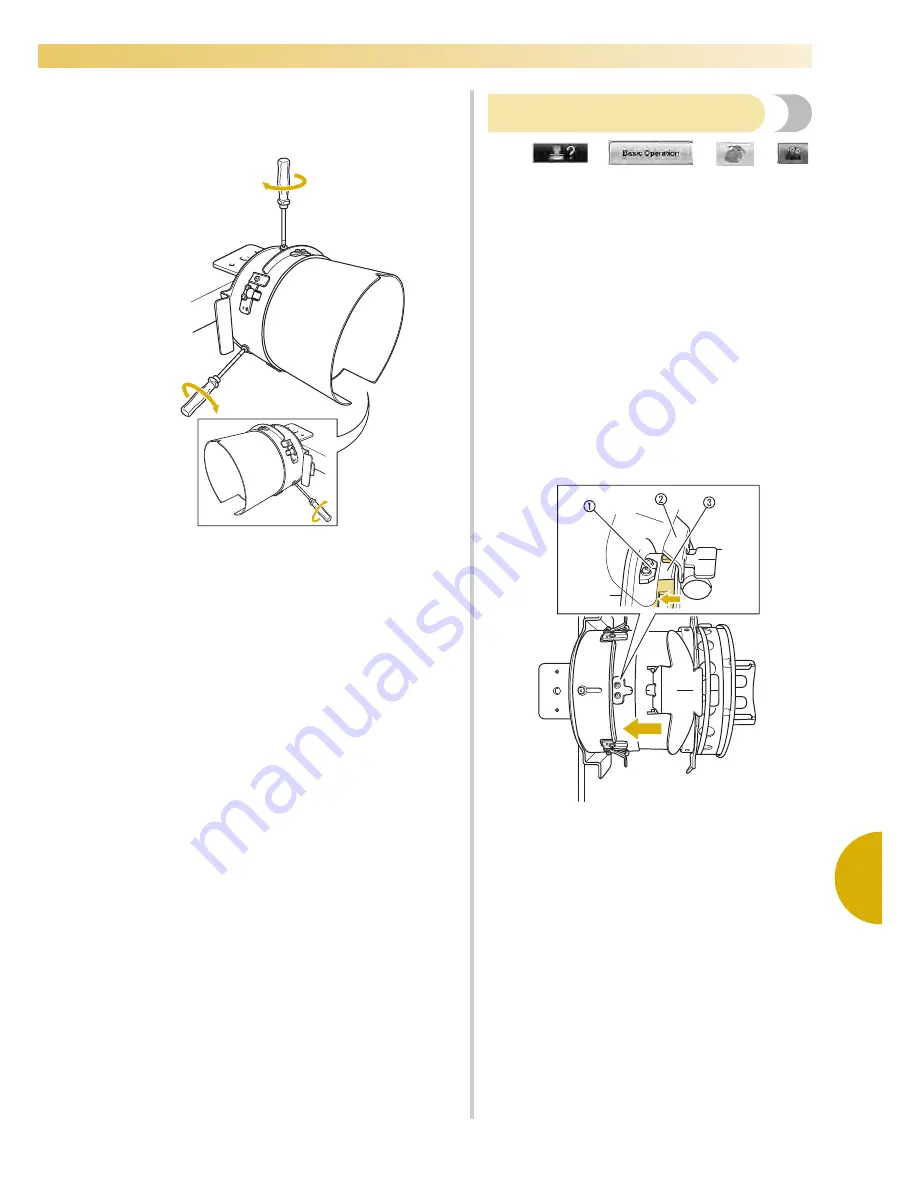
Pull the mounting jig toward you, and then use
the Phillips screwdriver to tighten the three
screws (one each at the top, left and right sides).
X
This completes the preparation of the
mounting jig.
Attaching the cap frame
Touch
→
→
→
in order to view a video of the operation on the
LCD (refer to page 230).
Put the cap into the cap frame attached to the
mounting jig, and then remove the cap frame from
the mounting jig with the cap clamped. Next,
attach the cap frame to the cap frame driver on the
machine.
■
Attaching the cap frame to the mounting jig
and putting a cap into the frame
1
Attach the cap frame to the mounting jig.
Slide the cap frame onto the mounting jig,
making sure that the notch at the base of the
brim holder on the cap frame is aligned with
the guide plate on the top of the mounting jig.
1
Guide plate on mounting jig
2
Brim holder
3
Notch
Summary of Contents for Enterprise BNT10L
Page 1: ......
Page 150: ...EMBROIDERING SETTINGS 148...
Page 216: ...SELECTING EDITING SAVING PATTERNS 214...
Page 302: ...APPENDIX 300 If any of the following messages appear consult your nearest Baby Lock retailer...
Page 303: ...Troubleshooting 301 7...
Page 308: ...APPENDIX 306...
Page 312: ...English 884 T11 XF0036 001 Printed in Taiwan...


