EDITING PATTERNS
212
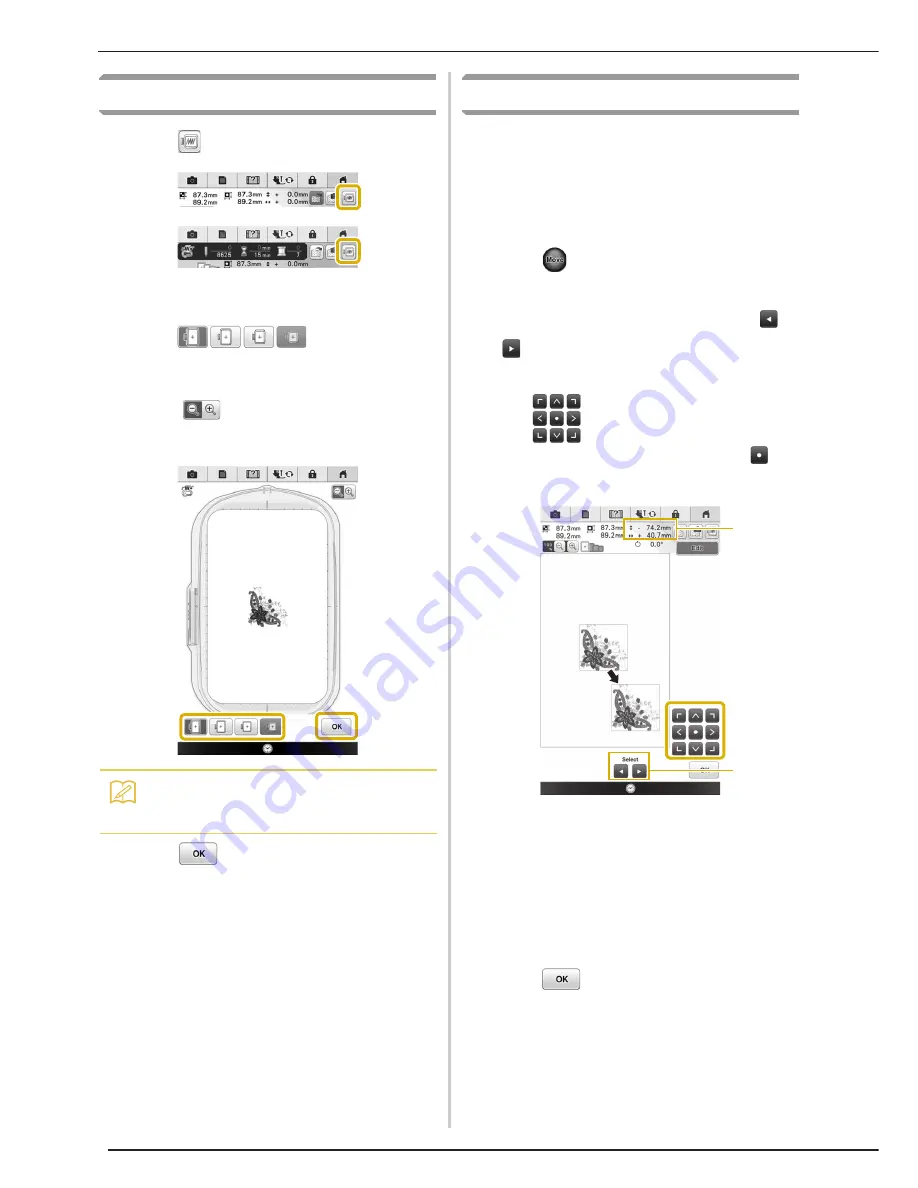
Previewing the Pattern
a
Press .
→
An image of the pattern as it will be embroidered
appears.
b
Press
to select the frame
used in the preview.
*
Frames displayed in dark gray cannot be selected.
*
Press
to enlarge the image of the pattern.
*
The pattern can be sewn as it appears in the
following display.
c
Press .
Moving the Pattern
The pattern can be moved to the desired position
by dragging on the screen using your finger, the
touch pen or connected mouse without displaying
the editing window. If you need some fine
adjustment, move the pattern from the editing
window.
a
Press
to display the pattern move
window.
b
Select the desired pattern by pressing
, if there are several patterns on the
screen.
c
Use
to move the pattern in the
direction shown by the arrow. Press
to
center the pattern.
a
Distance from the center
b
Pattern select key
The pattern can also be moved by dragging it.
If a USB mouse is connected, move the mouse to
position the pointer on the desired pattern, and
then select and drag the pattern. The pattern can
also be dragged by selecting it directly in the
screen with your finger or the touch pen.
d
Press .
Memo
• You can begin sewing from this screen by
pressing the “Start/Stop” button.
a
b
Summary of Contents for Destiny BLDY
Page 1: ......
Page 55: ...ATTACHING THE EMBROIDERY FRAME 248 b Pull the embroidery frame toward you...
Page 77: ...ADJUSTMENTS DURING THE EMBROIDERY PROCESS 270...
Page 129: ...RESUME FEATURE 322...
Page 163: ...STIPPLING 356...
Page 181: ...TROUBLESHOOTING 374...
Page 222: ......
Page 223: ......
Page 224: ......
Page 225: ...XF9969 001 English 882 W21 Printed in Taiwan...


