USING THE MEMORY FUNCTION
300
a
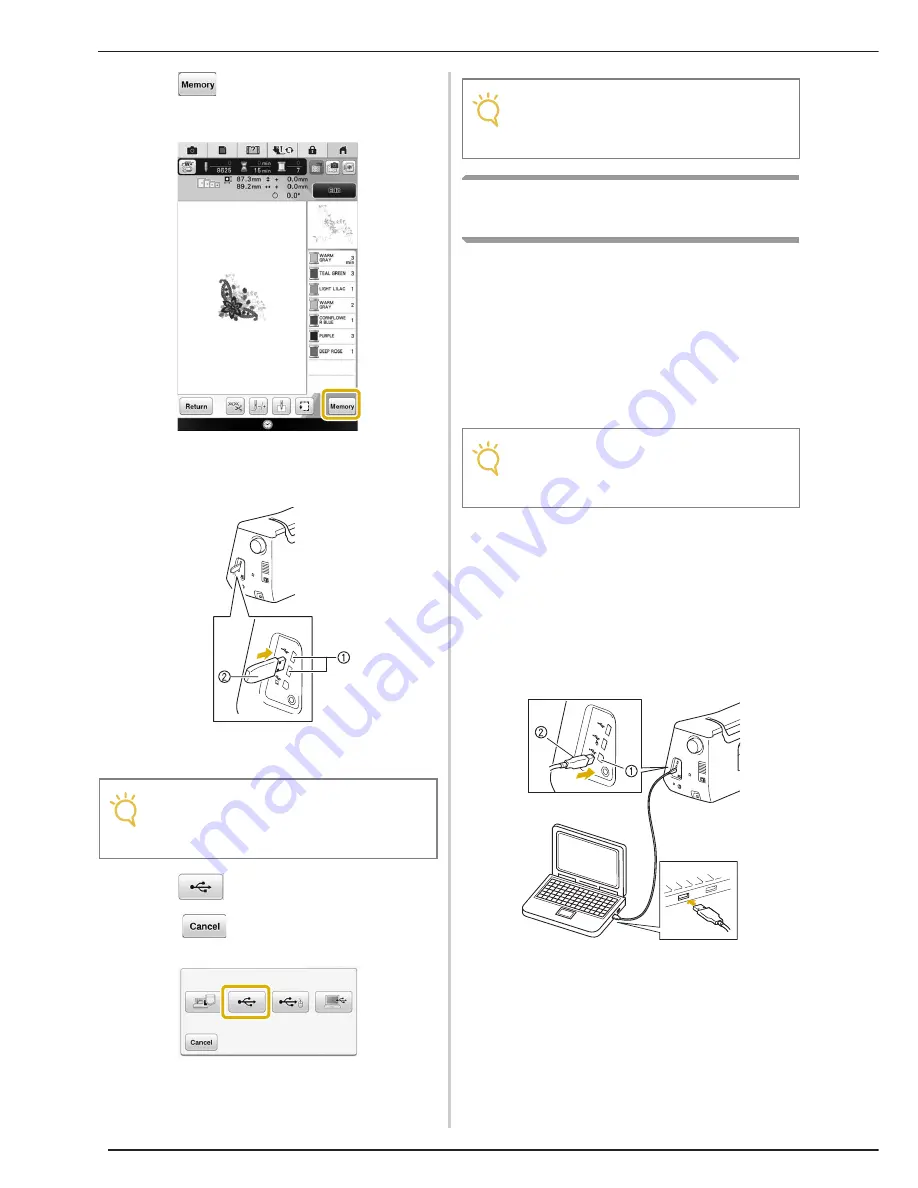
Press
when the pattern you want to
save is in the embroidering screen.
b
Insert the USB media into the USB port on
the machine.
a
USB port
b
USB media
c
Press .
*
Press
to return to the original screen
without saving.
→
The “Saving” screen is displayed. When the pattern
is saved, the display returns to the original screen
automatically.
Saving Embroidery Patterns in the
Computer
Using the included USB cable, the machine can
be connected to your computer, and the
embroidery patterns can be temporarily retrieved
from and saved in the “Removable Disk” folder in
your computer. A total of about 3 MB of
embroidery patterns can be saved in the
“Removable Disk”, but the saved embroidery
patterns are deleted when the machine is turned
OFF.
a
Plug the USB cable connector into the
corresponding USB ports for the computer
and for the machine.
b
Turn on your computer and select
“Computer (My Computer)”.
*
The USB cable can be plugged into the USB ports
on the computer and embroidery machine whether
or not they are turned on.
a
USB port for computer
b
USB cable connector
→
The “Removable Disk” icon will appear in
“Computer (My Computer)” on the computer.
Note
• Do not insert anything other than USB
media into the USB media port. Otherwise,
the USB media drive may be damaged.
Note
• Do not insert or remove USB media while
“Saving” screen is displayed. You will lose
some or all of the pattern you are saving.
Note
• Do not turn the main power to OFF while the
“Saving” screen is displayed. You will lose
the pattern you are saving.
Summary of Contents for Destiny BLDY
Page 1: ......
Page 55: ...ATTACHING THE EMBROIDERY FRAME 248 b Pull the embroidery frame toward you...
Page 77: ...ADJUSTMENTS DURING THE EMBROIDERY PROCESS 270...
Page 129: ...RESUME FEATURE 322...
Page 163: ...STIPPLING 356...
Page 181: ...TROUBLESHOOTING 374...
Page 222: ......
Page 223: ......
Page 224: ......
Page 225: ...XF9969 001 English 882 W21 Printed in Taiwan...


