


Installation &
Connection
12
Step 4: Screw the HDD onto the HDD bracket, two screws for each side. There are three screw
holes per side on the bracket and you can choose two of them to secure the HDD.
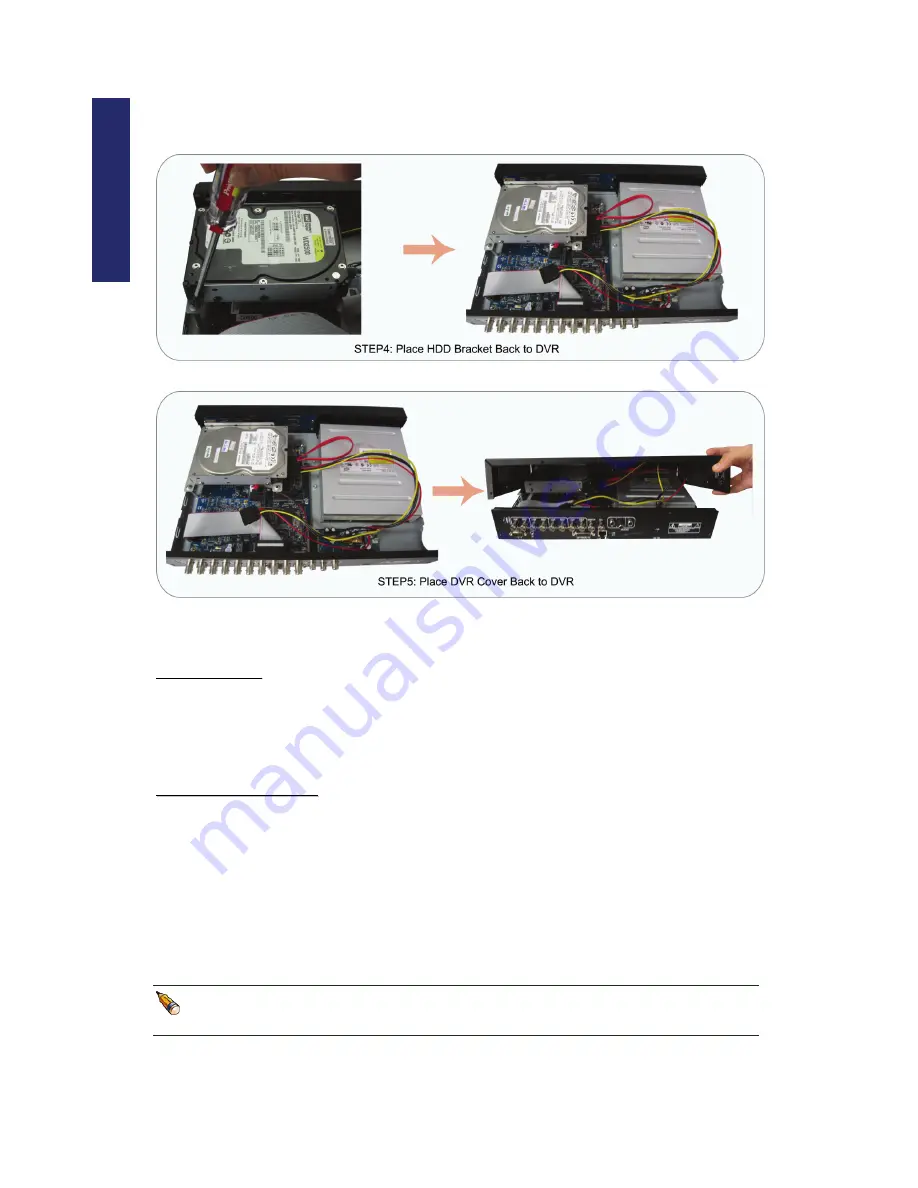
Then, screw the HDD bracket back to the base of the DVR.
Step 5: Close the upper cover of the DVR and fasten all the screws you loosen in step 1.
3
3
.
.
2
2
.
.
C
C
o
o
n
n
n
n
e
e
c
c
t
t
i
i
n
n
g
g
t
t
o
o
P
P
o
o
w
w
e
e
r
r
C
C
o
o
r
r
d
d
&
&
M
M
o
o
n
n
i
i
t
t
o
o
r
r
3
3
.
.
2
2
.
.
1
1
.
.
D
D
V
V
R
R
p
p
o
o
w
w
e
e
r
r
This device should be operated only with the type of power source indicated on the
manufacturer’s label. Connect the indicated AC power cord to the power adapter, and plug
into an electrical outlet.
3
3
.
.
2
2
.
.
2
2
.
.
C
C
o
o
n
n
n
n
e
e
c
c
t
t
i
i
n
n
g
g
M
M
o
o
n
n
i
i
t
t
o
o
r
r
For a CRT monitor
:
Step1: Prepare a coaxial cable, or a RCA cable with BNC connectors.
Step2: Connect the monitor to power.
Step3: Connect from the monitor-out connector, “MONITOR”, on the DVR rear panel, to the
monitor’s corresponding connector with a coaxial cable, or a RCA cable with BNC
connectors.
For a TFT monitor:
You need to purchase a VGA converter separately.
The following connection is an example. For the actual connection, please refer to the
user manual of your VGA converter.
Step1: Prepare a coaxial cable, or a RCA cable with BNC connectors.
Step2: Connect the monitor to power.
Step3: Find the monitor out connector on the DVR rear panel, and connect to the VGA
Summary of Contents for AVD 714
Page 1: ......
Page 2: ...Version Information Manual V0 9 Firmware 1227 1012 1032 1018 M1 6C1B Video Viewer 0086...
Page 6: ......
Page 16: ...System Overview 6...
Page 28: ...Installation Connection 18...
Page 42: ...Basic Operation 32...
Page 92: ...Web Browser 82...
Page 100: ...Appendix 90...
Page 102: ...Appendix 92...
Page 104: ...Appendix 94...
Page 106: ...Appendix 96...
Page 113: ...Appendix 103...
Page 114: ......


