background image

 Chapter 3: Using the MergePoint 5200 SP Manager        

31

3.

From the list, select the action(s) you wish to delete.

4.

Click 

Delete

. You will be prompted to confirm the action. The action will be removed from the 

Action window.

Viewing the Accounting Log

The accounting log records and displays all MergePoint 5200 SP manager operations. The WEB 
accounting log displays operations performed using the MergePoint 5200 SP manager web 
interface, while the CLP accounting log displays operations performed using SMASH CLP 
commands. SMASH CLP stands for Systems Management Architecture for Server Hardware 
(SMASH) Command Line Protocol (CLP). Detailed information including operation time, login 
username, operation type, target device and console IP are displayed in the accounting log.

To view the accounting log (for Admin users only):

1.

Click the 

Accounting Log

 tab.

2.

Click 

WEB 

to view operations performed through the MergePoint 5200 SP manager 

web interface.


-or-


Click 

CLP 

to view operations performed through the Command Line Protocol.

Summary of Contents for MergePoint 5200

Page 1: ...Installer User Guide MergePoint 5200 ...

Page 2: ... and used in accordance with the instruction manual may cause harmful interference to radio communications Operation of this equipment in a residential area is likely to cause harmful interference in which case the user will be required to correct the interference at his own expense Canadian Notification This class A digital apparatus complies with Canadian ICES 003 Cet appareil numérique de la cl...

Page 3: ...ocent the Avocent logo The Power of Being There DSView and MergePoint are trademarks or registered trademarks of Avocent Corporation or its affiliates All other marks are the property of their respective owners 2007 Avocent Corporation All rights reserved 590 638 501D ...

Page 4: ...Instructions This symbol is intended to alert the user to the presence of important operating and maintenance servicing instructions in the literature accompanying the appliance ...

Page 5: ...nse Keys 9 Setting Up the MergePoint 5200 SP Manager 10 Chapter 3 Using the MergePoint 5200 SP Manager 11 BMC Provisioning IPMI Targets Only 11 Starting or stopping the BMC provisioning service 12 BMC log 12 Viewing the Assigned Target Devices 13 Discovering and Adding Target Devices 13 Automatically discovering target devices 13 Manually discovering target devices 14 Manually adding a single targ...

Page 6: ...Accounts 26 Using the Alerts Viewer 28 Setting an alert action 29 Viewing the Accounting Log 31 Chapter 4 Managing Target Devices 33 Target Device Properties 34 Viewing the system name 34 Changing the target device alias 34 Adding a target device to a group 34 Removing a target device 35 Accessing BMC information IPMI target devices only 35 Accessing FRU information IPMI target devices only 35 Rem...

Page 7: ...h 44 SSH Passthrough commands 44 Appendices 47 Appendix A Technical Specifications 48 Appendix B User Privileges 49 Appendix C Configuring the BIOS Settings for SoL 57 Appendix D How To Configure Virtual Serial Port 58 Appendix E Reserved Words 59 Appendix F Glossary and Acronyms 60 Appendix G Technical Support 62 License Information 63 ...

Page 8: ...vi MergePoint 5200 Service Processor Manager Installer User Guide ...

Page 9: ...vii List of Figures Figure 1 1 MergePoint 5200 SP Manager Web Interface 4 Figure 2 1 MergePoint 5200 SP Manager Configuration 7 LIST OF FIGURES ...

Page 10: ...viii MergePoint 5200 Service Processor Manager Installer User Guide ...

Page 11: ... Required for Alert Management Actions 52 Table B 5 User Privileges Required for Accounting Log Actions 52 Table B 6 User Privileges Required for Provisioning Actions 52 Table B 7 User Privileges Required for Other Appliance Actions 53 Table B 8 User Privileges Required for Target Device Properties Actions 53 Table B 9 User Privileges Required for Target Device System Actions 53 Table B 10 User Pr...

Page 12: ...x MergePoint 5200 Service Processor Manager Installer User Guide ...

Page 13: ...face from a standard web browser This guide describes how to use the web interface to manage the SP manager For how to use the command line and scripting management options see the MergePoint 5200 Command Reference Guide NOTE Before using the MergePoint 5200 SP manager you must register the SP manager online and obtain and configure license keys For more information see Configuring the MergePoint ...

Page 14: ...target device is discovered you can manage the device from the MergePoint 5200 SP manager web interface Access to platform and system information You can view or modify hardware and operating system information for any target device managed by the MergePoint 5200 SP manager System event logs The MergePoint 5200 SP manager can display summary information about the event log or specific events withi...

Page 15: ...he IP address http appliance IP address of the MergePoint 5200 SP manager To set the appliance IP address see Using the Serial Port to Enable Web Interface Access on page 8 NOTE The first time you access the MergePoint 5200 SP manager web interface you are prompted to enter a license key See Configuring the MergePoint 5200 SP Manager License Keys on page 9 for more information 2 Type your username...

Page 16: ...Navigation Bar Use the side navigation bar to select the appliance or target devices and access or edit corresponding information in the content area The root of the tree is labeled MergePoint 5200 by default which represents the appliance 3 Tab Bar Use the tab bar to display and manage the MergePoint 5200 SP manager and managed groups and target devices 4 Top Navigation Bar The selections in the ...

Page 17: ...r cord in any Avocent product configuration Test AC outlets at the target device and monitor for proper polarity and grounding Use only with grounded outlets NOTE The AC inlet is the main power disconnect Rack Mount Safety Considerations Elevated Ambient Temperature If installed in a closed rack assembly the operating temperature of the rack environment may be greater than room ambient Use care no...

Page 18: ... transformers and light fixtures Do not tie cables to electrical conduits or lay cables on electrical fixtures Always test every installed segment with a cable tester Toning alone is not an acceptable test Always install jacks so as to prevent dust and other contaminants from settling on the contacts The contacts of the jack should face up on the flush mounted plates or left right down on surface ...

Page 19: ...er Configuration Table 2 1 Descriptions for Figure 2 1 Number Description 1 MergePoint 5200 SP Manager Web Interface 2 LAN 3 Target Device 4 CAT 5 Cables 5 MergePoint 5200 SP Manager 6 RJ 45 Ethernet Ports 7 Power 8 Connection to the Serial Port 9 Terminal or Workstation for Configuration ...

Page 20: ...nt Do not disable the power cord grounding plug The grounding plug is an important safety feature Plug the power cord into a grounded earthed outlet that is easily accessible at all times Disconnect the power from the target device by unplugging the power cord from either the electrical outlet or the target device Using the Serial Port to Enable Web Interface Access Perform the following procedure...

Page 21: ...mber of managed target devices that are supported by the license You may purchase upgrade licenses to add support for management of additional target devices up to a maximum of 256 Upgrade licenses can be purchased to add capability for either 64 or 128 target devices If you purchase one or more upgrade licenses perform the procedures to configure the SP manager with the master key and slave key s...

Page 22: ... appears 4 Type the slave key into the window 5 Click Apply Changes Setting Up the MergePoint 5200 SP Manager To set up the MergePoint 5200 SP manager 1 Optional Set the BMC provisioning range of the MergePoint 5200 SP manager See BMC Provisioning IPMI Targets Only on page 11 2 Optional Activate alert actions as desired See Using the Alerts Viewer on page 28 3 Discover new target devices See Viewi...

Page 23: ...rget devices System Use this tab to configure MergePoint 5200 SP manager settings Users Use this tab to manage MergePoint 5200 SP manager user accounts Alerts Use this tab to view query and activate system alerts Accounting Log Use this tab to view all MergePoint 5200 SP manager operations Provisioning Use this tab to configure and view the status of the BMC BMC Provisioning IPMI Targets Only NOTE...

Page 24: ... stop the BMC provisioning service by clicking a button in the Provisioning window If the service status is Running a Stop button is available if the service status is Stopped a Start button is available If the Stop button is clicked the BMC provisioning service stops and the MergePoint 5200 SP manager no longer accepts PXE boot requests from target devices on the LAN However previously provisione...

Page 25: ...e that has an IPMI BMC you need to make sure the BMC is provisioned to use automatic provisioning see BMC Provisioning IPMI Targets Only on page 11 You may designate up to two IP address ranges for discovery The first time you access the Targets window the IP address ranges are blank and may be modified by clicking Edit Automatically discovering target devices To automatically discover target devi...

Page 26: ...manual discovery click Start in the Operation column next to the IP address range you wish to discover The SP manager will search for target devices in the specified IP address range one time Discovery results are displayed in the Unmanaged Targets list in the Targets window Manually adding a single target device If you already know the IP address of a target device you may add it manually To manu...

Page 27: ... Managed Targets list for Admin users only 1 Click the Targets tab The Targets window appears 2 In the Unmanaged Targets list select the target device you wish to add 3 Click Manage 4 In the Input Target Information window specify the following information a If you wish to use the default username and password to connect to the new target device select Use default user and password or In the Usern...

Page 28: ...so you can perform operations on all devices in a group at the same time You may create an unlimited number of groups and the same target device may be a part of multiple groups A default target device group with the same name as the MergePoint 5200 SP manager alias is automatically created for you In the side navigation bar the appliance the target devices and target devices group are displayed i...

Page 29: ...rget device in the side navigation bar and copy or move the target device to a group For more information see Adding a target device to a group on page 34 To delete a device group for Admin users only 1 Click the Targets tab 2 In the top navigation bar click Group The Group Management window appears 3 In the Group list select the group you wish to delete 4 Click Delete 5 When prompted confirm the ...

Page 30: ...1 Click the Targets tab 2 In the top navigation bar click Group The Group window appears 3 In the Group list select the group s you wish to modify 4 Click Set Time The Set Time window appears 5 To synchronize the target devices with the SP manager time clock select Sync with Appliance or To synchronize the target devices with the client PC time clock select Sync with Console or To specify the time...

Page 31: ...you may configure a default username and password and assign it to be used when accessing specific target devices The MergePoint 5200 SP manager searches the entire list until it finds if a default username is specified for the target device being accessed You may create multiple entries of the same username with a different password for each A default user with a blank username and password is cr...

Page 32: ...n the MergePoint 5200 service processor manager to do the following tasks under the Setting tab Change the appliance name alias Configure groups of target devices for performing power management Reboot To change the MergePoint 5200 SP manager alias for Admin users only 1 Click the System tab 2 In the top navigation bar click Setting The Appliance Setting window appears 3 In the Alias field type th...

Page 33: ...the DSView 3 server To set the session time interval for Admin users only 1 Click the System tab 2 In the top navigation bar click Advanced Setting The Appliance Advanced Setting window appears 3 Enter the session time interval in the Session Time Interval field 4 Click Apply Changes To set SoL history size for Admin users only 1 Click the System tab 2 In the top navigation bar click Advanced Sett...

Page 34: ... addresses for the Ethernet ports and configure a DNS server A primary and a secondary DNS server may be configured to allow the use of target device names instead of IP addresses For example if you enable DNS and if you configure a Syslog server under the Syslog tab you can enter the DNS name for the server instead of its IP address To set the MergePoint 5200 SP manager IP address for Admin users...

Page 35: ...nse information License keys are required for the MergePoint 5200 SP manager to operate and they control the number of target devices that the SP manager is allowed to manage For more details see Configuring the MergePoint 5200 SP Manager License Keys on page 9 For how to add a master key see To add a master key on page 10 for how to add a slave key see To add a slave key on page 10 To view licens...

Page 36: ...tab 2 In the top navigation bar click Import Export The Import Export window appears 3 In the Filename field type the path to the file you wish to import or click Browse to select the file from the explorer window 4 Click Import to restore the data in the file to the SP manager Redirecting MergePoint 5200 SP manager system log You may redirect the MergePoint 5200 SP manager system log to a Syslog ...

Page 37: ...to display all device groups or select Nodes to display all target devices 5 Specify the following information a Select the group s or node s for which you wish to schedule tasks b Type the task name into the Task Name field c From the Operate drop down menu select Power On Power Off or Power Reset d From the Schedule Task drop down menu select Once Daily Weekly or Monthly e From the Time menu s s...

Page 38: ...int 5200 SP manager user accounts An account with the username of admin and the password of admin is configured and cannot be deleted An Administrator account user is allowed to be deleted if it is not the only Administrator account user in the SP manager Each SP manager should have at least one Administrator account user Do not use reserved words for usernames Reserved words that have special mea...

Page 39: ...b 2 In the top navigation bar click Users The User Configuration window appears 3 Click the username link for the user you wish to edit 4 To change the password select Change Password Type the new password in the New Password and Confirm Password fields 5 To change the privileges assigned to the user select the desired privilege from the Privilege drop down menu Admin Operator or User 6 For Operat...

Page 40: ... information for the new user a In the User Group Name field modify the group name b In the Users area select or unselect the users for the group c In the Targets area select or unselect the target devices for the group 5 Click Apply Changes To delete a user group for Admin users only 1 Click the Users tab 2 In the top navigation bar click Groups The User Group Configuration window appears 3 Selec...

Page 41: ...rts you wish to be included in the query results All Specified Monitor Information OK Non Critical Critical or Non Recoverable e From the Read Status drop down menu select the read status of the alerts you wish to be included in the query results All Read or Unread 4 Click Query to search the alerts The qualifying alerts will be displayed in a list below the Alert Query area To set an alert as rea...

Page 42: ...type the YAHOO IM account used as the YAHOO IM message sender In the YAHOO IM Password field type the password for the YAHOO IM account 5 Click Apply Changes To create an alert action for Admin users only 1 Click the Alerts tab 2 In the top navigation bar click Action 3 Click Add 4 In the Action Configuration area specify the following information a Select the Action Type from the drop down menu E...

Page 43: ...SP manager web interface while the CLP accounting log displays operations performed using SMASH CLP commands SMASH CLP stands for Systems Management Architecture for Server Hardware SMASH Command Line Protocol CLP Detailed information including operation time login username operation type target device and console IP are displayed in the accounting log To view the accounting log for Admin users on...

Page 44: ...32 MergePoint 5200 Service Processor Manager Installer User Guide ...

Page 45: ... target device at any time by changing the alias See Changing the target device alias on page 34 for more information When a target device is selected in the side navigation bar the following tabs are available Properties Use this tab to access BMC system information and Field Replaceable Unit FRU change alias and copy to or move the target device to a group System Use this tab to remotely perform...

Page 46: ... a target device name 2 Click the Properties tab 3 In the top navigation bar click System Name A window displaying target device information appears 4 Click Change Alias The Edit Target window appears 5 In the Alias field type the new name for the target device 6 Click Apply Changes Adding a target device to a group To add a target device to a group 1 In the side navigation bar click a target devi...

Page 47: ...n the side navigation bar click a target device name 2 Click the Properties tab 3 In the top navigation bar click Information A detailed BMC information report appears Accessing FRU information IPMI target devices only The MergePoint 5200 SP manager can find and display some Field Replaceable Unit FRU information for the selected target device including chassis type board language code and product...

Page 48: ...eady turned on click Power Reset This operation corresponds to a press of Reset button For IPMI and iLO target devices the button is only available when the power is On For DRAC this operation fails when the power is Off e To power down a server that is on and after several seconds power it up again click Power Cycle For DRAC this operation fails when the power is Off For IPMI the button is only a...

Page 49: ...te the success status of the self test Configuring Target Devices for Management This section describes how to configure the following types of parameters for target devices IP addresses DHCP configured or static user accounts PET alerts SoL session parameters and the time on a BMC BMC time Changing LAN parameters To change LAN parameters 1 In the side navigation bar click a target device name 2 C...

Page 50: ... and Confirm Password fields d Select Admin Operator User or No Access from the User Privilege menu NOTE The specific privileges assigned to the Admin Operator and User privilege types vary based on the type of SP on the target device See User Privileges on page 49 for which privileges are checked on the SP manager when a target device user attempts to perform an action 6 Click Apply Changes To cr...

Page 51: ...ation bar click Users The Users window appears 4 Click Remove User next to the user you wish to remove NOTE The line of the removed user will not disappear from the user list Instead it will become a user without a username that has Guest user privilege no matter which user privilege it had before To add a user account iLO targets only 1 In the side navigation bar click a target device name 2 Clic...

Page 52: ...tring field type the value to be displayed in the PET trap community string field The default value is public c For a target device with an IPMI SP type up to four IP addresses in the Alert Destination IP Address fields For a target device with an iLO SP type up to three IP addresses in the Alert Destination IP Address fields To configure the MergePoint 5200 SP manager to receive alerts for the ta...

Page 53: ... for target devices that have IPMI BMCs To set target BMC time 1 In the side navigation bar click a target device name 2 Click the Configuration tab 3 In the top navigation bar click Time The Set Time window appears 4 To synchronize the BMC time with the appliance time clock select Sync with Appliance or To synchronize the BMC time with the console time clock select Sync with Client PC or To speci...

Page 54: ...ver IP This allows remote users to have text based access to the BIOS utilities operating systems such as Command Line interfaces and Linux console and management services such as Microsoft s serial based Emergency Management Services EMS At the same time SoL provides access to IPMI platform management functions With the MergePoint 5200 SP manager you may use SoL to access the Linux serial console...

Page 55: ... the SoL tab 3 In the top navigation bar click SoL Replay 4 Click Open SoL Replay Window to replay SoL actions and results including the BIOS result Click and drag the speed bar to control replay speed Remote Control You may connect to a Remote Desktop Protocol RDP or Virtual Network Computing VNC server remotely through the MergePoint 5200 SP manager To connect to an RDP server 1 In the side navi...

Page 56: ...In this example userA is trying to access a target device serverB that is connected to a MergePoint 5200 SP manager applianceC This command allows the user to get access to serverB s service processor A menu appears after successfully logging in The user can manage serverB by choosing a menu item To access a target device through SSH Passthrough with SP command Run the command by entering the foll...

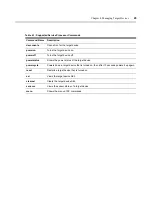
Page 57: ...erstatus Shows the power status of the target device powercycle Powers down a target device that is turned on then after 10 seconds powers it up again reset Restarts a target device that is turned on sel Views the target device SEL clearsel Clears the target device SEL sensors Views the sensor status of a target device menu Shows the menu of SP commands Chapter 4 Managing Target Devices 45 ...

Page 58: ...46 MergePoint 5200 Service Processor Manager Installer User Guide ...

Page 59: ...n the following information Technical Specifications on page 48 User Privileges on page 49 Configuring the BIOS Settings for SoL on page 57 Reserved Words on page 59 Glossary and Acronyms on page 60 Technical Support on page 62 APPENDICES ...

Page 60: ...ated Input Frequency 50 to 60 Hz Rated Output Power 260 W maximum Rated Output Voltages 3 3 V 15 A 5 V 25 A 12V 18A 12 V 1A BTU Rate 1400 Bus hour for rated output power of 260 W Environmental Temperature 0 to 35 Celsius 32 to 95 Fahrenheit operating Humidity 10 to 90 noncondensing operating Safety and EMC Approvals and Markings Electromagnetic Emissions FCC Class B EN 55022 Class B EN 61000 3 2 3...

Page 61: ...target device user privileges do not apply to those actions Table B 1 User Privileges Required for Target Device Actions Appliance User Target Device Management Actions User Operator Admin To copy a target device to another group X To move a target device to another group X To remove a target device from a group X To view the discovery setting list X To edit a discovery IP range X To start discove...

Page 62: ...t users X To add a default target user X To delete a default target user X Table B 2 User Privileges Required for Appliance Management Actions Appliance User Appliance Management Actions User Operator Admin To view appliance settings X To set appliance time X To reboot the appliance X To view appliance network settings X To set a default gateway X To set a DNS server X To set appliance eth0 eth1 n...

Page 63: ...al path X To add a scheduled task X To delete a scheduled task X To view all scheduled tasks X To edit a scheduled task X To view a scheduled task action result X To clear all scheduled task action results X Table B 3 User Privileges Required for Appliance User Management Actions Appliance User User Management Actions User Operator Admin To view all appliance users X To add an appliance user X To ...

Page 64: ...To set the alert status as read X Table B 5 User Privileges Required for Accounting Log Actions Appliance User Accounting Log Actions User Operator Admin To view the WEB account log X To view the CLP account log X Table B 6 User Privileges Required for Provisioning Actions Appliance User Provisioning Actions User Operator Admin To set provisioning X To view provisioning X To start stop provisionin...

Page 65: ...To view target device system name X X X X X X To change alias for a target device X X X X To copy a target device to a device group X X X X To move a target device to a device group X X X X To remove a target device X X X X To view target device firmware information X X X X X X To view target device FRU information X X X X X X Appendices 53 Table B 9 User Privileges Required for Target Device Syst...

Page 66: ...xcept password X X X X X To edit the target device user including enable user username password and privilege X X X X To view the event alert destination PET setting X X X X X To set the event alert destination PET setting for a target device X X X X To set the event destination PET setting for a group X X X X To view the SoL configuration X X X X X X To edit the SoL configuration X X X To view th...

Page 67: ...X To view sensors information X X X X X X To view SoL summary X X X X X X Appendices 55 Table B 12 User Privileges Required for Target Device Remote Control Actions Appliance User Target User Target Device Remote Control Actions User Operator Admin User Operator Admin To set target device RDP for a target device X X X X X X To set VNC for a target device X X X X X X To use the CLP command cd X X X...

Page 68: ... CLP command version X X X X X X To use the CLP command help X X X X X X To use the CLP command oemavocent_setdefault X X X X X To use the CLP command oemavocent_show X X X X X X To use the CLP command exit X X X X X X Table B 12 User Privileges Required for Target Device Remote Control Actions Continued Appliance User Target User Target Device Remote Control Actions User Operator Admin User Opera...

Page 69: ...ick Enter 4 Change the Redirection After Boot value from Disabled to Enabled 5 Save the settings to BIOS To set the BIOS with Windows 2003 If your operating system is Windows 2003 Enterprise enter the following command in the command line bootcfg ems ON port com1 baud 19200 id 1 To set the BIOS with Redhat Enterprise Linux 3 0 1 Modify the etc grub conf serial unit 0 speed 19200 terminal timeout 1...

Page 70: ...ity by pressing F9 during power up or system reset 2 Select BIOS Serial Console and EMS on the main menu 3 Press Enter to display the options 4 Select BIOS Serial Console Port on the options 5 Press Enter to display the options of BIOS Serial Console Port 6 Select Com1 or Com2 as the BIOS Serial Console Port 7 Press Enter to save the selection To configure EMC Console 1 Enter ROM Based Setup Utili...

Page 71: ...he following reserved words when configuring usernames Table E 1 Reserved Words Reserved Words Do Not Use as Usernames adm bin disk irc man proxy sudo utmp www data admin cdrom fax kmem news root sync uucp apache daemon floppy list nobody shadow sys video audio dialout games lp operator src tape voice backup dip gnats mail postgres sshd tty wheel ...

Page 72: ...d systems management and interoperability Visit www dmft org for more information DRAC The Dell Remote Access Card DRAC is an intelligent service processor integrated on certain Dell target devices DRAC III and IV target devices are supported by the MergePoint 5200 service processor manager iLO Integrated Lights Out iLO is an intelligent service processor integrated on certain Hewlett Packard HP t...

Page 73: ... for BIOS utilities operating systems and applications and to service processor functions Target device A target device can be a data center component such as a server or router that an administrator can remotely manage through the MergePoint 5200 service processor manager Telnet session A Telnet session is a type of target device session Once the MergePoint 5200 service processor manager is set u...

Page 74: ...our Avocent product If an issue should develop follow the steps below for the fastest possible service To resolve an issue 1 Check the pertinent section of this manual to see if the issue can be resolved by following the procedures outlined 2 Check our web site at www avocent com support to search the knowledge base or use the online service request 3 Call the Avocent Technical Support location ne...

Page 75: ...to make restrictions that forbid anyone to deny you these rights or to ask you to surrender the rights These restrictions translate to certain responsibilities for you if you distribute copies of the software or if you modify it For example if you distribute copies of such a program whether gratis or for a fee you must give the recipients all the rights that you have You must make sure that they t...

Page 76: ...oftware interchange or b Accompany it with a written offer valid for at least three years to give any third party for a charge no more than your cost of physically performing source distribution a complete machine readable copy of the corresponding source code to be distributed under the terms of Sections 1 and 2 above on a medium customarily used for software interchange or c Accompany it with th...

Page 77: ...istinguishing version number If the Program specifies a version number of this License which applies to it and any later version you have the option of following the terms and conditions either of that version or of any later version published by the Free Software Foundation If the Program does not specify a version number of this License you may choose any version ever published by the Free Softw...

Page 78: ...66 MergePoint 5200 Service Processor Manager Installer User Guide ...

Page 79: ......

Page 80: ...eland Tel 353 61 715 292 Fax 353 61 471 871 Avocent Asia Pacific Singapore Branch Office 100 Tras Street 15 01 Amara Corporate Tower Singapore 079027 Tel 656 227 3773 Fax 656 223 9155 Avocent Germany Gottlieb Daimler Straße 2 4 D 33803 Steinhagen Germany Tel 49 5204 9134 0 Fax 49 5204 9134 99 Avocent Canada 20 Mural Street Unit 5 Richmond Hill Ontario L4B 1K3 Canada Tel 1 877 992 9239 Fax 1 877 52...

Reviews: