9 — Label Formats
9–14
CX20/CX30/CX34 Service Manual
9.3.4
Example – creating a new 0 degree label format
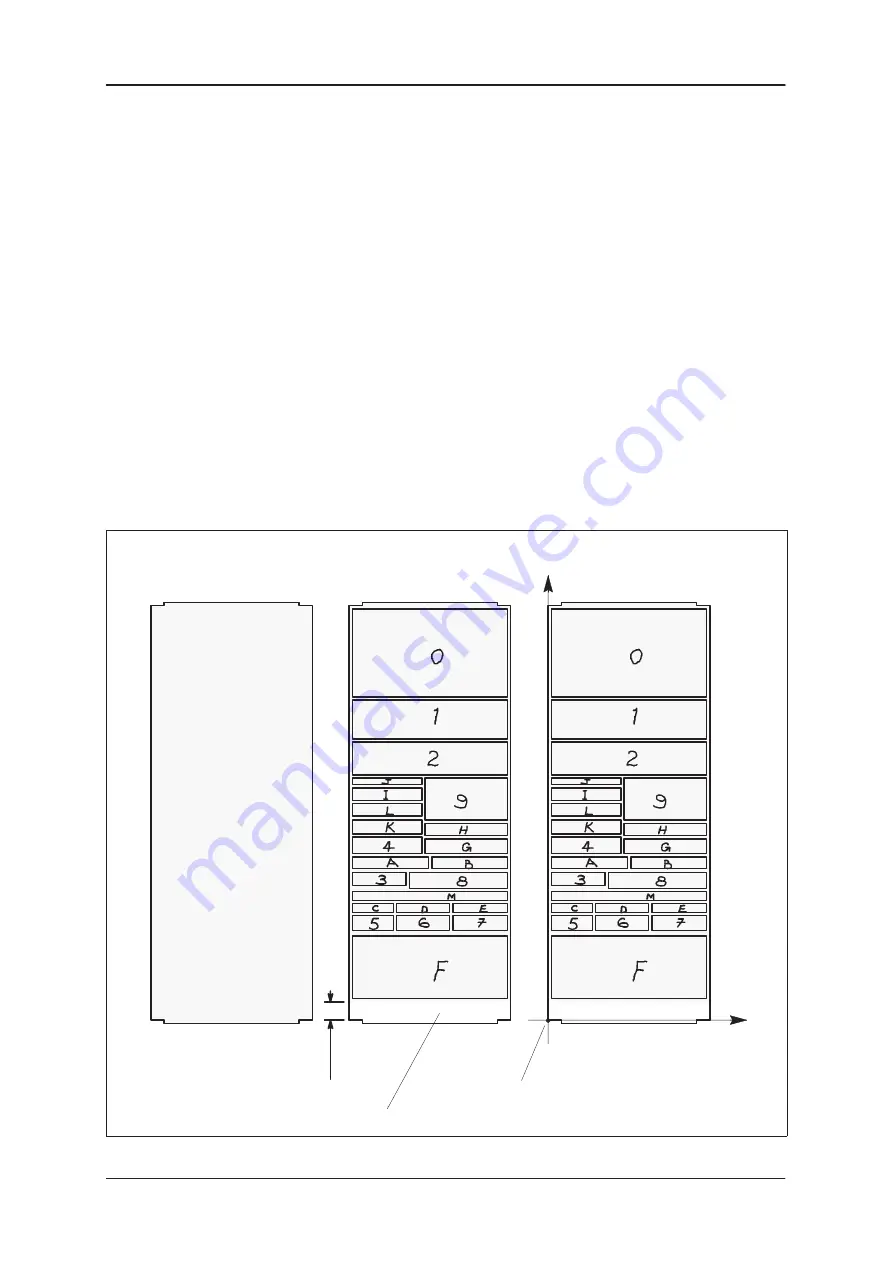
The following example shows how to create a new 0
°
label format.
1
Obtain a label, peel off the backing paper and stick it onto a sheet of
paper. (If a label is not available you can draw its outline on the paper.)
See Diagram A below.
2
On the label draw the outline of all the fields you require, identifying
each field by inserting its code number. See Diagram B below.
NOTE:
Don’t forget to allow 6 mm at the bottom of the label for the
STORE NAME, even if it has not has been programmed.
3
Mark the position of the label’s start point and draw in the X and Y
axes. See Diagram C below.
NOTE:
For 0
°
and 180
°
labels the start point must be offset. See
Section 9.2.5.
Start point (bottom left–hand corner of label)
Y axis
X axis
Diagram A
ÈÈÈÈÈÈÈÈ
ÈÈÈÈÈÈÈÈ
ÈÈÈÈÈÈÈÈ
ÈÈÈÈÈÈÈÈ
Reserve this area for STORE NAME – allow 6 mm.
6 mm
Diagram B
Diagram C
Summary of Contents for CX20 SERIES
Page 258: ...PL 1 CX20 CX30 CX34 Service Manual Section PL Parts List ...
Page 284: ......
Page 287: ......
Page 317: ...Addendum A Phase 1 4 and CX34 Parts List A 30 CX20 CX30 CX34 Addendum A ...
Page 318: ......
Page 321: ......
Page 323: ...Contents B 2 Addendum B ...
Page 343: ...Addendum B Phase 1 5 1 5 3 and New Main PCB B 22 Addendum B ...
Page 344: ......
Page 347: ......
Page 351: ...PL Parts List Devlin Keyboard C 6 Addendum C ...
Page 352: ......


