78
phone support this feature and your PC is connected to GSM/GPRS modem. To setup click
Detail
).
-
PTZ preset point
Position the PTZ camera based on the preset point setting. To setup click
Detail
(see also
-
Alarm SOP (Standard Operation Procedure)
List the instructions to inform the person of what to do when the alarm is activated. To setup click
Detail
).
-
Send to CMS (Central Management System)
Enable/disable the selected camera to send video to CMS when the alarm is activated (see also
-
Launch Program
To call up the external program that is provided by 3
rd
party. Click
Detail
and click
to locate the
program path. Enable
Multiple instance
check box to allow the program can be executed many
times at the same time.
-
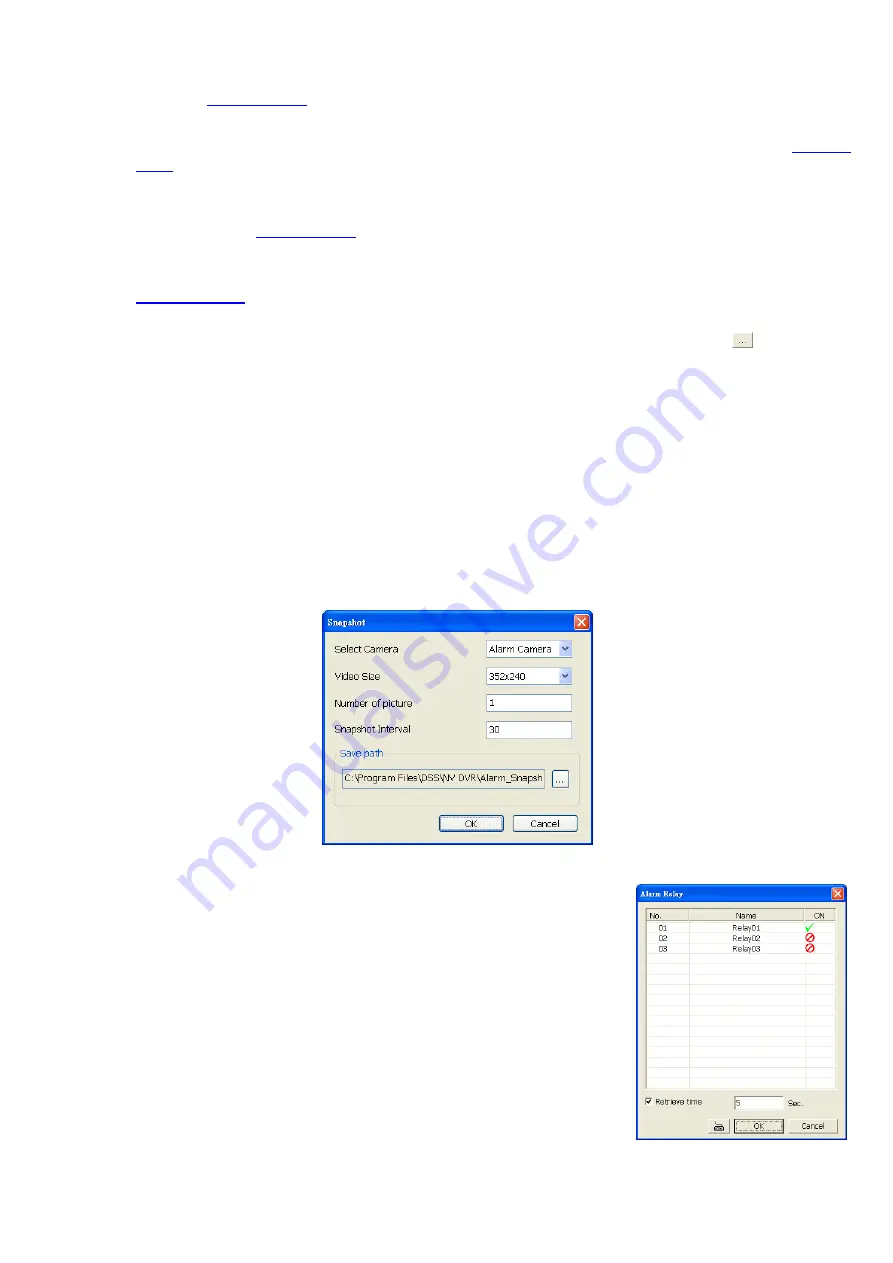
Snapshot
Take a snapshot when the alarm is activated.
a.
Select Camera:
specify which channel video to be snapshot when the alarm is occurred.
~
Alarm Camera:
when a channel has an alarm occurred, and then, the DVR system will
snapshot the channel video.
~
Camera # (1~32):
the selected channel would be snapshot when an alarm is occurred.
b.
Video Size:
select the size of snapshot picture.
c.
Number of picture:
the number of picture that is going to be taken.
d.
Snapshot Interval:
a time gap for next snapshot
e.
Save Path:
a storage path for saving snapshot pictures.
4.9.1
To Setup Alarm Relay:
1. Beside the Relay Output check box, click
Detail
.
2. In the Alarm Relay dialog box, select from the available relay list and in
the ON column, set to enable/disable the relay operation when the
alarm is activated.
3. In the Retrieve time check box, you may enable/disable to extend the
relay operation time and set the duration in second.
4.
Click
OK
to exit and accept the setting and
Cancel
to exit without
saving the setting.


