59
(10) Video Screen
Display the video of the selected camera.
(11) Input
Select the type of video camera input you are using.
-
Analog Camera
The video source is coming directly from camera that is connected to the NV Series PCI card.
-
Remote DVR
The video source is coming from another NV DVR server. In the Remote DVR dialog box, enter the
server IP, port number, user ID, password and select the camera number.
If you are not sure of the server IP and port, please check the NV DVR server IP address in Network
setting.
-
IP Camera
The video source is coming from Network camera or IP camera. In the IP Camera Settings dialog box,
select to connect using Protocol or URL and then enter the required info. If it requires user
identification, enable
Authentication
check box and enter User ID and Password.
If you are not sure of the Protocol or URL info, please refer to the IP camera manual or contact your IP
camera local distributor.
In the Camera Setting dialog box, click
OK
to accept the new settings, click
Cancel
to exit without
saving, and click
Default1/ Default2
to revert back to original factory setting.
4.2.1
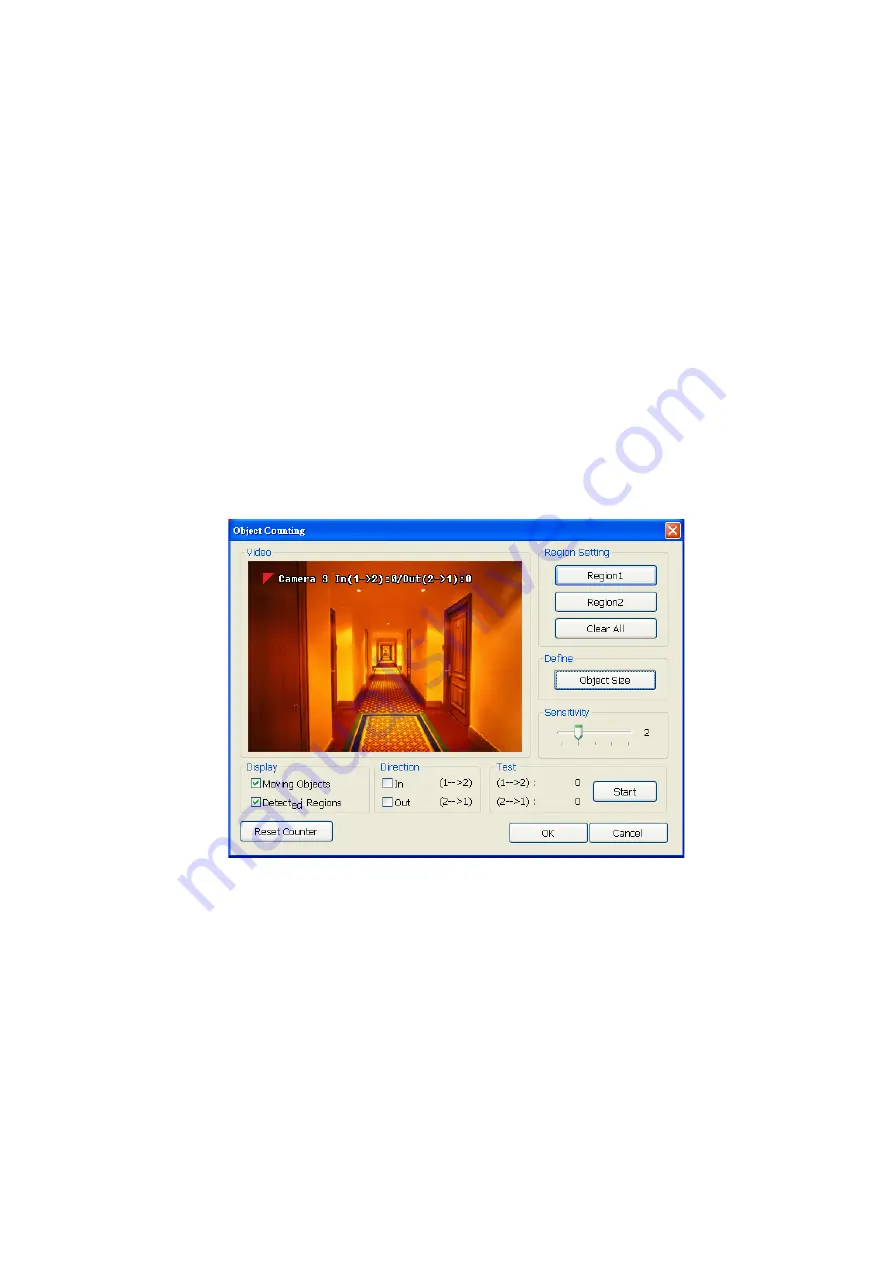
Setup the Object Counting
1. Click
Detail
to enter the object counting setup window.
2. Enable
Detected Regions
in
Display
section. This enables the object counting information show on the
screen.
Moving Object
will enable the object size frame to show on the screen.
3. Click
Region1
and press left button of mouse and drag the area that user wants the object to be counted.
And then, click
Region2
and drag another area that user wants the object to be counted, too. Those
selected regions will mark in different color. The system will count the objects that move between the
selected regions.
4. Click
Object size
to define the detected object dimensions. Press left button of mouse and drag on the
screen. To see the object size frame on screen, enable
Moving Object
in Display section.
5. Adjust the sensitive of object detecting.
6. To test the setting, mark the
Directions (In/Out)
want to be test and click
Start
. The testing result will
show in Test section.
7. Click
OK
to save the setting. Click
Cancel
to leave the setup window without saving.
8.
The object counting information will be display on the screen of upper part.


