AudioCodes MediaPack MP-202 User Manual Download Page 169

User's Manual 

169 

February 2007 


MP-202 Telephone Adapter 


13. Advanced Settings 


13 Advanced 

Settings 

This section of the Web-based Management is intended primarily for more advanced 
users. Some changes to settings within this section could adversely affect the operation of 
the MP-202 and the home network, and should be made with caution. 

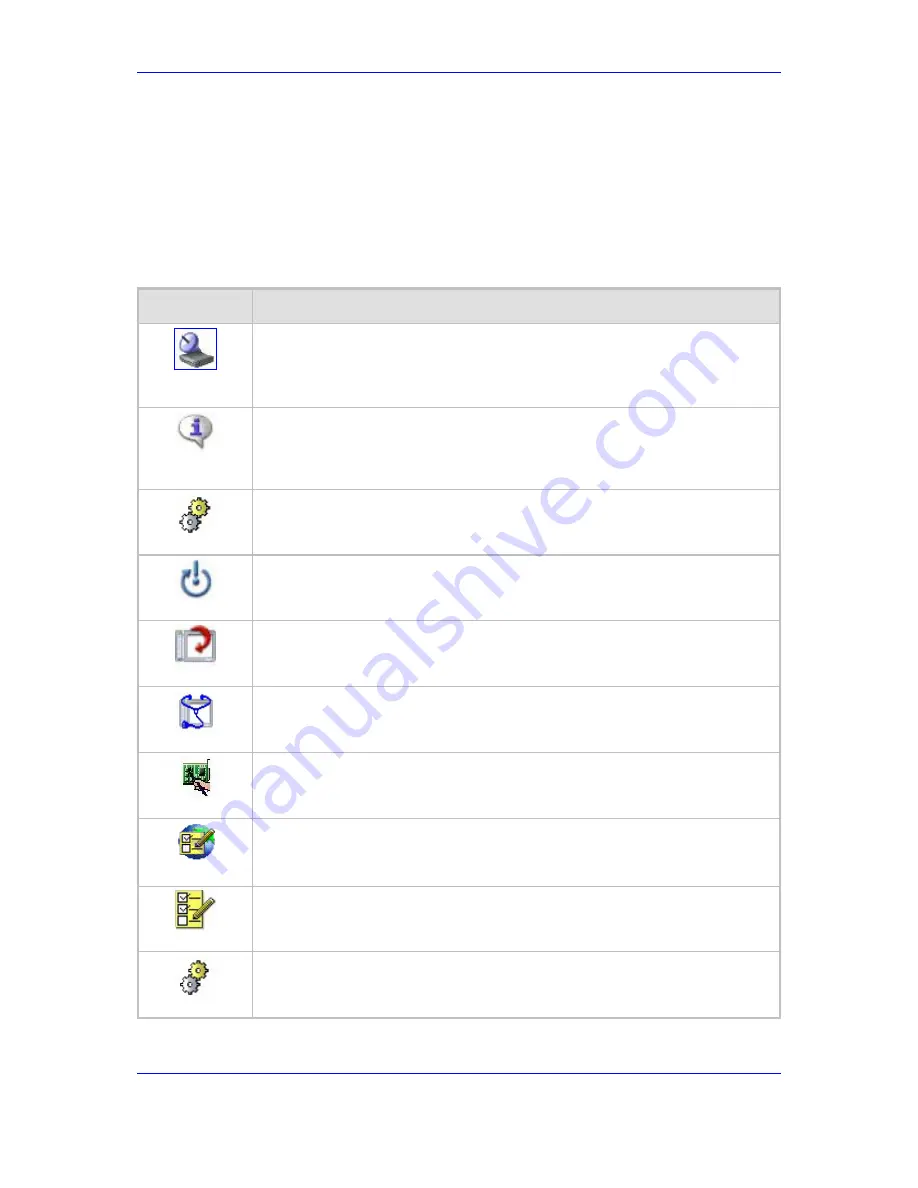
From the Advanced screen you can (refer to the table below): 

Table 


13-1: Action Icons in the Advanced Screen 

Icon 

What you can do 


Remote 

Administration 

Configure remote administration privileges 


About the MP-

202 

View technical information about the gateway, including version number 


Configuration File 

Load the Configuration File to the MP-202 


Restart 

Restart the MP-202 


Restore Defaults 

Restore default factory settings 


Diagnostics 

Perform networking diagnostics 


MAC Cloning 

Clone MP-202's MAC address. 


Regional Settings 

Change the regional settings 


System Settings 

Modify administrator settings, including the MP-202's hostname 


SNMP 

Configure the MP-202's SNMP agent 

Summary of Contents for MediaPack MP-202

Page 1: ...MP 202 Telephone Adapter User s Manual Version 2 4 0 Document LTRT 50604...

Page 2: ...cy of printed material after the Date Published nor can it accept responsibility for errors or omissions Updates to this document and other documents can be viewed and downloaded by registered Technic...

Page 3: ...des Limited WEEE EU Directive Pursuant to the WEEE EU Directive electronic and electrical waste must not be disposed of with unsorted waste Please contact your local recycling authority for disposal o...

Page 4: ...Release Notes AC494 VoIP SoC Data Book AC494 VoIP SoC User s Manual AC494 VxWorks SDK Getting Started Guide AC494 Linux SDK Getting Started Guide AC494 SDK Release Notes for VxWorks AC494 SDK Release...

Page 5: ...ick Setup Screen Parameters 25 3 2 2 1 Configuring Your Internet Connection 25 4 Using the MP 202 s Web Interface 31 4 1 Your Home Network Map 31 4 2 Managing Tables 33 5 Configuring VoIP Parameters 3...

Page 6: ...802 1p Mapping 72 8 5 Class Statistics 73 8 6 Configuring Basic VoIP QoS 74 9 WAN Settings 77 9 1 WAN Ethernet 77 9 1 1 General 78 9 1 2 Internet Protocol Settings 79 9 1 3 DNS Server 80 9 1 4 Routin...

Page 7: ...the Connection Wizard 103 10 1 2 General 104 10 1 3 IP Address Distribution 107 10 1 4 Routing 109 10 1 5 Internet Connection Firewall 111 10 1 6 Allow Unrestricted Administration 111 10 1 7 Addition...

Page 8: ...Cloning 178 13 8 Regional Settings 179 13 9 System Settings 180 13 10SNMP 183 13 10 1 Configuring Your Gateway s SNMP Agent 183 13 11Universal Plug and Play 184 13 12Firmware and Configuration Upgrad...

Page 9: ...s 13 20DNS Server 203 13 20 1 Viewing and Modifying the DNS Table 203 13 21Protocols 204 14 System Monitoring 207 14 1 Connections 207 14 2 Traffic 208 14 3 System Log 208 14 4 System Up Time 209 14 5...

Page 10: ......

Page 11: ...65 Table 8 3 Add Traffic Priority Rule Parameter Descriptions 67 Table 8 4 Add Traffic Priority Rule Parameter Descriptions 70 Table 8 5 Edit DSCP Settings Parameter Descriptions 72 Table 9 1 General...

Page 12: ...ure 5 12 VoIP Speed Dial 51 Figure 5 13 VoIP Speed Dial Settings 52 Figure 5 14 VoIP Speed Dial Local Line 52 Figure 5 15 VoIP Speed Dial Settings Local Line 53 Figure 5 16 VoIP Speed Dial Direct Call...

Page 13: ...n Disable DHCP 109 Figure 10 10 Advanced Routing Properties 111 Figure 10 11 Internet Connection Firewall 111 Figure 10 12 Allow Unrestricted Administration 111 Figure 10 13 Additional IP Addresses 11...

Page 14: ...e 12 18 Edit Service Opened Ports 154 Figure 12 19 New Port Triggering Rule 155 Figure 12 20 Website Restrictions 156 Figure 12 21 Restricted Website 156 Figure 12 22 Add a Specific Host 157 Figure 12...

Page 15: ...Address Distribution DHCP Relay 201 Figure 13 30 Advanced IP Address Distribution DHCP Relay New IP Address 201 Figure 13 31 Advanced IP Address Distribution Connection List 202 Figure 13 32 Advanced...

Page 16: ......

Page 17: ...g from its accumulated experience in providing IP telephony solutions the MP 20x series combines superior voice quality and state of the art features for end users such as T 38 Fax Relay and G 168 200...

Page 18: ......

Page 19: ...10 100 Base T RJ 45 connector labeled LAN PC to a PC 3 Optionally you can connect the MP 202 s connector labeled LAN PC to a switch hub and connect multiple PCs to the latter 4 Connect the MP 202 s t...

Page 20: ......

Page 21: ...allation Guide for instructions relating to installation on a Windows operating system Each network interface on the PC should either be configured with a statically defined IP address and DNS address...

Page 22: ...and that the physical cable connections are correct Figure 3 1 IP and DNS Configuration 3 1 1 Windows XP 1 Access Network Connections from the Control Panel 2 Right click on the Ethernet connection i...

Page 23: ...3 From the IP Address tab select the Obtain an IP address automatically radio button 4 From the DNS tab verify that no DNS server is defined in the DNS Service Search Order box and no suffix is define...

Page 24: ...up screen appears refer to the figure 3 2 1 Logging In The figure below shows the Logging In screen Figure 3 3 Logging In To log in take these steps 1 The default User Name is admin note that it is ca...

Page 25: ...fy the device s host name in the Hostname field This host name is used to access the device s Web based management Specify the administrator s e mail in the E mail field System alerts and notification...

Page 26: ...n the figure below Figure 3 5 Internet Connection Automatic IP Address Ethernet Connection If left at the default the MP 202 will obtain the WAN IP and DNS IP addresses from a DHCP server on the WAN 3...

Page 27: ...dress Subnet mask Default device Primary DNS server Secondary DNS server 3 2 2 1 3 Point to Point Protocol over Ethernet PPPoE Select Point to point protocol over Ethernet PPPoE from the Connection Ty...

Page 28: ...r to the figure Figure 3 8 Internet Connection Point to Point Tunneling Protocol Your ISP should provide you with the following information PPTP Server Host Name or IP Address Login user name Login pa...

Page 29: ...erver Host Name or IP Address Login user name Login password 3 2 2 1 6 No Internet Connection Select No Internet Connection from the Connection Type combo box refer to the figure Choose this connectio...

Page 30: ......

Page 31: ...Figure 4 1 Network Map The network map depicts the various network elements from top going down 1 External network interface Internet connection 2 Firewall 3 MP 202 4 Telephones connected to the MP 20...

Page 32: ...home network will use the following icons to indicate the interface used for connecting the PC Table 4 2 Icons to Indicate the Interface Used for Connecting the PC Represents an Ethernet Local Area N...

Page 33: ...n this section apply to all tables in the Web based Management Figure 4 3 Typical Table Structure The figure illustrates a typical table Each row denotes an entry in the table The following buttons lo...

Page 34: ......

Page 35: ...s showing the tabs that allow Configuring Signaling Protocol Parameters on page 36 Configuring Dialing Parameters on page 41 Configuring Media Streaming Parameters on page 43 Configuring Voice and Fax...

Page 36: ...rameter Description Use SIP Proxy When checked outgoing calls will be routed to the configured SIP proxy If the parameter Use SIP Proxy IP and Port for Registration is checked as well the configured S...

Page 37: ...r s Manual 37 February 2007 MP 202 Telephone Adapter 5 Configuring VoIP Parameters the advanced parameters including the basic parameters opens Figure 5 2 VoIP Signaling Protocol SIP Proxy and Registr...

Page 38: ...he parameter Use SIP Proxy IP and Port for Registration is checked as well the configured SIP proxy will also be used as the registrar allowing incoming calls Proxy IP Address or Host Name The IP addr...

Page 39: ...The SIP INVITE timer according to RFC 3261 Uncheck the box Use SIP Proxy IP and Port for Registration and check Use SIP Registrar the parameters screen for SIP Registrar opens showing the basic parame...

Page 40: ...y the parameters screen for SIP Outbound Proxy opens showing the basic parameters Click the button Advanced the parameters screen for SIP Outbound Proxy showing the advanced parameters including the b...

Page 41: ...onfiguring VoIP Parameters 5 1 2 Configuring Dialing Parameters To configure Dialing parameters Click tab Dialing the Dialing Parameters screen opens Click the button Advanced the advanced Dialing Par...

Page 42: ...es not match any pattern the number will be terminated using the timeout or when the user presses the pound key Dial Plan This parameter works in conjunction with the Digit Map and enables translation...

Page 43: ...202 Telephone Adapter 5 Configuring VoIP Parameters 5 1 3 Configuring Media Streaming Parameters To configure Media Streaming parameters Click tab Media Streaming the Media Streaming screen opens Figu...

Page 44: ...to Configuring Codecs on page 45 3rd Codec Refer to Configuring Codecs on page 45 4th Codec Refer to Configuring Codecs on page 45 5th Codec Refer to Configuring Codecs on page 45 6th Codec Refer to C...

Page 45: ...use RTP to receive a better priority and will help prevent high voice jitter that results of slow upstream transmission rate as common with most WAN connections DSL DOCSIS etc 5 1 3 1 Configuring Code...

Page 46: ...20 millisecond packets Selecting 10 millisecond packets reduces the delay but increases the bandwidth consumption 5 1 4 Configuring Voice and Fax Parameters To configure Voice and Fax parameters Click...

Page 47: ...Disabled Enable Echo Cancellation Check to enable echo cancellation disabling echo cancellation should be done for testing purposes only Default Enabled Fax Transport Mode Selects the way fax calls a...

Page 48: ...MP 202 Telephone Adapter 48 LTRT 50604 MP 202 Click the button Advanced the extended Service parameters screen opens Figure 5 8 VoIP Services Basic Figure 5 9 VoIP Services Advanced...

Page 49: ...ming calls are forwarded only if the endpoint does not answer before a pre configured timeout see next parameter Time for No Reply Forward If you specify 5 seconds for this parameter for example and N...

Page 50: ...parameters 1 Click the tab Line Settings the screen that opens refer to the figure enables you to define the phone ports of the MP 202 and to configure them Figure 5 10 VoIP Line Settings 2 Click the...

Page 51: ...sed when sending a response to Unauthorized or Proxy Authentication Requested 401 407 Authentication Password The password received from the VoIP Service Provider Used when sending a response to Unaut...

Page 52: ...oIP Speed Dial Settings Table 5 14 Speed Dial Settings via Proxy Parameter Description Speed Dial Defines the number to dial Destination Defines the entry s destination in this case a proxy server Use...

Page 53: ...how a speed dial direct call is configured The call is configured to one of the pre configured lines of a remote device 10 16 2 26 Figure 5 16 VoIP Speed Dial Direct Call Table 5 15 Speed Dial Setting...

Page 54: ......

Page 55: ...a SIP account The following section describes how to open a free worldwide dialing SIP account You can also obtain a paid SIP account To open a free worldwide dialing SIP account on the Pulver com Fre...

Page 56: ...IP Address or Host Name of the ISP s SIP proxy provided by the ISP refer to Configuring Signaling Protocol Parameters on page 36 6 Press OK or Apply to complete the VoIP configuration Note Check that...

Page 57: ...hold and switches to the waiting call 2 To return to the original call press Flash again You can toggle from one party to another as much as you like by pressing Flash To answer a waiting call when Fl...

Page 58: ...ring a call with party B press Flash Party B is placed on hold and you ll hear a dial tone 2 Dial party C s number 3 You can wait for C to answer or not 4 On hook you ve transferred B to C To transfer...

Page 59: ...then the 3 key 7 6 Forwarding Calls to Another Phone To forward calls to another phone 1 First configure call forwarding refer to Configuring Services Parameters on page 47 2 Pick up the phone 3 Make...

Page 60: ......

Page 61: ...ackets and transmits them in a steady predictable stream so that the network is not overwhelmed with traffic While Traffic Priority allows basic prioritization of packets Traffic Shaping provides more...

Page 62: ...includes all your interfaces as well as category options e g All LAN Devices All WAN Devices and VPNs such as PPoE PPTP and L2TP if defined Select for example the option WAN Ethernet and click OK the...

Page 63: ...refer to the figure This function allows you to define the maximal allowed transmission time frame in milliseconds of a single packet Any packet that requires a longer time to be transmitted will be...

Page 64: ...fer to the figure Figure 8 3 QoS Edit Device Traffic Shaping Add Class 2 Name the new class and click OK to save the settings the screen Edit Device Traffic Shaping opens 3 Click the class name to edi...

Page 65: ...izes multiple queues so that traffic is distributed among queues based on priority This priority is defined according to packet priority which can be defined explicitly by a DSCP value or by a 802 1p...

Page 66: ...The gateway cannot queue packets since in most cases the LAN is much faster then the WAN and when the gateway receives a packet from the WAN it passes it immediately to the LAN QoS for ingress data h...

Page 67: ...CP refer to the descriptions below Set Priority Check this check box to add a priority to the rule Select priority level 0 7 where 0 lowest and 7 highest each priority level is mapped to low medium hi...

Page 68: ...racking mechanism used by firewall Once a packet matches a rule all subsequent packets with the same attributes receive the same QoS parameters both inbound and outbound A packet can match more than o...

Page 69: ...oS Input Rules and the other for QoS Output Rules which are for prioritizing inbound and outbound traffic respectively Each section lists all the devices on which rules can be set You can set rules on...

Page 70: ...o low medium high priority This sets the priority of a packet on the connection matching the rule while routing the packet Set DSCP Check this check box to mark a DSCP value on packets matching this r...

Page 71: ...markings are used by Diffserv network routers to appropriately classify packets and to apply particular queue handling or scheduling behavior The gateway provides a table of predefined DSCP values whi...

Page 72: ...l 0 Low which means that such packets will receive the lowest priority 8 4 802 1p Mapping The IEEE 802 1p priority marking method is a standard for prioritizing network traffic at the data link Mac su...

Page 73: ...evels for each of the eight values in their respective combo box Click OK to save the settings 8 5 Class Statistics The gateway provides you with accurate real time information on the traffic moving t...

Page 74: ...a minimal QoS configuration that ensures sufficient QoS for VoIP calls when the gateway is connected behind a broadband cable or DSL modem with limited uplink bandwidth and the user runs bandwidth co...

Page 75: ...opens 4 Limit the Tx bandwidth parameter Tx Bandwidth according to your modem s uplink bandwidth 5 To prevent jitter in outgoing RTP packets select When Active Voice Calls Exist from the drop down li...

Page 76: ...hone Adapter 76 LTRT 50604 MP 202 6 Click OK to submit the new definition Figure 8 13 QoS Edit Device Traffic Shaping Submitting the Configuration 7 Click OK again to exit the QoS page and return to t...

Page 77: ...Network Connections screen check the Advanced Connection radio button and then choose the connection type 9 1 WAN Ethernet WAN Ethernet is the default mode WAN Ethernet is used to connect the MP 202...

Page 78: ...net Configuration 9 1 1 General The top part of the screen Configure WAN Ethernet displays general communication parameters It is recommended not to change the default values in this screen unless you...

Page 79: ...ne of the following Internet Protocol options from the Internet Protocol drop down menu No IP Address Obtain an IP Address Automatically Your WAN connection is configured by default to act as a DHCP c...

Page 80: ...rent DNS server address one primary another secondary Figure 9 5 DNS Server Settings 9 1 4 Routing You can choose to setup your Telephone Adapter to use static or dynamic routing Dynamic routing autom...

Page 81: ...ting of multicast packets according to the IGMP requests of LAN devices asking to join multicast groups Select the Multicast IGMP Proxy Internal check box to enable this feature Routing Table Allows y...

Page 82: ...n is active via Advanced Scheduler Rules Network Select whether the parameters you are configuring relate to a LAN WAN connection by selecting LAN WAN from the drop down list MTU MTU is the Maximum Tr...

Page 83: ...point to point protocol session only when packets are actually sent over the Internet Time Between Reconnect Attempts Specify the duration between PPP reconnected attempts as provided by your ISP Fig...

Page 84: ...n the middle attacks can easily determine the remote access client s password PAP offers no protection against replay attacks remote client impersonation or remote server impersonation Support Challen...

Page 85: ...eer supports 128 bit encryption keys 9 2 5 PPP Compression The PPP Compression Control Protocol CCP is responsible for configuring enabling and disabling data compression algorithms on both ends of th...

Page 86: ...RC4 and routes using the generic routing encapsulation GRE protocol With your gateway PPTP is targeted at serving two purposes 1 Connecting the gateway to the Internet when it is used as a cable modem...

Page 87: ...ter 9 WAN Settings 3 Select the radio button External Cable Modem this option is for both internal and external cable modems and click Next the screen Internet Cable Modem Connection opens refer to th...

Page 88: ...ng Protocol 5 Enter the username and password provided by your Internet Service Provider ISP 6 Enter the PPTP server host name or IP address provided by your ISP 7 Select whether to obtain an IP addre...

Page 89: ...a new PPTP VPN connection take these steps 1 Open the screen Network Connections and click link New Connection the screen Connection Wizard opens 2 Select the radio button Connect to a Virtual Privat...

Page 90: ...etwork PPTP VPN 5 Enter the username and password provided by the administrator of the network you are trying to access 6 Enter the remote tunnel endpoint address This would be the IP address or domai...

Page 91: ...during which the connection may be active Once a scheduler rule s is defined this field changes to a drop down list allowing you to choose between the available rules Network Select whether the param...

Page 92: ...83 9 3 6 PPP Encryption Refer to PPP Encryption on page 84 9 3 7 Internet Protocol Refer to Internet Protocol Settings on page 79 9 3 8 DNS Server Refer to DNS Server on page 80 9 3 9 Routing Refer t...

Page 93: ...net when it is used as a cable modem or when using an external cable modem Such a connection is established using user name and password authentication 2 Connecting the gateway to a remote network usi...

Page 94: ...phone Adapter 94 LTRT 50604 MP 202 3 Select the radio button VPN Client or Point To Point and click Next the screen VPN Client or Point To Point opens refer to the figure Figure 9 20 VPN Client or Poi...

Page 95: ...to the figure Figure 9 21 Layer 2 Tunneling Protocol over Internet Protocol Security L2TP IPSec VPN 5 Enter the username and password provided by the administrator of the network you are trying to acc...

Page 96: ...the new L2TP IPSec VPN connection is added to the network connections list and is configurable like any other connection 9 4 2 Creating an L2TP IPSec VPN Connection with the Connection Wizard To creat...

Page 97: ...y 2007 MP 202 Telephone Adapter 9 WAN Settings 3 Select the radio button VPN Client or Point To Point and click Next the screen VPN Client or Point To Point opens refer to the figure Figure 9 23 VPN C...

Page 98: ...et Protocol Security L2TP IPSec VPN 5 Enter the username and password provided by the administrator of the network you are trying to access 6 Enter the IPSec shared secret which is the encryption key...

Page 99: ...ced Scheduler Rules in order to define time segments during which the connection may be active Once a scheduler rule s is defined this field changes to a drop down list allowing you to choose between...

Page 100: ...n decompression mechanism in a reliable manner Figure 9 26 PPP Compression For each compression algorithm select one of the following from the drop down menu Table 9 10 PPTP Compression Parameters Par...

Page 101: ...User s Manual 101 February 2007 MP 202 Telephone Adapter 9 WAN Settings 9 4 11 Internet Connection Firewall Refer to Internet Connection Firewall on page 81...

Page 102: ......

Page 103: ...ork Connections screen refer to the figure the Connection Wizard screen opens refer to the figure 2 Select the Advanced Connection radio button and click Next the Advanced Connection screen appears re...

Page 104: ...ish to save the settings the new VLAN interface is added to the network connections list it s configurable like any other connection 10 1 2 General The top part of the configuration window displays ge...

Page 105: ...he physical address of the network card used for your network Some cards allow you to change this address Clone MAC Allows you to copy the current MAC address of your PC to the MAC address of this dev...

Page 106: ...DHCP client You should keep this configuration in case your service provider supports DHCP or if you are connecting using a dynamic IP address The server that assigns the Telephone Adapter with an IP...

Page 107: ...re 10 5 Internet Protocol Settings Static IP 10 1 3 IP Address Distribution The IP Address Distribution section allows you to configure the device s Dynamic Host Configuration Protocol DHCP server par...

Page 108: ...belongs An example of a subnet mask value is 255 255 0 0 Lease Time In Minutes Each device will be assigned an IP address by the DHCP server for this amount of time when it connects to the network Whe...

Page 109: ...ss link appears Figure 10 7 IP Address Distribution DHCP Relay 2 Click the New IP Address link The DHCP Relay Server Address screen appears Figure 10 8 DHCP Relay Server Address 3 Specify the IP addre...

Page 110: ...ort translation in addition to address translation Device Metric The device metric is a value used by the device to determine whether one route is superior to another considering parameters such as ba...

Page 111: ...rom gaining access to it through a network such as the Internet The firewall can be activated per network connection To enable the firewall on this network connection select the Enabled check box For...

Page 112: ...tion to 192 168 1 1 and http MP 202 home Figure 10 13 Additional IP Addresses 10 1 8 Example of Configuring 3 VLANs VoIP Data and Management This example explains how to configure three separate VLANs...

Page 113: ...et the new WAN interface to use static route 11 11 11 11 Choose advanced route In advanced route choose ROUTE mode device metric 2 and check the default gateway check box 5 Add static route Do so for...

Page 114: ...New Interface on the WAN Side 3 Enter the new interface by clicking the Action icon shown in the screen above the screen shown below opens Figure 10 17 Configuring WAN Ethernet 4 Assign an IP address...

Page 115: ...Network Connections WAN Ethernet 2 Settings the figure shown below opens Figure 10 19 Routing Advanced 2 In the Routing drop down list change the mode to Advanced extended parameters are displayed re...

Page 116: ...een shown below opens Figure 10 21 Route Settings 2 From the Name drop down list choose WAN Ethernet configure the parameters Destination Netmask and Gateway Adding a Security Input Rule To add a secu...

Page 117: ...apter 10 VLAN and Bridge Settings 2 Add a new entry for the interface choose what the filter will be determined by Source IP Destination IP or Protocol In the example shown in the figure below Port 80...

Page 118: ...that the VOIP is using 802 1q p that the VLAN ID is 300 and that the IP is 3 3 x x refer to the screen shown below Figure 10 24 Testing the Setup 2 Connect a PC to the LAN port of MP202 1 or 2 and se...

Page 119: ...Bridge WAN bridge creates a bridge over WAN and LAN devices In this way PCs on the ProductNameGeneric s LAN side can get IP addresses that are known on the WAN side 10 2 1 Creation with the Connection...

Page 120: ...t the radio button Network Bridging and click Next the screen Bridge Options opens refer to the figure below Figure 10 27 Bridge Options 4 Select whether to configure an existing bridge this option wi...

Page 121: ...ns or remove existing ones by checking or unchecking their respective check boxes Figure 10 28 Network Bridging For example checking the WAN check box will create a LAN WAN bridge 2 Add a New Bridge S...

Page 122: ...onding to your changes Figure 10 30 Connection Summary Configure Existing Bridge 2 Check the check box Edit the Newly Created Connection to be routed to the new connection s configuration screen after...

Page 123: ...Click the icon Edit on the VLAN column to assign the network connections to specific Virtual LANS Select the check box STP to enable the Spanning Tree Protocol on the device You should use this to en...

Page 124: ...VLANs Setup Two MP 202s are connected to the switch Both are configured to use VLAN 200 for VOIP VLAN 300 for Data and VLAN 400 for Management Three DHCP servers are connected to the same switch optio...

Page 125: ...e it to Obtain IP Address Automatically refer to the figure below optionally you can use a static IP address Figure 10 33 Network Connections 5 For VOIP configure VLAN ID 200 and then configure it to...

Page 126: ...to the figure below Figure 10 35 Network Bridging 8 Set the bridge to use No IP Address Click Apply and OK and then click OK again Figure 10 36 No IP Address 9 Reboot the MP 202 optional 10 Ensure tha...

Page 127: ...ws the System Monitoring screen Figure 10 37 System Monitoring Testing the Setup 13 Place a VOIP call and see that the VOIP is using 802 1q p and that the VID is 200 14 Ping from the PC behind MP202 1...

Page 128: ...for VoIP and non VLAN traffic for data Two DHCP servers are connected to the same switch One is in a VLAN 200 network the other is in a non VLAN network To configure tagging for VoIP and untagging fo...

Page 129: ...ge In the screen Network Bridging check LAN Ethernet and WAN Ethernet refer to the figure below Figure 10 39 WAN LAN Bridge 5 For VoIP add VLAN Interface 200 VID 200 and choose option Bridge in the dr...

Page 130: ...the Network Connection screen edit the Bridge and WAN interfaces to enable VLAN for all VLAN IDs refer to the screen below Figure 10 41 Bridge Section of the Screen Figure 10 42 VLAN Settings 7 Set th...

Page 131: ...configure this interface to Obtain IP Address Automatically Optionally you can choose option Use the Following IP Address for a static IP address Figure 10 44 Configuring WAN Ethernet 9 Set your PC t...

Page 132: ...o the LAN port of the MP 202 and verify that the data traffic ICMP is untagged refer to the screen below Figure 10 47 Testing the Setup 10 2 5 3 Example 3 Configuring VoIP and Data in the Same VLAN To...

Page 133: ...d Bridge Settings Figure 10 48 Configuring VoIP and Data in the Same VLAN 2 Define a new network bridge Define it by checking the check boxes of LAN Ethernet and the new VLAN Interface that you define...

Page 134: ...e Adapter 134 LTRT 50604 MP 202 3 Go to the regular WAN and change the mode to No IP Address Figure 10 50 No IP Address If your configuration is correct all data from the LAN and VoIP should be sent i...

Page 135: ...ral mechanism for adding vendor specific provisioning capabilities as needed The provisioning mechanism allows CPE provisioning at the time of initial connection to the broadband access network and th...

Page 136: ...lName Description Product Class SerialNumber HardwareVersion SoftwareVersion SpecVersion ProvisioningCode UpTime DeviceLog InternetGatewayDevice LANDevice i InternetGatewayDevice LANDevice i LANHostCo...

Page 137: ...nkStatus TotalBytesSent TotalBytesReceived TotalPacketsSent TotalPacketsReceived InternetGatewayDevice WANDevice i WANDSLConnectionManagement InternetGatewayDevice WANDevice i WANDSLConnectionManageme...

Page 138: ...parameters can be viewed and configured via the CLI This section presents a specific example of how to view and change TR 069 parameters Use the example as a guide To run CLI commands 4 Open Telnet 5...

Page 139: ...the following CLI commands rg_conf_set cwmp enabled 1 reconf 1 To stop and restart the TR 69 client use the following CLI commands cwmp_session_start cwmp_session_stop TR 069 Parameter Descriptions N...

Page 140: ......

Page 141: ...service provider The MP 202 firewall supports advanced filtering designed to allow comprehensive control over the firewall s behavior You can define specific input and output rules control the order o...

Page 142: ...pass through the MP 202 or rejected barred from passing through the MP 202 according to a flexible and configurable set of rules These rules are designed to prevent unwanted intrusions from the outsi...

Page 143: ...Maximum Security Default Blocked No access to home network from Internet except as configured in the Local Servers DMZ host and Remote Access screens Limited Only commonly used services such as Web b...

Page 144: ...from transferring files using FTP and the whole network from receiving incoming e mail Access Control defines restrictions on the types of requests that may pass from the home network out to the Inte...

Page 145: ...rule will take effect You can select between Always or a specific schedule If you choose the option Specify Schedule the screen refreshes and an Add link appears Click it to specify a schedule 6 Clic...

Page 146: ...ied computer Similarly to grant Internet users access to servers inside your home network you must identify each service that you want to provide and the PC that will provide it For example to host a...

Page 147: ...nformation that allows them to be routed correctly An ALG is needed to handle these packets and ensure that they reach their intended destinations OpenRG is equipped with a robust list of ALG modules...

Page 148: ...ect or specify the type of protocol that will be used In addition to the list of popular protocols it provides you may also choose any or a specific protocol If you choose the option Specify Protocol...

Page 149: ...6 Click Add to specify a protocol and click OK to save your changes the screen Port Forwarding displays a summary of the rule that you just added refer to the figure Figure 12 10 Port Forwarding Rule...

Page 150: ...play a game simultaneously All computers on the network can use a specific service as clients simultaneously Being a client means that the computer within the network initiates the connection for exam...

Page 151: ...r the local IP address of the computer to be designated as a DMZ host Note that only one LAN computer can be a DMZ host at any time 3 Click OK to save your changes and return to the screen DMZ Host Yo...

Page 152: ...replies to the gateway s IP and the connection is not sent back to your host since it is not part of a session To solve this you need to define a Port Triggering entry which allows inbound traffic on...

Page 153: ...ens refer to the figure Figure 12 14 Adding Port Triggering Rules 2 Enter a name for the service e g game_server and click the link New Trigger Ports the screen Edit Service Server Ports opens refer t...

Page 154: ...estination port Figure 12 16 Edit Service Server Ports 5 Click OK to save the settings 6 In the screen Edit Service click the link New Opened Ports the screen Edit Service Opened Ports opens refer to...

Page 155: ...lear the check box next to the service name To reinstate it later simply reselect the check box To remove a rule click the action icon Remove for the service the service is permanently removed There m...

Page 156: ...w Entry the Restricted Website screen opens refer to the figure Figure 12 21 Restricted Website 3 Enter the website address IP address or URL that you would like to make inaccessible from your home ne...

Page 157: ...lved into one or more IP addresses 6 Click the Refresh button to update the status if necessary If the site is successfully located Resolved will appear in the status bar if not Hostname Resolution Fa...

Page 158: ...disable a rule clear the check box adjacent to the service name To reinstate it at a later time recheck the check box To remove a rule click the action icon Remove for the service the service will be...

Page 159: ...is divided into two identical sections one for Input Rule Sets and the other for Output Rule Sets which are for configuring inbound and outbound traffic respectively Each section is comprised of subse...

Page 160: ...Note The order of the firewall rules appearance in the screen Advanced Filtering represents the sequence by which they will be applied Numerous rules are automatically inserted by the firewall to prov...

Page 161: ...12 Security To configure an advanced filtering rule 1 After choosing the traffic direction and the device on which to set the rule click the appropriate link New Entry the screen Add Advanced Filter o...

Page 162: ...Protocol 6 Click the link Add this commences a sequence that adds a new protocol 7 In the screen section Operation define what action the rule will take check one of the following radio buttons Drop...

Page 163: ...packets matching this rule the screen refreshes refer to the figure allowing you to enter the hexadecimal value of the DSCP Figure 12 29 Set DSCP Rule 10 Under the screen section Logging check the pa...

Page 164: ...event is a result of an incoming packet Outbound Traffic The event is a result of outgoing packet Firewall Setup Configuration message WBM Login Indicates that a user has logged in to WBM CLI Login I...

Page 165: ...re Figure 12 31 Security Log Settings 2 Select the types of activities for which you would like to have a log message generated Accepted Events Accepted Incoming Connections Write a log message for ea...

Page 166: ...an accompanying explanation from the firewall internal mechanism will be added in case this event type is recorded Firewall status changed the firewall changed status from up to down or the other way...

Page 167: ...N packet has been accepted Outbound Auth1X an outbound Auth1X packet has been accepted IP Version 6 an IPv6 packet has been accepted OpenRG initiated traffic all traffic that OpenRG initiates is recor...

Page 168: ...locked because of a TCP connection that had started without a SYN packet Error No memory a message notifying that a new connection has not been established because of lack of memory NAT Error Connecti...

Page 169: ...13 1 Action Icons in the Advanced Screen Icon What you can do Remote Administration Configure remote administration privileges About the MP 202 View technical information about the gateway including...

Page 170: ...r system rules Date and Time Set the local date and time Users Configure users Routing Manage routing policies Network Objects Define groups of LAN devices for system rules Dynamic DNS View and modify...

Page 171: ...change settings or help you trouble shoot functionality or communication issues from a remote location Remote access to the MP 202 is blocked by default to ensure the security of your home network How...

Page 172: ...difficult or impossible to access the Telephone Adapter from the home network Therefore remote access to Telnet or HTTP services should be blocked and should only be permitted when absolutely necessar...

Page 173: ...e under these circumstances ignore it and continue It should be noted that even though this message appears the self generated certificate is safe and provides you with a secure SSL connection It is a...

Page 174: ...Contents of the Configuration File 2 Click the button Load Configuration File to restore your configuration from a file and restart the gateway 3 Click Save Configuration File to back up your current...

Page 175: ...ter restarting the gateway click the browser s Refresh button 13 5 Restoring Default Settings You can restore the MP 202 s factory default settings when for example you re building a new network from...

Page 176: ...ing a paper clip press the pushbutton located on the bottom of the MP 202 a pinhole at one of the corners 3 While pressing the pushbutton power up the device Keep the pushbutton pressed for another 5...

Page 177: ...ctivity 1 Click the Diagnostics icon from the Advanced screen in the Web based Management the Diagnostics screen is displayed Figure 13 7 Advanced Diagnostics 2 Under the screen section Ping ICMP Echo...

Page 178: ...enter the IP address or URL to be tested in the Destination field 3 Press the button Go a traceroute commences constantly refreshing the screen refer to the figure above 4 To stop the trace and view...

Page 179: ...13 8 Regional Settings The behavior and parameters of analog telephones lines vary between countries The set of Call Progress Tones the protocol used for caller ID and the analog line impedance are al...

Page 180: ...fetime the duration of idle time in seconds in which the WBM session will remain active When this duration times out the user will have to re login Language select a different language for the WBM int...

Page 181: ...rom address and some outgoing servers refuse to forward mail without a valid from address for anti spam considerations Enter a from email address in the From Email Address field If your outgoing mail...

Page 182: ...MP 202 Telephone Adapter 182 LTRT 50604 MP 202 Enter the port that is used by your outgoing mail server Figure 13 11 System Settings...

Page 183: ...fy and resolve technical problems 13 10 1 Configuring Your Gateway s SNMP Agent Technical information regarding the properties of the gateway s SNMP agent should be provided by your ISP To configure t...

Page 184: ...ecture that provides compatibility among networking equipment software and peripherals UPnP enabled products can seamlessly connect and communicate with other Universal Plug and Play enabled devices w...

Page 185: ...date use this method to upgrade your firmware by remotely downloading an updated software image file Go to Upgrading from a Computer on the Network on page 185 Go to Upgrading from the Internet on pag...

Page 186: ...screen prompts you if you want to upgrade to the new version 4 Click OK to confirm the upgrade process commences and shouldn t take longer than a couple of minutes to complete 5 At the conclusion of t...

Page 187: ...The upgrade process will begin and should take no longer than one minute to complete At the conclusion of the upgrade process the MP 202 will automatically reboot The new software version will run If...

Page 188: ...dure is to upload a mp202 conf file from a working device system and remove all sections except those that should be modified by the remote configuration For example a Service Provider can choose to c...

Page 189: ...t Scheduler Rule 3 Specify a name for the rule in the Name field 4 Specify if the rule will be active inactive during the designated time period by selecting the appropriate Rule Activity Settings che...

Page 190: ...ght savings time settings 1 Click the Date and Time icon in the Advanced screen of the Web based Management The Date Time settings screen will be displayed Figure 13 20 Date Time Settings 2 Select the...

Page 191: ...Protocol radio button Specify how often to perform the update in the Update Every field You can define time server addresses by pressing the New Entry link on the bottom of the Automatic Time Update...

Page 192: ...events are Error Warning and Information If the Information level is selected the user will receive notification of Information Warning and Error events If the Warning level is selected the user will...

Page 193: ...anced Settings 13 16 Routing 13 16 1 Managing Routing Table Rules You can access the routing table rules by clicking the Routing icon from the Advanced screen The Routing screen will appear Figure 13...

Page 194: ...work to be updated whenever an important change occurs in the network A multicast is simply a message that is sent simultaneously to a pre defined group of recipients When you join a multicast group y...

Page 195: ...Objects screen appears refer to the figure Network Objects 2 Click the link New Entry the Edit Network Object screen appears refer to the figure Edit Network Object 3 Name the network object in the D...

Page 196: ...applying for an account you will need to specify a user name and password Have them readily available when customizing the MP 202 s DDNS support For detailed information on DDNS refer to http www dynd...

Page 197: ...Enter your DDNS user name Password Enter your DDNS password Host Name Enter your full DDNS domain name Wildcard Select this check box to enable use of special links such as www yourhost dyndns org Ma...

Page 198: ...vides the above configurations for each LAN device and can be configured and enabled disabled separately for each LAN device Can assign a static lease to a LAN PC so that it receives the same IP addre...

Page 199: ...h static IP addresses only To edit the DHCP server settings for a device 1 Under the column Action click the icon Edit the DHCP Server settings for this device are displayed refer to the figure Figure...

Page 200: ...me when it connects to the network When the lease expires the server will determine if the computer has disconnected from the network If it has then the server may reassign this IP address to a newly...

Page 201: ...n DHCP Relay New IP Address 3 Specify the IP address of the DHCP server 4 Click OK to save the settings 5 Click OK once more in the DHCP Settings screen 6 Click the icon Network Connections on the sid...

Page 202: ...igure 13 32 Advanced IP Address Distribution Connection List New Static Connection 2 Enter a host name for this connection 3 Enter the fixed IP address to be assigned to the computer 4 Enter the MAC a...

Page 203: ...DHCP server Supports multiple subnets within the LAN simultaneously Automatically appends a domain name to unqualified names Allows new domain names to be added to the database using the MP 202 s Web...

Page 204: ...NS Table you can modify its host name and or IP address If it wasn t you can only modify its host name 3 Click OK to save your changes To remove a host from the DNS table Click Delete under column Act...

Page 205: ...r 13 Advanced Settings 2 Click the icon Protocols the Protocols screen appears refer to the figure Figure 13 35 Advanced Protocols 3 Click the link New Entry the Edit Service screen appears refer to t...

Page 206: ...gure Figure 13 37 Advanced Protocols Edit Service Server Ports 5 You may choose any of the protocols available in the combo box or add a new one by selecting Other When selecting a protocol from the c...

Page 207: ...as last started Voice over IP 14 1 Connections To monitor connections 1 Click the menu System Monitoring in the left sidebar the System Monitoring screen tab Connections is displayed showing a read on...

Page 208: ...statistical information about data received from and transmitted to the Internet WAN and about data received from and transmitted to computers in the local network LAN To view traffic statistics Clic...

Page 209: ...Click tab System Log the System Monitoring System Log screen opens Figure 14 3 System Monitoring System Log 14 4 System Up Time To display the system up time Press tab System to display the length of...

Page 210: ...r 210 LTRT 50604 MP 202 14 5 Voice over IP To monitor VoIP Click tab Voice over IP the System Monitoring Voice over IP screen opens showing read only VoIP call related parameters Figure 14 5 Advanced...

Page 211: ...queues VLAN 802 1p Q tagging traffic shaping or Layer 2 switching not supported in this version Media Processing Voice Coders G 711 G 723 1 G 729A B G 726 Optional Voice Coders iLBC AMR separate softw...

Page 212: ...art On Off Hook Flash Hook Table 15 2 MP 202 Telephone Adapter Hardware Specifications Power 12VDC Interfaces RJ 45 10 100 Base T for LAN RJ 45 10 100 Base T for WAN 2xRJ 11 2 FXS lines for telephones...

Reviews: