87
www.analogway.com
USER MANUAL
USER MANUAL
USER MANUAL
USER MANUAL
USER MANUAL
USER MANUAL
USER MANUAL
USER MANUAL
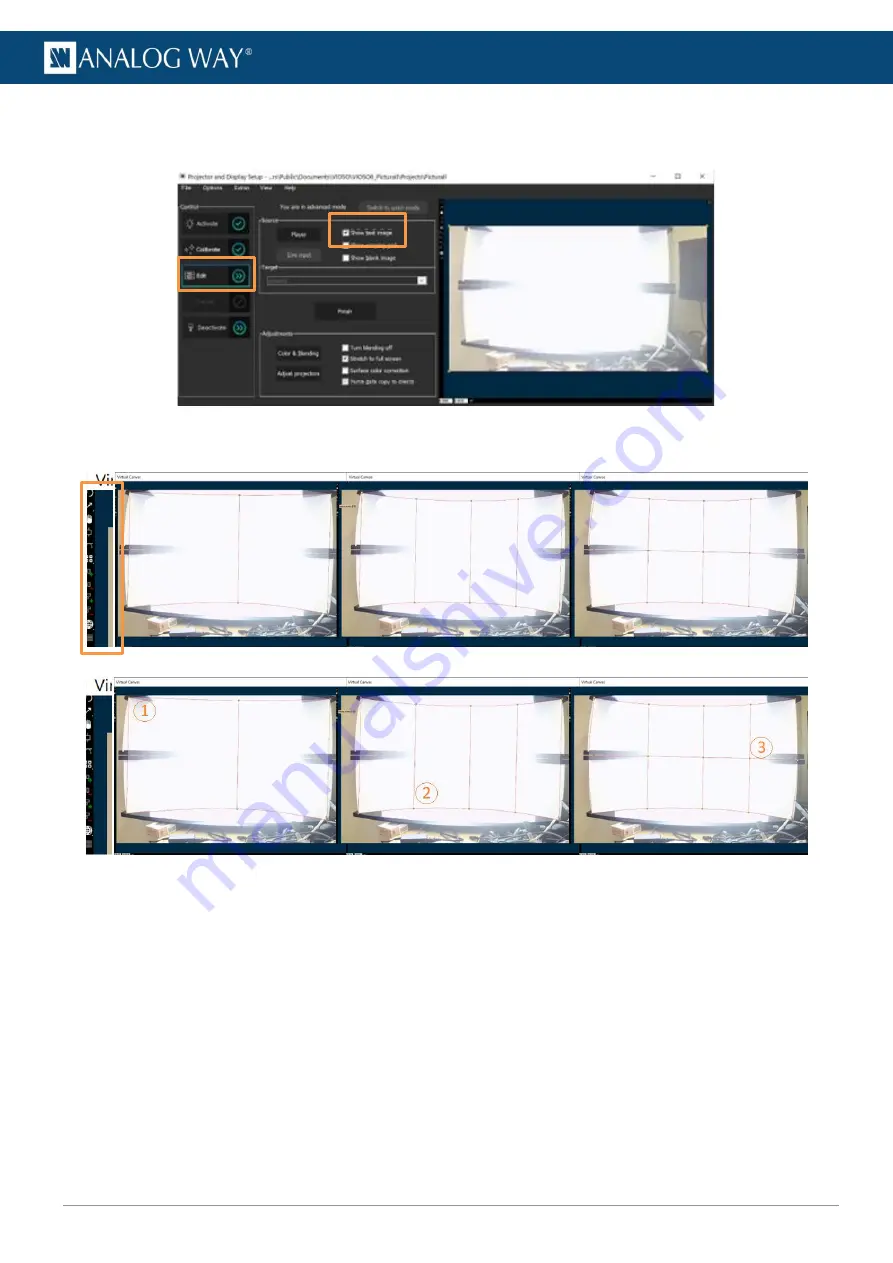
The projection is now calibrated based on the camera view, so it will require some adjusting to be sharp and
clear. This can be done by selecting Edit from the first page of the Projector and Display setup and enabling
the show test image
Fig. 79 -
Autocalibration: opening a virtual canvas to warp the outputs
Go to virtual canvas. Next, w
e’re going to warp the output so that it contours the curved
surface.
Fig. 80 -
Autocalibration: warping the outputs
The tools to create output warping are located on the left-hand side of the virtual canvas. The tools are
magnified in the image above. In this example, following was done:
1.
Drag the corners to the corners of the projection surface.
2.
On the left, click add more columns. Drag the ends of the columns to match the curve at the top and
bottom. Add as many as needed.
3.
Then add rows to match the edges.
With these adjustments, the lens distortion caused by the camera has been compensated, but the projection
still isn’t tidy around the edges
. Next,
we’ll set masks.
From the front page of the Projector and Display setup
select Adjust projectors.


