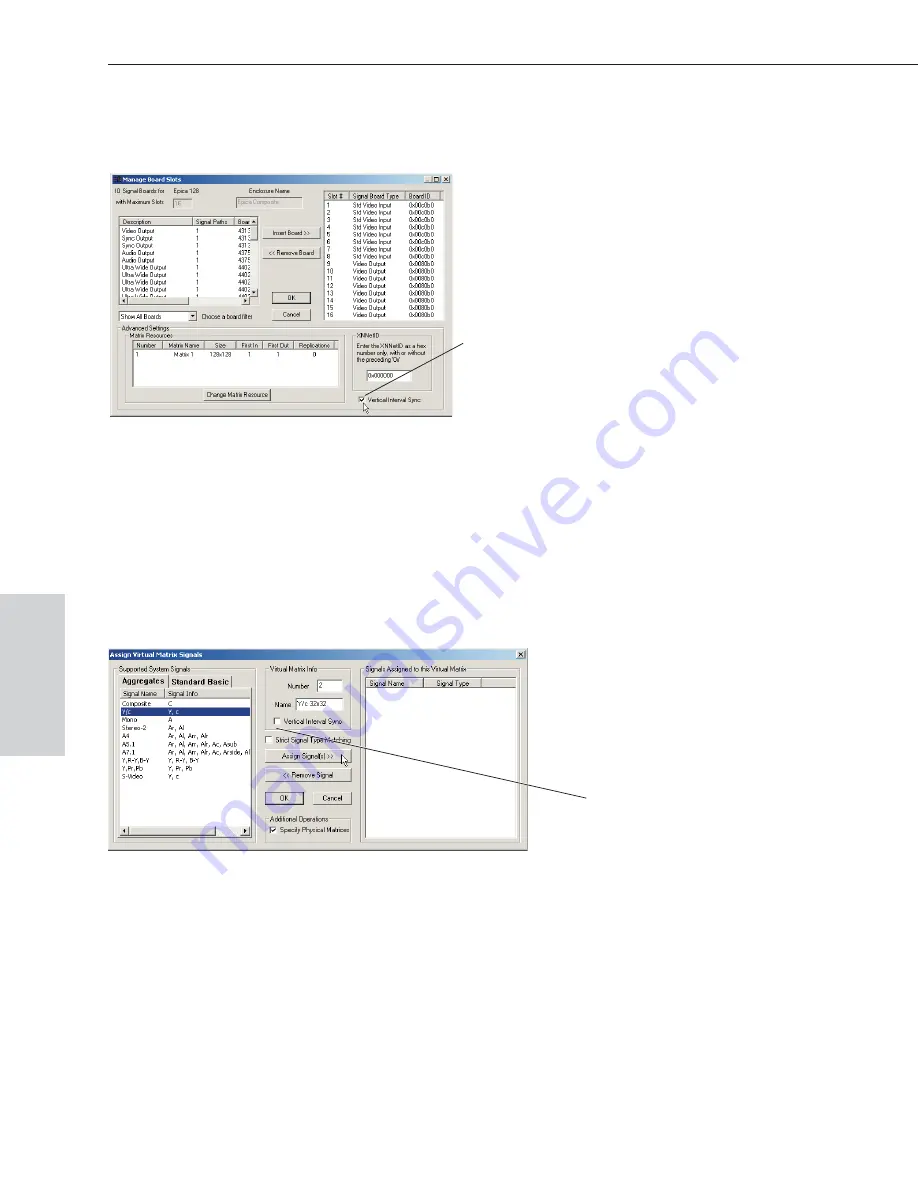
2. In the Hardware view, right click the enclosure with the VI Sync board and
select Manage Board Slots from the shortcut menu.
3. Check the Vertical Interval Sync box to assign the board to an enclosure.
Click OK.
4. Repeat Steps 2 and 3 for all enclosures with a VI Sync board.
5. In the Virtual Matrix view, right click the first video virtual matrix that
participates in the vertical sync and select Assign Signals from the shortcut
menu.
The Assign Virtual Matrix Signals dialog box opens.
6. Check the Vertical Interval Sync check box to assign the VI Sync board to
the virtual matrix. Click OK. Click OK to close the next window.
7. Repeat Steps 5 and 6 for all remaining video virtual matrices that contain
signals that need to be synchronized.
8. Connect the enclosure to a PC via the serial ports and load the configuration
file using the Configure All option
A-6
Epica-128 & Epica-256 Installation & Setup
Enabling Vertical Interval Sync
Vertical Interval Sync
Vertical Interval Sync check box
Vert
ical
Int
e
rval
Sync


