Or
To establish external serial control for RS-422:
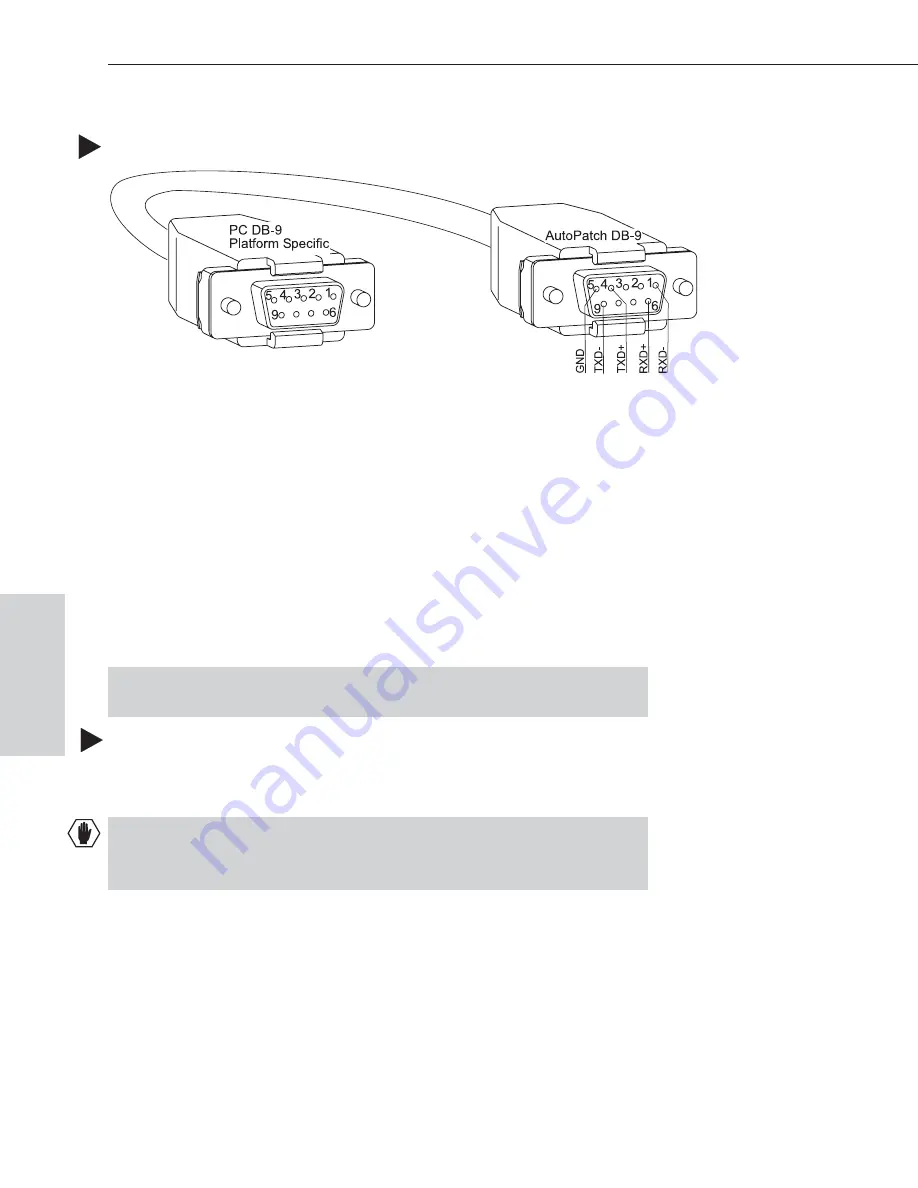
Use a cable that matches the pin diagram in Figure 12 for RS-422. To enable
the RS-422 option, use X
N
Connect. Establish a serial connection with a PC
using Serial Port 1 (see previous page). Install and open XNConnect. In the
Hardware view, right-click on the icon for Serial Port 2 and select Change
Settings. On the Modify Serial Port drop-down menu under Mode, select
RS-422 Character (unless directed by Technical Support to use RS-422
Block). After changing the Mode setting, click Download. Click OK. Then
plug one end of the RS-422 serial cable into Serial Port 2 (DB-9) on the
enclosure (see Figure 11), and the other end into the RS-422 port on the
control device.
Important:
After a serial port is configured for RS-422 cable,
do not
attach an
RS-232 cable without first reconfiguring the port in X
N
Connect.
To complete establishing external serial control:
2. If not already on, apply power first to the Epica enclosure and then to the
source and destination devices (see Chapter 6, “Applying Power & Startup”).
Caution:
To avoid system damage, follow the power-up sequence on page 6-1.
We recommend attaching
all
power cords to a surge protector and/or an
AC line conditioner.
3. Set up and run the desired method of control:
NetLinx
®
or Duet compatible devices – see specific device documentation.
APControl 3.0 – install and open the program (located on the
AMX
AutoPatch CD
). Follow the setup wizard, which will discover the system’s
configuration information and open the APControl Launchbar.
Terminal emulation – Open the program, select the COM port, and check
that the settings match those in the Epica Serial Port Settings table
4-4
Epica-128 & Epica-256 Installation & Setup
Attaching External Controllers
Ext
e
rnal
Cont
rol
Figure 12: RS-422 pin diagram


