Section 7 — Maintenance • 41
Notice
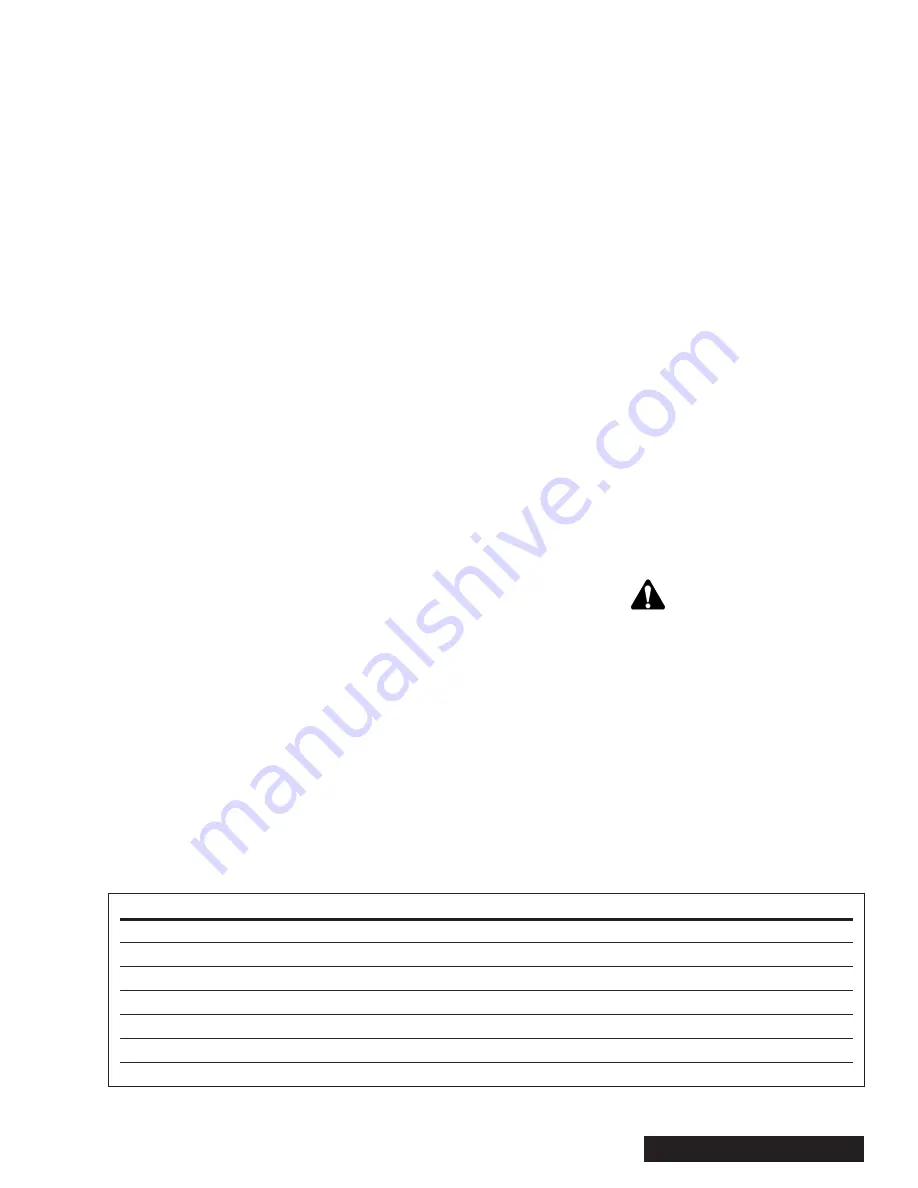
Change the oil if the sample has any of the charac-
teristics listed in Figure 7.1.
If making a visual inspection, compare the sample of oil
to a sample of new oil of the same type. Also, compare
it to previous samples taken from the same unit. Look for
the signs of oil deterioration listed in Figure 7.1.
There are fluid contamination detector kits available
which allow for rapid, on-the-spot analysis of the hydraulic
system’s condition. Contact your Altec representative for
further information.
Oxidation produces varnishes that bake onto hot sur
-
faces. Oxidation products are acidic and tend to attack
metal surfaces. This can damage pumps, motors, and
valves. High operating temperatures will increase the
rate of oxidation of the oil. The presence of water or air
in hydraulic oil also causes oxidation.
The presence of water may cause rust and corrosion. If
laboratory analysis or visual inspection indicate that the
oil is deteriorating prematurely, determine the cause of
the problem and correct it.
Changing Oil and Flushing the System
A properly maintained filtration system greatly extends
the useful life of the hydraulic oil. However, the oil will
eventually need to be replaced due to contaminants that
form during normal operation of the unit.
It is impossible to recommend an exact time interval for
oil changes due to varying conditions of unit use. Use
the following guidelines to determine when the hydraulic
oil should be changed.
• Change the oil as recommended by the checklists
in the Appendix.
• If a hydraulic component fails and contaminates the
system with metallic particles, change the component
and the oil immediately.
• In climates with a wide variation in operating tempera
-
tures between summer and winter months, change
to the appropriate weight oil each spring and fall.
Replace the return line filter cartridge and filler breather
cap every time the hydraulic oil is changed. Also, clean
or replace the suction filter.
A significant quantity of oil remains in the hydraulic system
when the reservoir is drained. Flush the system when the
oil is changed. This is especially important if the system
is heavily contaminated with metal particles.
If the oil is contaminated with water, it may not be neces-
sary to change the oil and flush the system. Follow the
instructions under Water Removal in this section.
The following equipment and supplies are necessary to
properly flush the hydraulic system.
• Approximately 13 gallons (49 l) of proper hydraulic
oil
• Three return line filter cartridges
• Clean, lint-free rags
• Breather (if component has not been replaced
within one year)
Caution
Spilled hydraulic oil creates slick surfaces and can
cause personnel to slip and/or fall. Keep the unit and
work areas clean.
Use the following procedure to flush the hydraulic sys
-
tem.
1. If the oil is being changed because of contamination
due to hydraulic component failure, proceed to step
2. Otherwise, operate the unit to circulate the oil and
warm it to operating temperature. This will allow many
of the impurities to drain off in suspension.
2. Drain the oil reservoir completely.
Figure 7.1 — Hydraulic Oil Conditions
Condition
Possible Cause
Dark color
Oxidation; contamination
Cloudiness or milky appearance
Presence of water or wax
Rancid or burned odor
Oxidation
Increase in viscosity
Oxidation; addition of improper fluids; presence of water
Decrease in viscosity
Addition of improper fluids; additive deterioration
Separation of water or other fluids from the oil
Presence of water; addition of improper fluids
Foreign particles or other visible contamination
Contamination; emulsion of water with oil additives
Summary of Contents for DRM 12
Page 3: ......
Page 7: ...2 Section 1 Introduction...
Page 17: ...12 Section 3 Safety Rear View Top View Bottom View 12 5 22 19 10 23 10 17 30 20 3 2 30...
Page 18: ...Section 3 Safety 13 4 8 7 2 3 970116658 1 6 5...
Page 19: ...14 Section 3 Safety 970116649 970116652 12 14 13 10 11 9...
Page 21: ...16 Section 3 Safety D G G D 25 26 24 27 23 22...
Page 22: ...Section 3 Safety 17 970137595 3X 30 31 28 29...
Page 23: ...18 Section 3 Safety...
Page 41: ...36 Section 6 Care of the Unit...
Page 62: ...Appendix...
Page 63: ......
Page 79: ...16 Appendix Glossary...
Page 83: ...Appendix Daily Preoperational Checklist...
Page 85: ...Appendix Preventive Maintenance and Inspection Checklist...
Page 88: ......
Page 89: ......
Page 91: ......
Page 93: ......
Page 96: ...07 13 970413443 A 2A PAGE 1 OF 2 ASSEMBLY FEED SYSTEM HYDRAULIC LIFT DRM 12...
Page 99: ...07 13 970413407 A 3A PAGE 1 OF 4 ASSEMBLY FEED CONTROL HYDRAULIC LIFT DRM 12...
Page 103: ...08 13 970485929 A 4A PAGE 1 OF 3 ASSEMBLY HAND CRANK CHUTE ROTATION DRUM CHIPPER...
Page 108: ...07 13 970413409 A 5A PAGE 1 OF 3 ASSEMBLY POWER SYSTEM KUBOTA 67 HP 74 HP 99 HP DIESEL DRM 12...
Page 113: ...07 13 970413438 A 6A PAGE 1 OF 4 FINAL ASSEMBLY DRM 12...
Page 117: ......
Page 118: ......
Page 119: ......
Page 120: ......
Page 121: ......
Page 122: ......
Page 123: ......
Page 124: ......
Page 125: ......
Page 127: ......
Page 128: ......
Page 129: ......
Page 138: ...79A PAGE 1 OF 3 05 13 970457633 A ASSEMBLY FUEL SYSTEM DRM12 CFD1217...


