Configuring the Scanner or Bridge
4-3
3.
In the list, select the EtherNet/IP scanner or bridge used by your
controller and then select the major revision of its firmware in the
Major Revision box. In this example (
Figure 4.3
), we use a
1756-ENBT EtherNet/IP Bridge (Series A), so the 1756-ENBT/A
option is selected.
4.
Click
OK
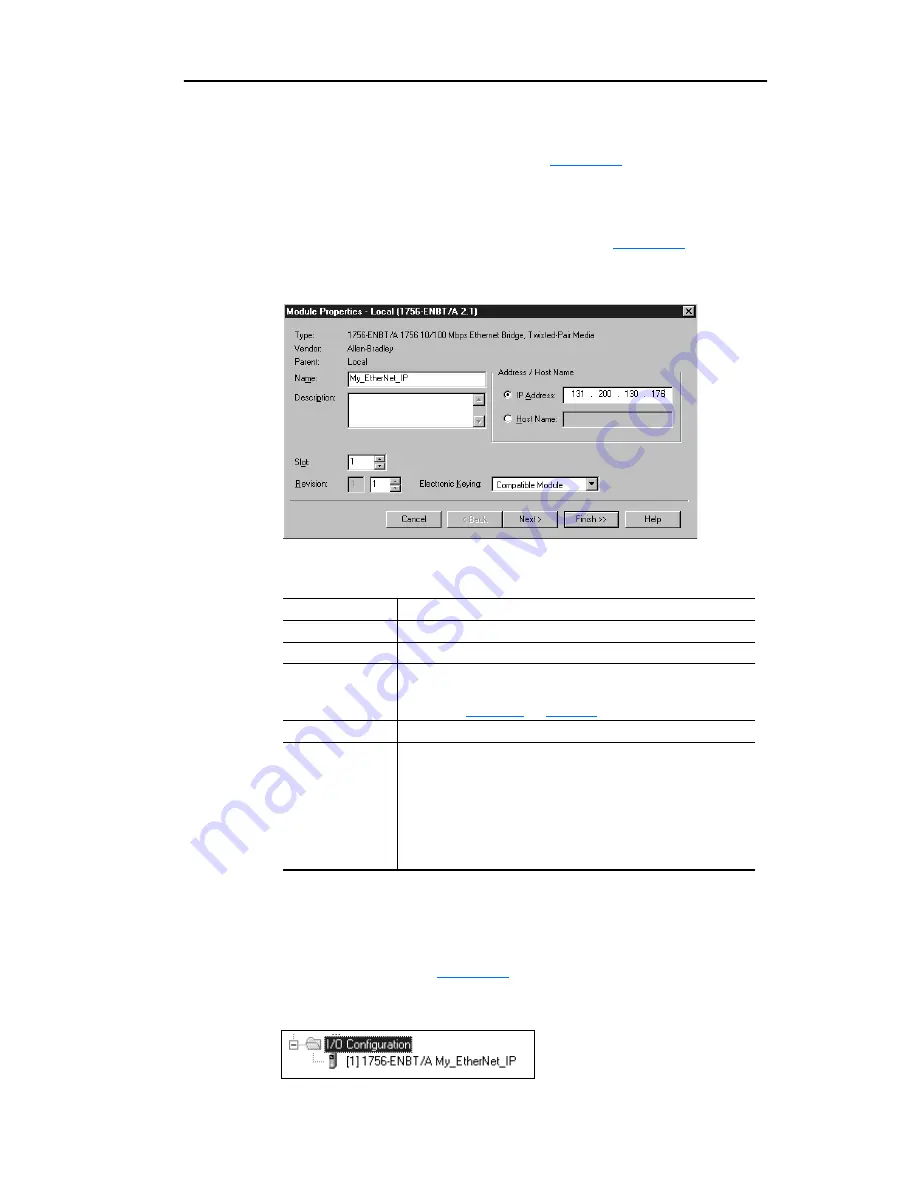
. The Module Properties dialog box (
Figure 4.4
) appears.
Figure 4.4 Module Properties Dialog Box - Page 1
5.
Edit the following:
6.
Click
Finish>>
. The scanner or bridge is now configured for the
EtherNet/IP network. It appears in the I/O Configuration folder. In
our example, a 1756-ENBT bridge appears under the I/O
Configuration folder (
Figure 4.5
).
Figure 4.5 RSLogix 5000: I/O Configuration Folder
Box
Type
Name
A name to identify the scanner or bridge.
Slot
The slot of the EtherNet/IP scanner or bridge in the rack.
Revision
The minor revision of the firmware in the scanner. (You
already set the major revision in the Select Module Type
dialog box,
Figure 4.3
on
page 4-2
.)
IP Address
The IP address of the EtherNet/IP scanner or bridge.
Electronic Keying
Compatible Module
. This setting for Electronic Keying
ensures the physical module is consistent with the software
configuration before the controller and scanner or bridge
make a connection. Therefore, ensure that you have set the
correct revision in this dialog box. Refer to the online Help if
the controller and scanner have problems making a
connection and you want to change this setting.
Summary of Contents for 22-COMM-E FRN 1.xxx
Page 1: ...EtherNet IP Adapter 22 COMM E FRN 1 xxx User Manual...
Page 4: ...S ii Summary of Changes...
Page 8: ...iv Table of Contents...
Page 12: ...P 4 About This Manual Notes...
Page 44: ...4 8 Configuring the Scanner or Bridge Notes...
Page 60: ...6 10 Using Explicit Messaging Notes...
Page 112: ...B 6 Adapter Parameters Notes...
Page 148: ...C 36 EtherNet IP Objects Notes...
Page 164: ...I 6 Index...
Page 165: ......


