Chapter 5 The HiveAP 320 Platform
78
Aerohive
Surface Mount
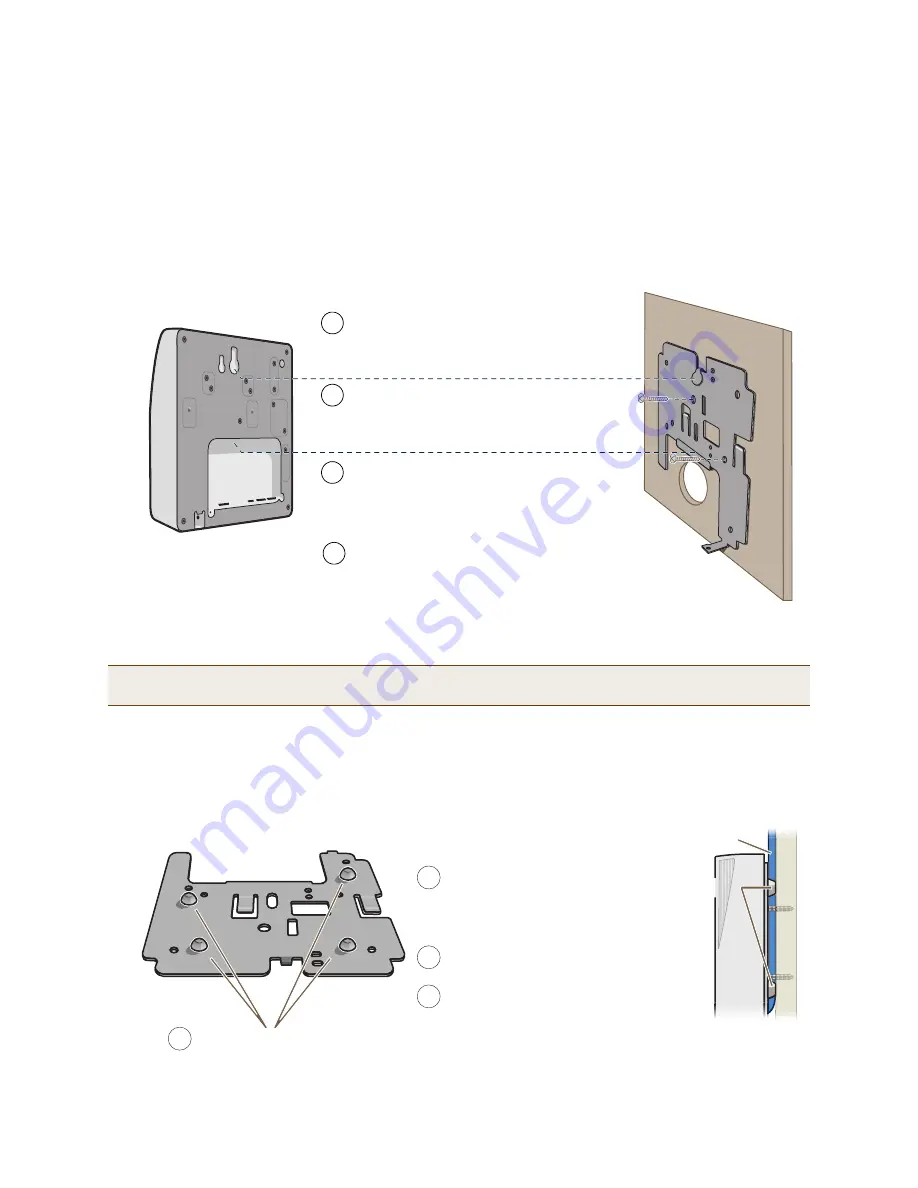
You can use the mounting plate to attach the HiveAP 320 to any surface that supports its weight, and to which you
can screw or nail the plate. First, mount the plate to the surface. Then, through the large opening in the lower part
of the plate, make a hole in the wall so that you can pass the cables through to the HiveAP.
Finally, attach the device to the plate, and connect the cables, as shown in
Figure 7
.
Figure 7
Mounting the HiveAP 320 on a wall
If you do not pass the cables through a hole, you can run them along the wall between the wall and the mounting
plate. To create space for the cables, attach the rubber feet to the mounting plate before attaching it to the wall.
The recommended positions for the four rubber feet and the mounting instructions are shown in
Figure 8
.
Figure 8
Using the rubber feet to provide clearance for cables
Note:
You can use the locking screw to secure the HiveAP 320 to the mounting plate. For information, see
"Locking the HiveAP 320" on page 77
.
Insert the tabs on the mounting plate into the
slots on the underside of the HiveAP 320.
Then push the HiveAP 320 downward to
lock it in place.
Orient the mounting plate as shown and attach
it to a secure object such as a wall, post, or
beam. Use #6 screws.
1
3
Note: There are a variety of holes through which you can screw or nail the plate in
place. Choose the two or three that best suit the object to which you are attaching it.
HiveAP 320
2
Cut or drill a hole through the large space
near the bottom of the mounting plate to
pass the cables through to the HiveAP 320.
Connect the cables to the HiveAP 320.
Depending on the deployment, you might connect
one or two Ethernet cables and a power cable.
4
(side view)
wall
Mounting
Plate
Mounting Plate
Attach the four rubber feet here.
Run all the cables between the
mounting plate and the wall before
fastening the plate in place with the
screws. The rubber feet provide
clearance for the cables to pass.
Connect the cables to the ETH0 and
ETH1 ports and power connector.
Attach the HiveAP 320 to the
mounting plate.
H
veAP
320
Cables
1
2
3
4
(side view)
Rubber Feet
Side of W
all
Summary of Contents for access point
Page 1: ...Aerohive Deployment Guide ...
Page 7: ...HiveAP Compliance Information 6 Aerohive ...
Page 13: ...Contents 12 Aerohive ...
Page 37: ...Chapter 2 The HiveAP 20 ag Platform 36 Aerohive ...
Page 71: ...Chapter 4 The HiveAP 340 Platform 70 Aerohive ...
Page 81: ...Chapter 5 The HiveAP 320 Platform 80 Aerohive ...
Page 105: ...Chapter 8 The High Capacity HiveManager Platform 104 Aerohive ...
Page 123: ...Chapter 10 Using HiveManager 122 Aerohive ...
Page 209: ...Chapter 14 Deployment Examples CLI 208 Aerohive ...


