Deployment Guide
141
E
XAMPLE
1: M
APPING
L
OCATIONS
AND
I
NSTALLING
H
IVE
AP
S
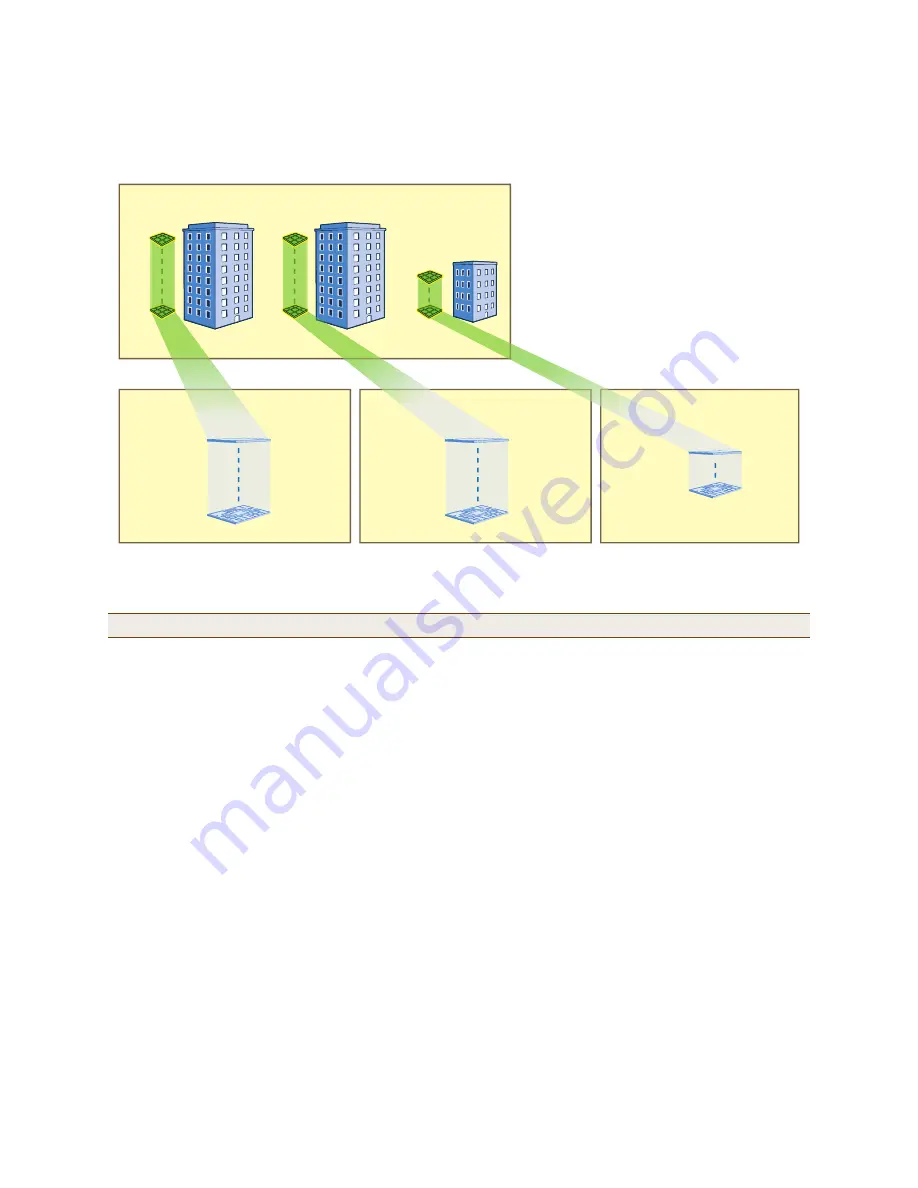
Figure 2
Organizational structure of level-1 and -2 maps
Uploading Maps
1. Log in to the HiveManager GUI as explained in
" Installing and Connecting to the HiveManager GUI" on page 109
.
2. To begin using maps, you must first set the root map, which will be at the top level of all the maps you add
under it. Click Topology, enter the following, and then click Update:
Root Map Name: CorpOffices (Note that spaces are not allowed in map level names. This will be the map at
the top of a hierarchical structure of maps. After defining this map, you can then add other maps beneath
it.)
Operational Environment: Because the CorpOffices "map" does not contain any HiveAP icons—it is an
illustration of three buildings that you use to organize the submaps of the floors in each building—the
environment setting is irrelevant. Leave it at its default, Office.
Background Image: Click Import > Upload, navigate to corp_offices.png and select it. Then choose
corp_offices.png from the Background Image drop-down list.
Map Size and HiveAP Installation Height: Because the corp_offices.png depicts buildings instead of a floor
plan, it is not necessary to specify the size of the image or the HiveAP installation height.
3. To add maps below the root map, click Topology, right-click CorpOffices, and then choose Add/Delete Image
from the pop-up menu that appears. In the Add/Delete Image window, click Upload, navigate to the directory
containing the image files that you want to upload, select up to five of them, and then click Open.
The selected image files are transferred from your management system to HiveManager as shown in
Figure 3 on
page 142
.
Note:
All image files that you upload to HiveManager must be in .png or .jpg format.
8 Maps
(one per floor)
“HQ B1 F1”
“HQ B1 F8”
8 Maps
“HQ B2 F1”
“HQ B2 F8”
4 Maps
“Branch 1 F1”
“Branch 1 F4”
Headquarters Building 1 (HQ B1) Maps
Headquarters Building 2 (HQ B2) Maps
Branch 1 Maps
CorpOffices (Level 1 Map)
This map shows 3 buildings and 20 icons that link to level 2 maps.
8 icons linking
to level 2 maps
8 icons linking
to level 2 maps
4 icons linking
to level 2 maps
Level 1
Level 2
Double-clicking a floor icon on the CorpOffices map
(level 1) opens the corresponding level-2 map.
You can also navigate to any map within the
Topology Maps section of the navigation tree in the
HiveManager GUI.
Summary of Contents for access point
Page 1: ...Aerohive Deployment Guide ...
Page 7: ...HiveAP Compliance Information 6 Aerohive ...
Page 13: ...Contents 12 Aerohive ...
Page 37: ...Chapter 2 The HiveAP 20 ag Platform 36 Aerohive ...
Page 71: ...Chapter 4 The HiveAP 340 Platform 70 Aerohive ...
Page 81: ...Chapter 5 The HiveAP 320 Platform 80 Aerohive ...
Page 105: ...Chapter 8 The High Capacity HiveManager Platform 104 Aerohive ...
Page 123: ...Chapter 10 Using HiveManager 122 Aerohive ...
Page 209: ...Chapter 14 Deployment Examples CLI 208 Aerohive ...


