


413
ADOBE PHOTOSHOP CS2
User Guide
3
Specify the scope of blending options:
•
Select Blend Interior Effects As Group to apply the blending mode of the layer to layer effects that modify opaque
pixels, such as Inner Glow, Satin, Color Overlay, and Gradient Overlay.
•
Select Blend Clipped Layers As Group to apply the blending mode of the base layer to all layers in the clipping
mask. Deselecting this option, which is always selected by default, maintains the original blending mode and
appearance of each layer in the group.
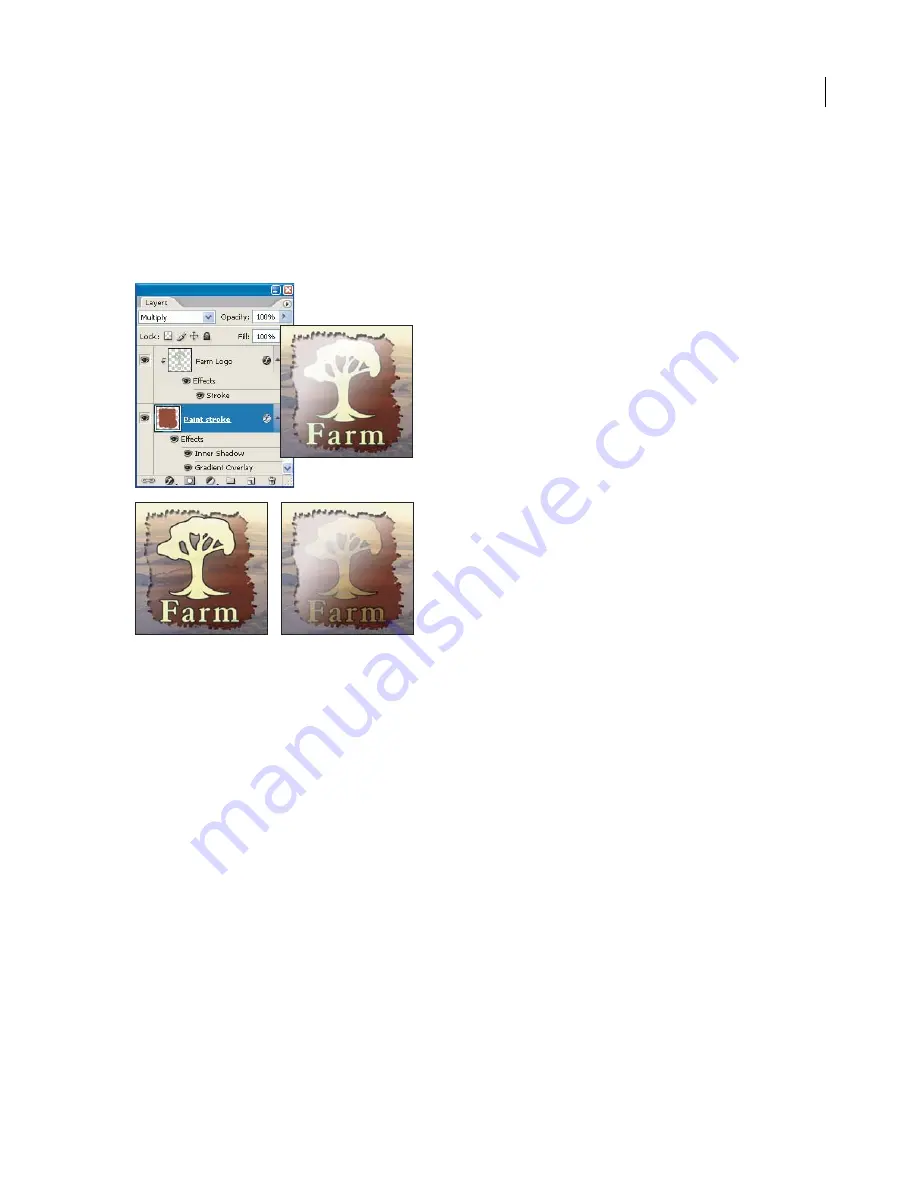
A
B
C
Advanced blending options
A.
Farm Logo and Paint Stroke layers each with its own blending mode
B.
Blend Interior Effects As Group option selected
C.
Blend Clipped
Layers As Group option selected
•
Select Transparency Shapes Layers to restrict layer effects and knockouts to opaque areas of the layer. Deselecting
this option, which is always selected by default, applies these effects throughout the layer.
•
Select Layer Mask Hides Effects to restrict layer effects to the area defined by the layer mask.
•
Select Vector Mask Hides Effects to restrict layer effects to the area defined by the vector mask.
4
Click OK.
To specify a tonal range for blending layers
The sliders in the Blending Options dialog box control which pixels from the active layer and from the underlying
visible layers appear in the final image. For example, you can drop dark pixels out of the active layer or force bright
pixels from the underlying layers to show through. You can also define a range of partially blended pixels to produce
a smooth transition between blended and unblended areas.
1
Double-click a layer thumbnail, choose Layer > Layer Style > Blending Options, or choose Add A Layer Style >
Blending Options from the Layers palette menu.
Note:
To view blending options for a text layer, choose Layer > Layer Style > Blending Options, or choose Blending
Options from the Add A Layer Style button at the bottom of the Layers palette menu.


