


455
ADOBE PHOTOSHOP CS2
User Guide
Drawing curves with the Pen tool
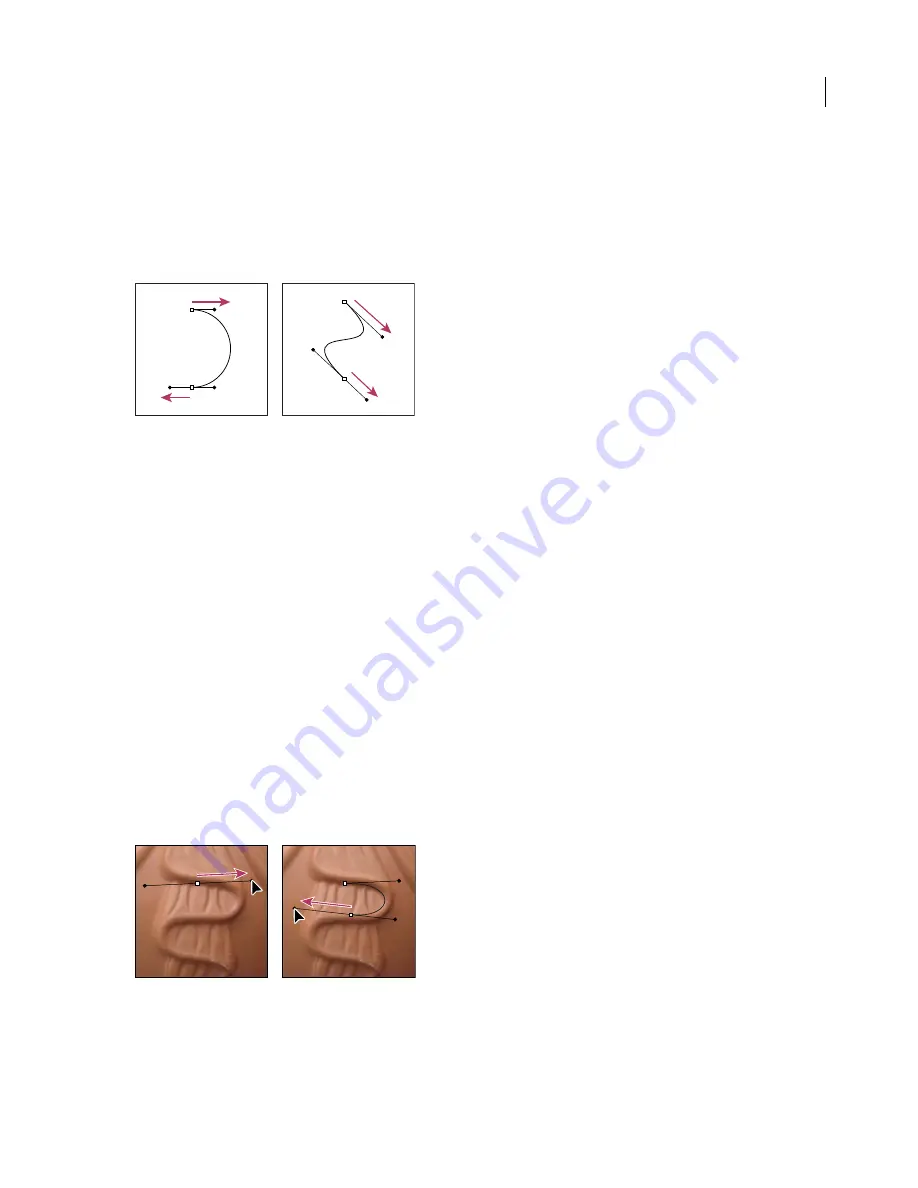
You create curves by dragging the Pen tool in the direction you want the curve to go. Keep these guidelines in mind
when drawing curves:
•
Always drag the first direction point in the direction of the bump of the curve, and drag the second direction point
in the opposite direction to create a single curve. Dragging both direction points in the same direction creates an
“S” curve.
Drag in the opposite direction to create a smooth curve. Drag in the same direction to create an “S” curve.
•
When drawing a series of smooth curves, draw one curve at a time, placing anchor points at the beginning and
end of each curve, not at the tip of the curve.
•
To decrease the file size and reduce the potential for printing errors, use as few anchor points as possible, and place
them as far apart as possible.
See also
“Path segments, components, and points” on page 460
To draw a curve
1
Position the pointer where you want the curve to begin, and hold down the mouse button. The first anchor point
appears.
2
Drag in the direction you want the curve segment to be drawn. See “Drawing curves with the Pen tool” on
page 455.
Hold down the Shift key to constrain the tool to multiples of 45˚, and release the mouse button after you position the
first direction point.
The length and slope of the direction line determine the shape of the curve segment. You can adjust one or both sides
of the direction line later.
Drag in the direction of the curve to set the first anchor point. Drag in the opposite direction to complete the curve segment.


