61
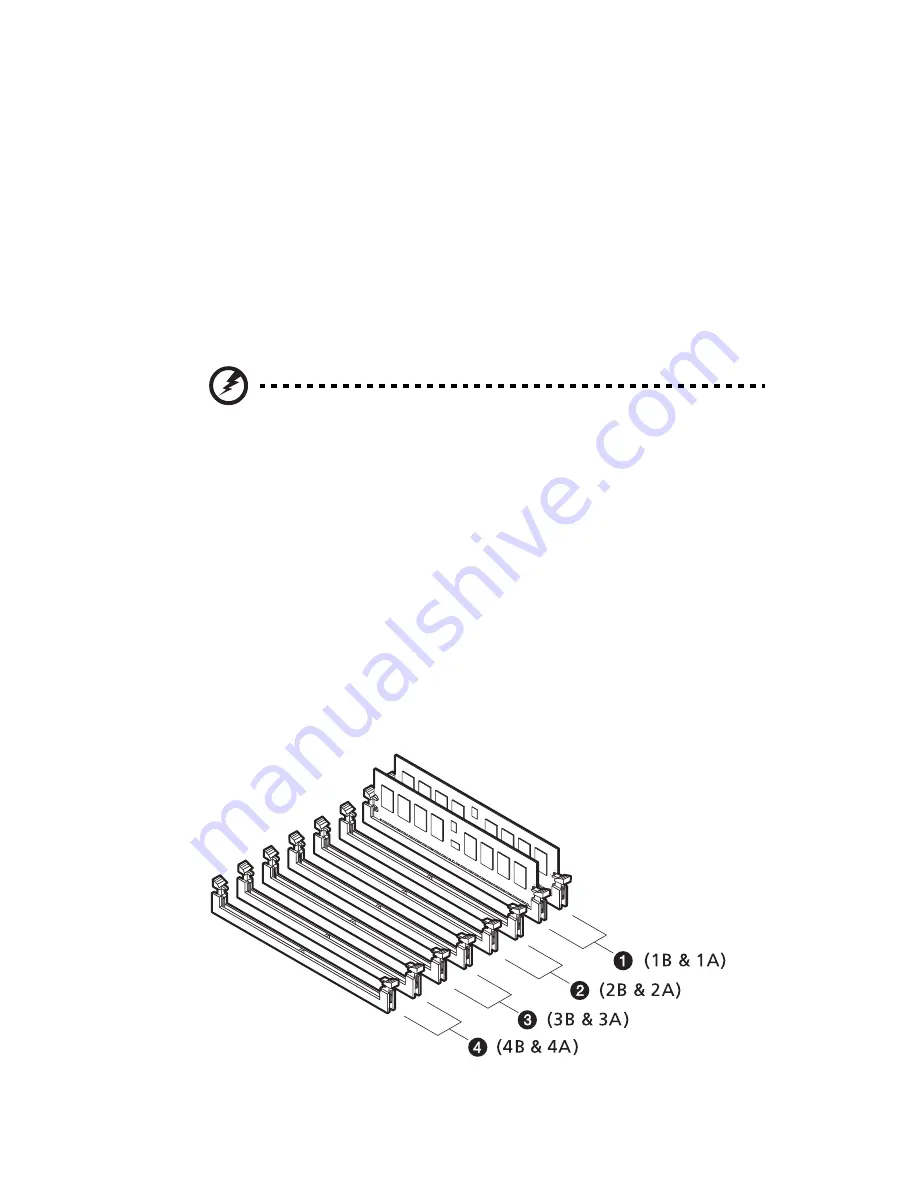
The minimum memory configuration is one DIMM, installed in DIMM
1B slot (the slot nearest to the power supply connector). However, for
optimum performance and 2-way memory interleave operation, two
DIMMs with identical size should be installed. DIMMs on memory
channel A are paired with DIMMs on memory channel B to configure 2-
way memory interleave.
Both DIMM 1B and 1A must be populated before any DIMMs are
installed. DIMM 2B and DIMM 2A must be populated in pairs.
All DIMMs installed must be identical (same manufacturer, CAS latency,
number of rows, columns and devices, timing parameters, etc.).
Warning! Functionality issues may be encountered if mixed
memory types are installed on the same mainboard. DIMM
modules of identical type, banking and stacking
technology, and manufacturer should be installed in the
Altos G710 system.
Memory configurations for the DDR2 DIMMs
The memory modules of identical type, banking, stacking and
manufacturer must be installed and removed in the following order:
•
DIMM 1B and DIMM 1A
•
DIMM 2B and DIMM 2A
•
DIMM 3B and DIMM 3A
•
DIMM 4B and DIMM 4A
Summary of Contents for Altos G710
Page 1: ...Acer Altos G710 User s Guide ...
Page 10: ...x Setting 183 Index 187 ...
Page 11: ...1 System tour ...
Page 35: ...2 System setup ...
Page 46: ...2 System setup 36 ...
Page 47: ...3 System upgrade ...
Page 69: ...59 2 Pull out the CPU from the socket 2 ...
Page 89: ...4 BIOS setup ...
Page 130: ...4 BIOS setup 120 ...
Page 131: ...5 Troubleshooting ...
Page 142: ...5 Troubleshooting 132 ...
Page 143: ...Appendix A System management ...
Page 151: ...Appendix B Acer Altos G710 rack installation guide ...
Page 152: ...This appendix shows you how to set up the Altos G710 server in a rack mount configuration ...
Page 167: ...Appendix C SCSI RAID configuration ...
Page 168: ...This appendix shows you how to create a RAID volume in your SCSI drives ...
Page 173: ...Appendix D ePanel ...
Page 196: ...Appendix D ePanel 186 ...


