


77
OUR Setup:
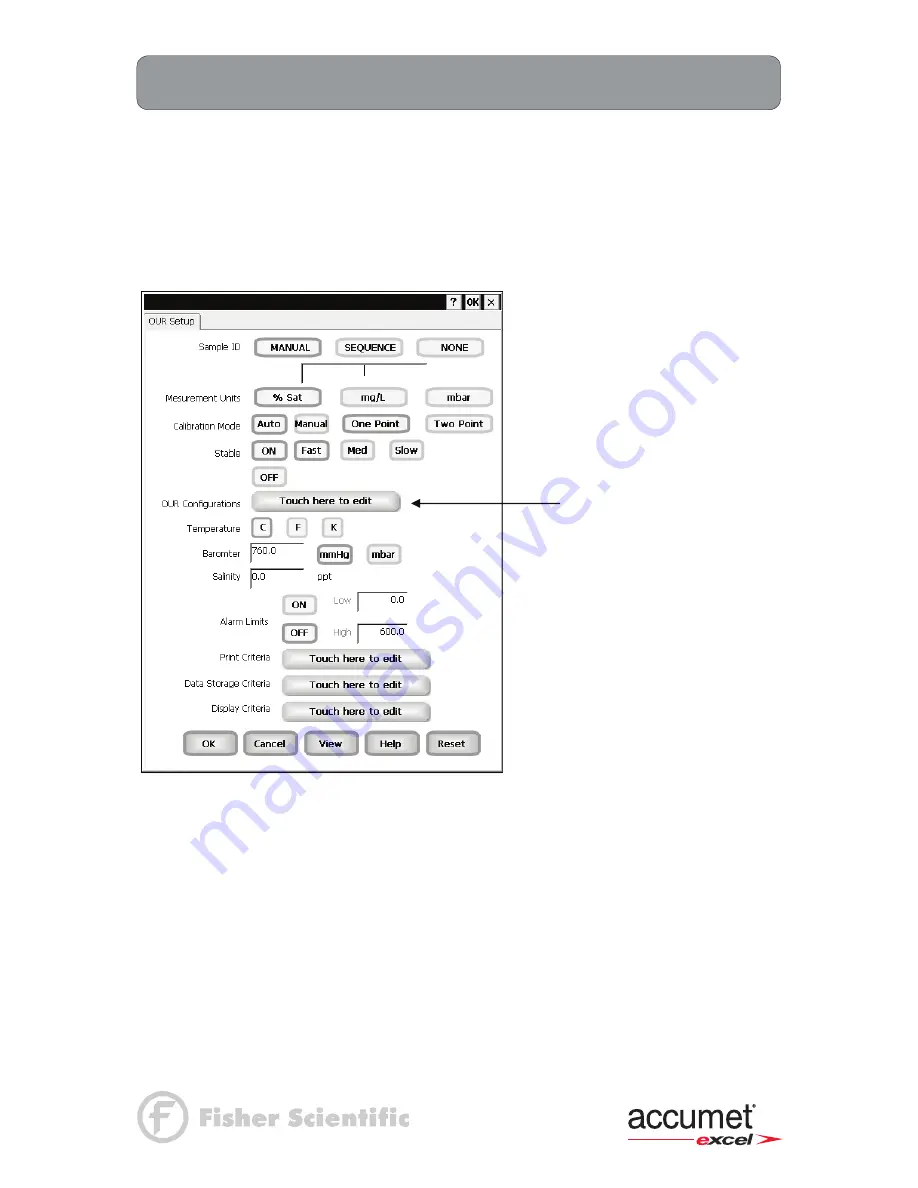
OUR Setup Screen
XL40 and 60 meters
The OUR Setup screen present many options to control the operating parameters of the meter.
The meter is factory set with regard to these options, and is ready for use under most
circumstances (see
‘
Appendix: XL Series Meters Factory Default Settings’
section for default
settings).The operating parameters of the OUR mode can be set and controlled from the OUR
setup screen. The OUR setup screens are virtually identical to the DO setup screens with
exceptions noted. The previous section on the DO Setup will guide you through the various
options available in the OUR setup mode. The main difference is the OUR has a configuration to
edit in the setup mode, see next page for details.
Function Buttons on OUR Setup Screen
Touch
OK
to confirm OUR Setup and return to the OUR Measure screen.
Touch
Cancel
to exit and return to the OUR Measure screen without confirming OUR Setup.
Touch
View
will bring up Select View dialog box. You will have the option of selecting the OUR
results or the all OUR data points stored in the memory.
When you touch the
Help
button, information about the current screen appears. This information
includes step-by-step instructions for operating the meter from the current screen and possible
applications information for that screen.
Touch
Reset
to reset all OUR Setup Criteria to the factory default.
Example: - OUR Setup screen
To set OUR Configuration
Summary of Contents for XL 20
Page 1: ......
Page 138: ...127 Ion Operation Known Addition Method XL25 50 and 60 meters...
Page 140: ...129 Ion Operation Known Subtraction Method XL25 50 and 60 meters...
Page 142: ...131 Ion Operation Analate Addition Method XL25 50 and 60 meters...
Page 144: ...133 Ion Operation Analate Subtraction Method XL25 50 and 60 meters...