


18
Using the XL Series Meter:
Setting Time and Date
XL15, 20, 25, 30, 40, 50 and 60 meters
Setting the Time
1.
From the
HOME
screen tap the bottom left of the screen to access the Start menu. Tap
Start > Settings > Control Panel
. This launches the
Control Panel
screen.
2.
Double tap
Date/Time
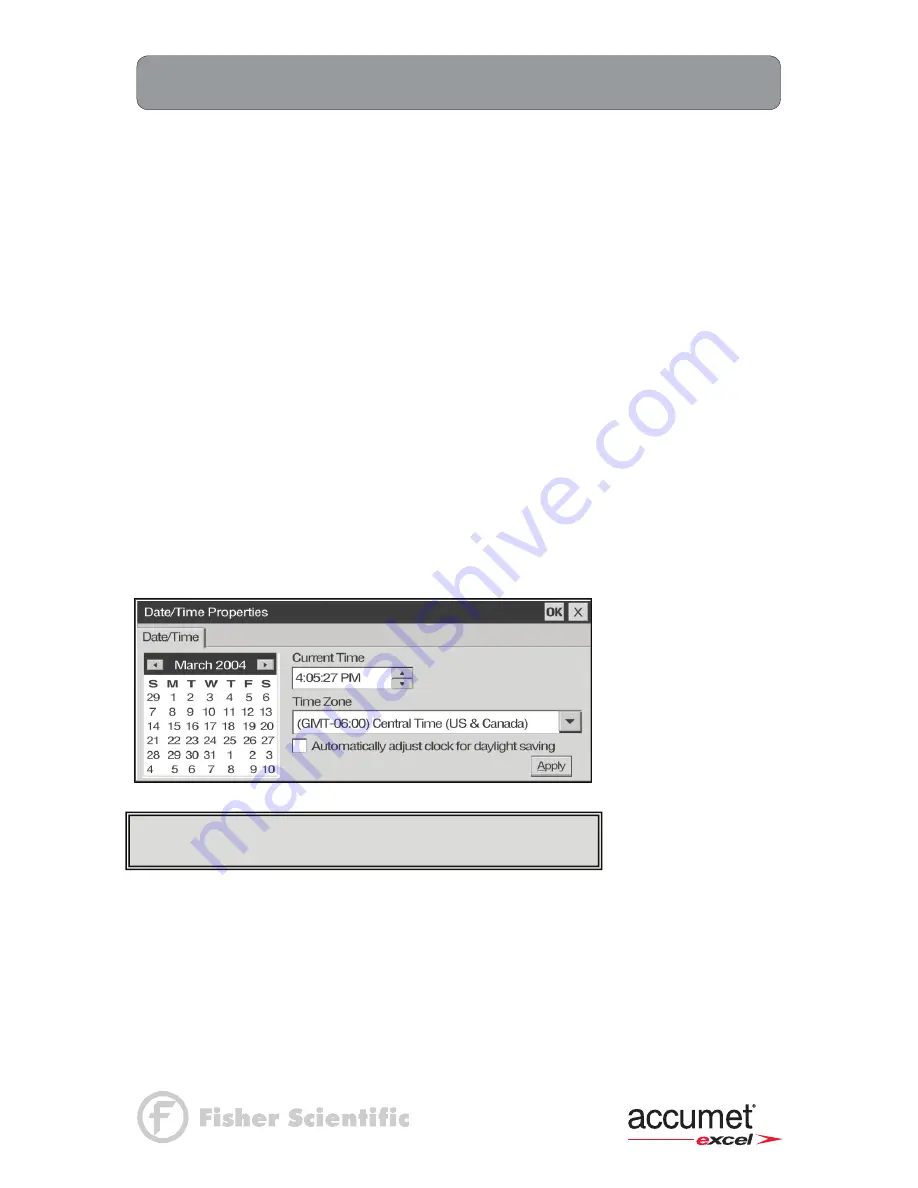
icon. This launches the
Date/Time Properties
window.
3.
Tap the time-zone down arrow, and select the appropriate time zone.
4.
Tap the hour, minutes, or seconds. Tap up and down arrows to adjust.
5.
Tap AM or PM. Use up and down arrow to select.
6.
Tap
Apply
button.
7.
Tap
OK
to save the time.
Setting the Date
1.
From the
HOME
screen tap the bottom left of the screen to access the Start menu. Tap
Start > Settings > Control Panel
. This launches the
Control Panel
screen.
2.
Double tap
Date/Time
icon. This launches the
Date/Time Properties
window.
3.
Tap the left or right arrow to select a month and year.
4.
Tap a day.
5.
Tap
Apply
button.
6.
Tap
OK
to save the time.
You need to reset your time zone, time, and date if:
• The time changes or you are traveling to a different time zone.
The time on the meter can be synchronized with your personal
computer through Microsoft
®
"Active sync".
Summary of Contents for XL 20
Page 1: ......
Page 138: ...127 Ion Operation Known Addition Method XL25 50 and 60 meters...
Page 140: ...129 Ion Operation Known Subtraction Method XL25 50 and 60 meters...
Page 142: ...131 Ion Operation Analate Addition Method XL25 50 and 60 meters...
Page 144: ...133 Ion Operation Analate Subtraction Method XL25 50 and 60 meters...