Solares
TM
Smart Spa Parts Manual
CD0039
11
Rev:1121
5.
Remove valve and replace with new one in same orientation as the original by ling up the short
pipe on the bottom of the valve with the hole in the manifold. (Side of valve with round base
faces center of manifold.)
6.
Replace screws and the DIN connector.
7.
Test valve and verify there are no leaks.
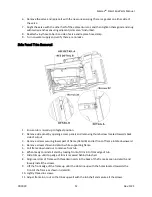
Part #8 - Series 3685 2-way, 2pos valve.
1.
Disconnect DIN cable by loosening screw on back of connector all the way and pulling connector
away from valve.
2.
Turn off hot/ cold water supply.
3.
Use touch screen to briefly open tub or shower valve to bleed pressure form lines.
4.
Remove manifold from frame per freshwater manifold replacement instructions. (Note: Valve
can be replaced without removing the manifold from the frame; however,
it’s
difficult to align
both the gasket and the valve together properly with the manifold while fighting gravity and
trying to keep the spring from falling out.
It’s also very easy to accidently cross thread the
screws when trying to install the valve vertically. This is why it’s best to remove the manifold
before attempting a replacement of this valve.)
5.
Use 9/64 hex wrench to remove all screws securing valve.
6.
Remove valve and rubber seal underneath it from manifold.
7.
Place rubber seal from new valve in the impression on the manifold with the large stainless
plate facing up. Carefully push edges of gasket into the impression. It’s very important that
the
gasket lines up with the impression exactly.
8.
Place the spring on top of the nub coming out of the center of the stainless plate.
9.
Place the valve on top making sure that the side of the valve with the bump on its face is
pointing downward.
10.
Lightly twist the valve back and forth with slight/ increasing pressure until the valve seats
securely onto the gasket. If everything is aligned,
then the valve shouldn’t be able to rotate
freely.
11.
Replace screws to secure valve to manifold. Tighten screws down lightly following a crisscrossing
star pattern like you would when securing a wheel on a car.
12.
Once screws are lightly fastened; go around once more to snug up each screw following the
same pattern.
13.
Replace DIN connector onto valve and turn water back on.
14.
Press “Fill Tub” on water control screen to test valve for proper operation and ensure that
there’s no leaks.
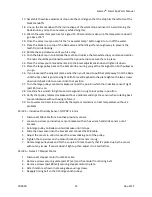
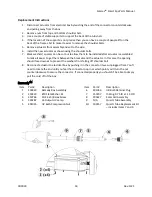
Part # 9 - Backflow W/ Air Vent; ¾ NPT
1.
Turn off hot/ cold water supply.
2.
Use touch screen to briefly open tub or shower valve to bleed pressure form lines.
3.
Use flathead screwdriver to separate teeth on hose clamp and remove it.
4.
Remove vinyl hose from port on side of backflow preventer.
5.
Use two wrenches to disconnect unions on top and bottom of valve without disturbing the joint
on the other side.


