11-4
C
HAPTER
11: D
IAL
SECURITY
WARNING:
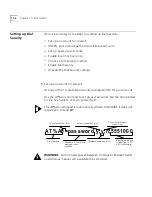
Be sure to remember your administrative password. If you
enable Dial Security and then forget your administrative password, you
will be locked out of the Courier V.Everything modem’s dial security
features. You will need to restore the factory defaults by setting DIP
switch 10 ON. This will erase ALL passwords and you will have to
reconfigure all your accounts.
3
Set up guest-user accounts.
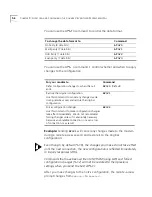
Use the AT%A
n
command to set up guest-user accounts in the same way
you set up your administrative account. You can set up nine guest
accounts. Refer to the figure in step 1 regarding information about
formatting the AT%A
n
command.
After you have enabled the guest accounts, make sure the guest users
know their passwords and the log-in procedure.
Modifying Accounts
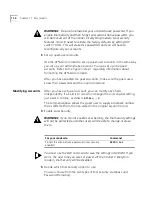
After you have set up an account, you can modify each field
independently. If a field is to remain unchanged from its original setting,
just insert a comma, as shown:
AT%A1=,,,Y,
The command above allows the guest user to supply a dialback number
that is different from the one stored in the original account record.
4
Enable Local Security.
WARNING:
If you do not enable Local Security, the Dial Security settings
will not be protected and other users will be able to change or erase
them.
You must use the &W command to save the settings in NVRAM. If you
don’t, the next time you reset or power off the Courier V.Everythin
modem, Dial Security will be disabled.
5
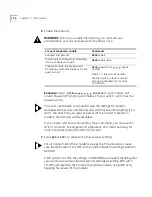
Decide which Dial Security option to use.
You can choose from the two types of Dial Security: Autopass and
Password Prompting.
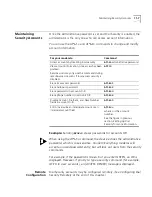
For your modem to
Command
Protect the administrative password (local security
enabled)
ATS53.2=1
Summary of Contents for Courier
Page 12: ......
Page 28: ...1 14 CHAPTER 1 CONNECTING TO YOUR ISP ...
Page 36: ...3 4 CHAPTER 3 UPGRADING YOUR MODEM ...
Page 58: ...6 6 CHAPTER 6 WORKING WITH MEMORY ...
Page 64: ...8 4 CHAPTER 8 CONTROLLING EIA 232 SIGNALING ...
Page 72: ...9 8 CHAPTER 9 ACCESSING AND CONFIGURING THE COURIER V EVERYTHING MODEM REMOTELY ...
Page 80: ...10 8 CHAPTER 10 CONTROLLING DATA RATES ...
Page 96: ...12 6 CHAPTER 12 FLOW CONTROL ...
Page 108: ...13 12 CHAPTER 13 HANDSHAKING ERROR CONTROL DATA COMPRESSION AND THROUGHPUT ...
Page 112: ...14 4 CHAPTER 14 DISPLAYING QUERYING AND HELP SCREENS ...
Page 122: ...15 10 CHAPTER 15 TESTING THE CONNECTION ...
Page 142: ...17 8 CHAPTER 17 TROUBLESHOOTING ...
Page 156: ...A 14 APPENDIX A S REGISTERS ...
Page 172: ...B 16 APPENDIX B ALPHABETIC COMMAND SUMMARY ...
Page 178: ...C 6 APPENDIX C FLOW CONTROL TEMPLATE ...
Page 186: ...E 4 APPENDIX E V 25 BIS REFERENCE ...

