


2N TELEKOMUNIKACE a.s., www.2n.cz
56/377
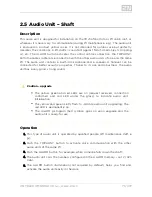
1.
2.
3.
4.
5.
Note
If external LEDs are connected to connectors 7 and 8, LED indicators 1
and 2 will not be shining.
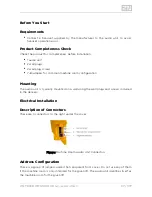
Audio Unit Location Configuration
The audio unit is configured as a cabin audio unit by default and so it is not necessary
to change the configuration. To use the audio unit in a room other than the lift cabin,
proceed as follows.
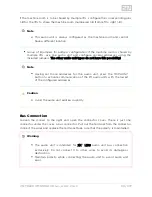
Procedure
Reconfigure the jumper on configuration jumper 12.
If there is poor access to the pins, you can remove the electronics cover. Slightly
loosen the four screws and shift the cover downwards. Now you can remove the
cover.
The first 4 pins help set the audio unit location (1 – cabin ceiling, 2 – cabin,
default, 3 – under cabin, 4 – shaft bottom, 1+ 4 – cabin 2 roof, 2+ 4 – cabin 2, 3 +
4 under cabin 2). Use the jumpers for 1–4 settings. In cabin 2 setting, set one
jumper to the shaft bottom position (4) and then select the position with the
other jumper (1 – cabin 2 roof , 2 – cabin 2, 3 – under cabin 2).
Configure the required changes as printed on the electronics cover.
If you have removed the cover, put it back in the original position and tighten the
screw.
Summary of Contents for Lift8
Page 1: ...www 2n cz 2N Lift8 Communicator for lifts User Manual Firmware Version 2 3 1 ...
Page 28: ...2N TELEKOMUNIKACE a s www 2n cz 28 377 Indication Elements ...
Page 40: ...2N TELEKOMUNIKACE a s www 2n cz 40 377 Examples of Connection ...
Page 70: ...2N TELEKOMUNIKACE a s www 2n cz 70 377 ...
Page 95: ...2N TELEKOMUNIKACE a s www 2n cz 95 377 ...
Page 136: ...2N TELEKOMUNIKACE a s www 2n cz 136 377 User name Admin Password 2n ...
Page 202: ...2N TELEKOMUNIKACE a s www 2n cz 202 377 Connection two cabin lift ...
Page 210: ...2N TELEKOMUNIKACE a s www 2n cz 210 377 ...


