|
11
PDM
PDM Operator's Manual Version 2.4a • September 2019
Basic Operation
PDM’s flexibility doesn’t get in the way of easy operation
4
. These functions are also ex-
plained graphically, starting on
page 16
.
To begin a program segment…
…press the green
BUILD
button. It will flash while the delay is building up.
Talent should start talking immediately. Depending on how your system is set up
5
, PDM
will either:
n
Build a delay by expanding: PDM will send the incoming audio to the transmitter. But
it’ll be subtly slowed down, taking more time until the delay memory is filled.
n
Build a delay by playing a station jingle, ID, or other fill material from PDM’s internal
memory.
n
Build a delay by Pre-rolling: PDM mutes its output while you play material from
another source, or while PDM signals your automation or cart replacement system to
play audio.
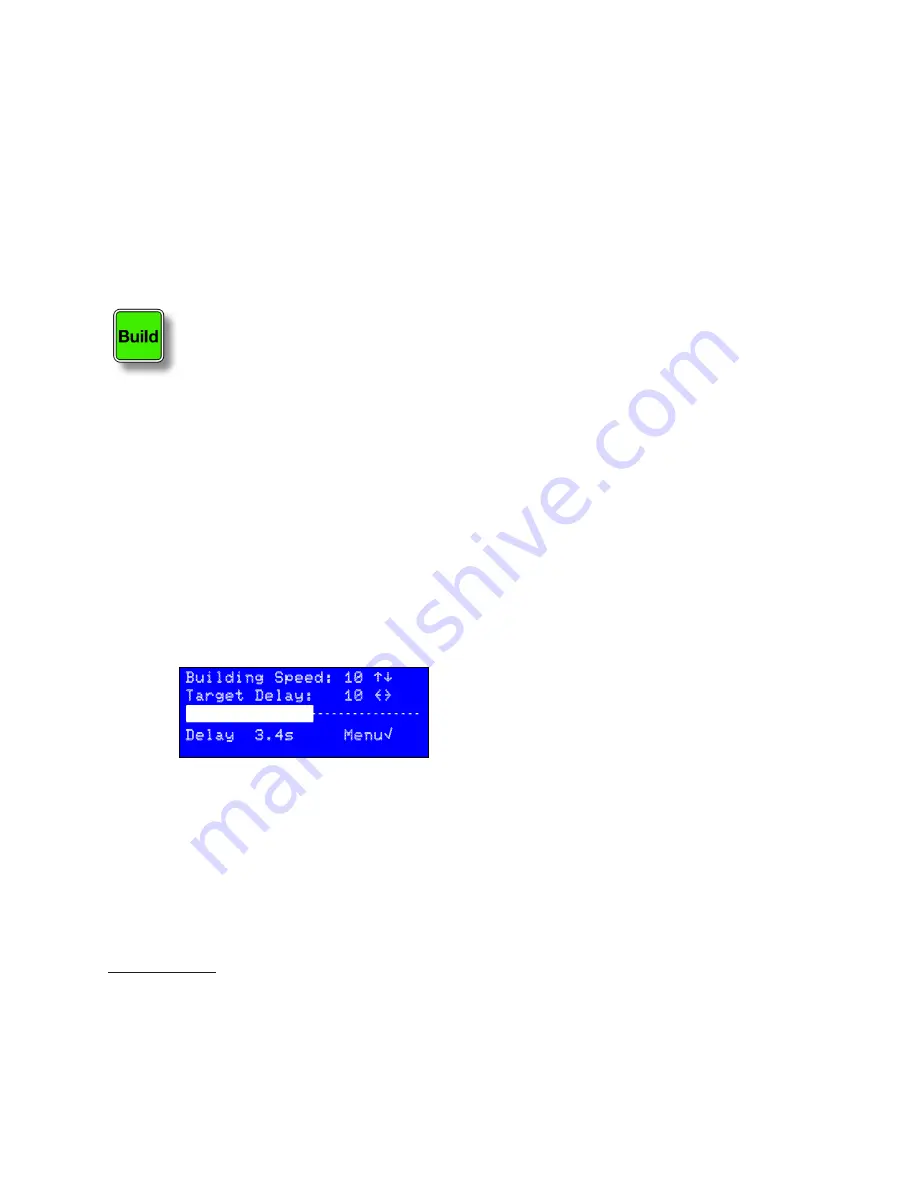
While the delay is building, the LCD will look like this:
Building Speed: 10 “‘
Target Delay: 10 {}
Delay 3.4s Menu√
The
“ ‘ { }
and
√
symbols mean you can use front panel
buttons to change parameters or access PDM’s menus.
There’s more about using the front panel buttons on
page 20.
The horizontal bar will fill, and
Delay
on the bottom line of the display will count how
many seconds of audio are in PDM’s delay memory.
As soon as there’s enough audio in memory to dump programming smoothly, the
DUMP
button will light.
The delay memory can hold more audio than is needed for a single Dump event. When
it reaches a limit you’ve previously set
1
, the
BUILD
button’s light stops flashing. The
DUMP
button remains lit.
You can choose how long PDM takes to build a delay. Choose a setting based on how
quickly your talent talks, how subtle you want the time manipulations to be (slower
speaking styles can work with higher speed settings), and how long you’re willing to
wait for the delay memory to fill.
As a general guide:
Speed setting
Minutes:seconds
to build 8-second delay
7
*
2:00
10
1:30
15
1:00
*
factory default
To dump an objectionable comment…
…tap the red
DUMP
button. PDM will eliminate the last few seconds of audio that you
heard in the control room, before it can get to the transmitter or network feed. How
many seconds get dumped depends on how PDM is set up, and on how much delay
memory it’s had a chance to store.
•
The size of each Dump event is determined when the unit is set up, but can
be changed at any time—even while you’re on the air.
•
When there’s enough audio in memory to smoothly Dump the full amount
you’ve preset, the
DUMP
button will light
1
. This starts a few seconds after you
begin a segment, or as you rebuild after an earlier Dump event.
1
You can also change this limit at any time.
There’s more about using the front panel buttons on
page 27
.
The horizontal bar will fill, and
Delay
on the bottom line of the display will count how
many seconds of audio are in PDM’s delay memory.
As soon as there’s enough audio in memory to dump programming smoothly, the
DUMP
button will light.
The delay memory can hold more audio than is needed for a single Dump event. When it
reaches a limit you’ve previously set
6
, the
BUILD
button’s light stops flashing. The
DUMP
button remains lit.
4 These examples assume a normal installation: the console program output is routed through PDM before it
goes to the transmitter or network feed; talent and producer are listening to the console’s program output, not
to the PDM’s delayed output. Other installation possibilities are covered later in this manual.
5 You can change which mode gets activated easily, at any time, from the front panel LCD or remotely from a
Web browser. See
page 29
.
6 You can also change this limit at any time.
Summary of Contents for PDM
Page 78: ......


