Chapter 17 Link Aggregation
GS1350 Series User’s Guide
159
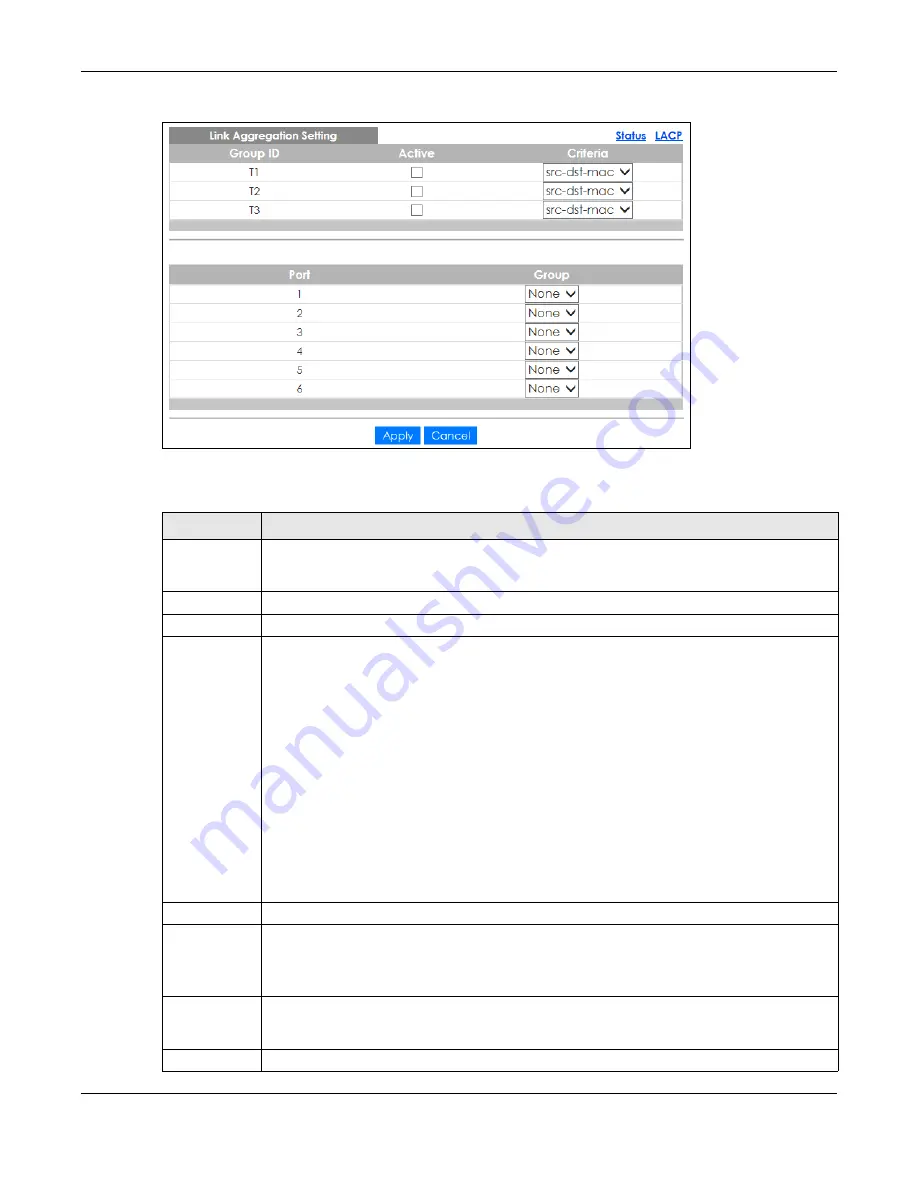
Figure 120
Advanced Application > Link Aggregation > Link Aggregation Setting
The following table describes the labels in this screen.
Table 69 Advanced Application > Link Aggregation > Link Aggregation Setting
LABEL
DESCRIPTION
Link
Aggregation
Setting
This is the only screen you need to configure to enable static link aggregation.
Group ID
The field identifies the link aggregation group, that is, one logical link containing multiple ports.
Active
Select this option to activate a trunk group.
Criteria
Select the outgoing traffic distribution type. Packets from the same source and/or to the same
destination are sent over the same link within the trunk. By default, the Switch uses the
src-dst-mac
distribution type. If the Switch is behind a router, the packet’s destination or source MAC address
will be changed. In this case, set the Switch to distribute traffic based on its IP address to make
sure port trunking can work properly.
Select
src-mac
to distribute traffic based on the packet’s source MAC address.
Select
dst-mac
to distribute traffic based on the packet’s destination MAC address.
Select
src-dst-mac
to distribute traffic based on a combination of the packet’s source and
destination MAC addresses.
Select
src-ip
to distribute traffic based on the packet’s source IP address.
Select
dst-ip
to distribute traffic based on the packet’s destination IP address.
Select
src-dst-ip
to distribute traffic based on a combination of the packet’s source and
destination IP addresses.
Port
This field displays the port number.
Group
Select the trunk group to which a port belongs.
Note: When you enable the port security feature on the Switch and configure port
security settings for a port, you cannot include the port in an active trunk group.
Apply
Click
Apply
to save your changes to the Switch’s run-time memory. The Switch loses these
changes if it is turned off or loses power, so use the
Save
link on the top navigation panel to save
your changes to the non-volatile memory when you are done configuring.
Cancel
Click
Cancel
to begin configuring this screen afresh.
Содержание GS1350 Series
Страница 19: ...19 PART I User s Guide ...
Страница 42: ...42 PART II Technical Reference ...
Страница 291: ...GS1350 Series User s Guide 291 Figure 218 Example Lock Denoting a Secure Connection EXAMPLE ...
Страница 381: ...381 PART III Troubleshooting and Appendices ...


