Roll-ZAS
http://www.zennio.com
Technical Support:
http://zennioenglish.zendesk.com
7
pressing button number 5 (labelled on the screen with the text “Prog. LED”) will be
totally equivalent to making use of the programming button (3).
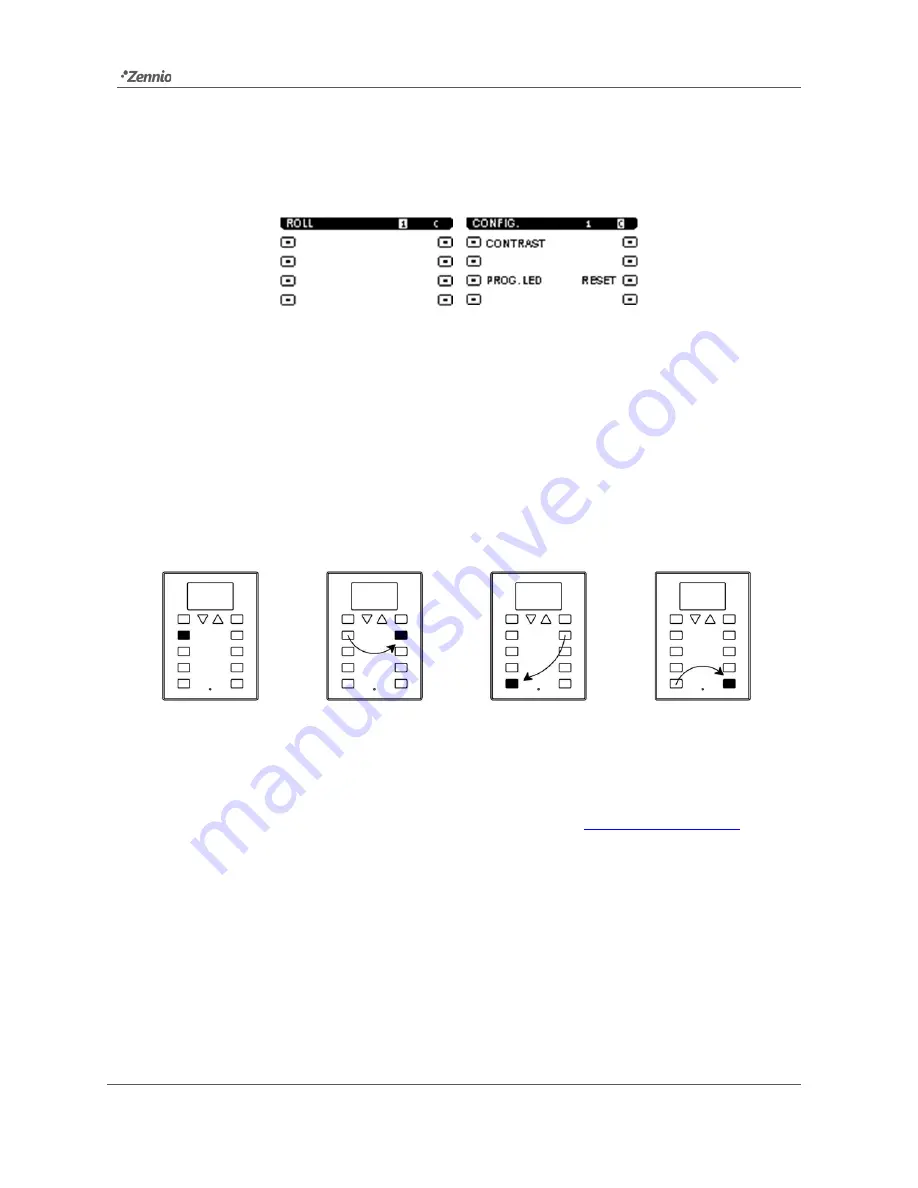
Figure 3.
Screens "1" and "C" in the Factory State
Nevertheless,
prior to accessing this default interface and also at the end of every
download of the application program
performed afterwards, it will be necessary to
calibrate
ZAS. The touch calibration is carried out by pressing buttons 1, 2, 7 and 8, in
this order (sequence shown by Figure 4). The display will show the button to be
pressed each time (only if a text string has been previously configured in ETS for this
process, under "General Labels". See section 3.2 for more details.
Figure 4
Calibration Sequence
To obtain detailed information about the technical features of ZAS, as well as on
security and installation procedures, please refer to the device Datasheet, provided
with the original packaging of the device and also available at
http://www.zennio.com
.


