Alyza IQ PO4
Commissioning
29
ba76201d03
05/2020
Mount the Alyza IQ at a suitable height so that the liquids in the return lines
(into the basin) can freely drain off at a steady slope.
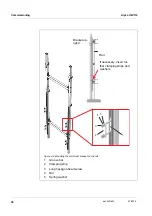
The Alyza IQ may only be fastened on a wall or fixture with the aid of the two
C-rails (housing upright).
For mounting work, only use the mounting accessories included in the scope
of delivery (screws, washers, springs, nuts). This ensures the safe fastening
at the mounting location.
Main steps
Installation of the Alyza IQ includes the following main steps:
1
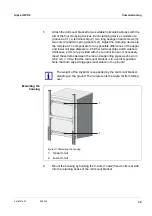
Installing the housing (see section 3.3.4 Installing the housing,
2
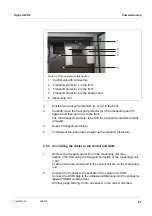
Removing the transport protection of the measuring unit (see
section 3.3.8 Removing the transport protection of the measuring unit,
42).
3
4
5
Installing the bug screen and condensate drain adapter (see
section 3.3.11 Installing the bug screen and condensate drain adapter,
45).
6
With the relevant accessories:
Mounting the terminal holder (TM) (see section 3.3.12 Mounting the ter-
minal holder (TM),
7
Mounting the collection funnel (see section 3.3.14 Mounting the collec-
tion funnel,
8
With the relevant accessories:
Installing the FM/PC filter module and M 1.5 basin holder for filtration
(see section 3.3.16 Installing the FM/PC filter module and M 1.5 basin
holder for filtration,
9
With the relevant accessories:
Connecting the power cable and heat tracing lines (see section 3.3.13
Connecting the power cable and heat tracing lines,
50).
10
Setting up a connection with the IQ S
system (see
section 3.3.18 Setting up a connection with the IQ S
69).
11
Содержание WTW Alyza IQ PO4
Страница 171: ......


