background image

Initial Setup 


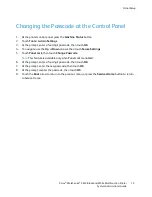
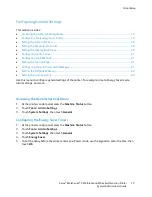
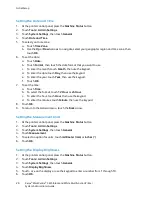
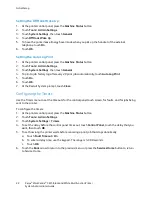
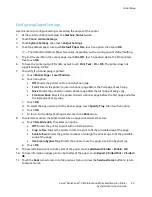
Configuring Tray Settings 

Use this menu to configure the paper trays for the paper size and type, set custom sizes, and turn the 

display prompts on and off. 
1.


At the printer control panel, press the 

Machine Status

 button. 

2.


Touch 

Tools

 > 

Tray Management

 > 

Tray Settings

3.


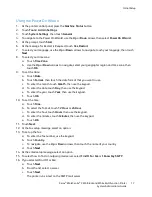
To configure the bypass tray settings: 
a.


Touch 

Bypass Tray

b.


To have the printer prompt you to set the paper type and size when paper is loaded, select 

Display Tray Prompt

c.


To use the paper size and type from the print driver, select 

Use Driver Settings for Print Job

d.


To dedicate the bypass tray for a paper size and type, clear 

Display Tray Prompt

 and 

Use 

Driver Settings for Print Job


To select a paper or envelope size, touch 

Size

, touch the 

Up

 or 

Down

 arrows to navigate, 

then touch a size. 


To select a paper type, touch 

Type

, touch the 

Up

 or 

Down

 arrows to navigate, then touch 

a paper type. 

e.


Touch 

OK

4.


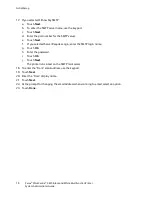
To configure a paper tray: 
a.


Touch 

Tray 1–4

b.


To have the printer prompt you to set the paper type and size when paper is loaded, select 

Display Tray Prompt


To select a paper or envelope size, touch 

Size

, touch the 

Up

 or 

Down

 arrows to navigate, 

then touch a size. 


To select a paper type, touch 

Type

, touch the 

Up

 or 

Down

 arrows to navigate, then touch 

a paper type. 

c.


Touch 

OK

5.


Touch the 

Back

 arrow to return to the previous menu, or press the 

Services Home

 button to return 

to Service Home. 


24 

Xerox

®

 WorkCentre

®

 3615 Black and White Multifunction Printer 


System Administrator Guide 


Содержание WorkCentre 3615

Страница 1: ...lack and White Multifunction Printer Imprimante multifonctions noir et blanc System Administrator Guide Guide de l administrateur syst me Espa ol Gu a del administrador del sistema Portugu s Guia de A...
Страница 2: ...Apple Bonjour EtherTalk TrueType iPad iPhone iPod iPod touch Mac and Mac OS are trademarks of Apple Inc registered in the U S and other countries AirPrint and the AirPrint logo are trademarks of Apple...

Страница 3: ...Cloning Printer Settings 26 Configuring Mail Alerts 27 Configuring System Settings 27 Configuring Clock Settings 28 Configuring Tray Settings 28 Resetting Service Defaults 29 Configuring CentreWare I...

Страница 4: ...t 62 4 Security 63 Configuring Security Settings Using CentreWare Internet Services 64 Opening the Security Menu 64 Configuring Administrative Security Settings 65 Controlling Access 65 Accessing Secu...

Страница 5: ...n CentreWare Internet Services 84 Limiting Access to Copying 85 6 Scanning 87 Setting Up Scanning 88 Scanning Setup Overview 88 Limiting Access to Scanning 88 Setting Up Scanning to a Shared Folder on...

Страница 6: ...the Control Panel 113 Using the Address Book Editor Utility 113 8 Administrator Tools 115 Setting Up the Email Address Book 116 Adding or Editing Contacts in the Email Address Book 116 Adding or Edit...

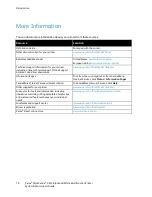
Страница 7: ...This chapter includes Overview 8 Configuration Steps 9 More Information 10 1 Introduction Xerox WorkCentre 3615 Black and White Multifunction Printer 7 System Administrator Guide...

Страница 8: ...g network user accounts Use this guide to help you configure and manage your printer on a network Notes Network features are not available when you are connected over USB Not all options listed are su...

Страница 9: ...open a Web browser then type the IP address for your printer CentreWare Internet Services is the administration and configuration software installed on the embedded Web server in the printer It allow...

Страница 10: ...es Print from the control panel or from CentreWare Internet Services click Status Information Pages CentreWare Internet Services documentation In CentreWare Internet Services click Help Order supplies...

Страница 11: ...etup at the Control Panel 14 Changing the Passcode at the Control Panel 15 Configuring General Setup Using the Control Panel 16 Configuring General Setup Using CentreWare Internet Services 25 2 Initia...

Страница 12: ...r IPv4 and IPv6 Note After the printer has been on for two minutes print the Configuration Report The TCP IP address appears in the Network section of the page If the IP address listed on the page is...

Страница 13: ...ntrol panel press the Machine Status button 2 Touch Tools Admin Settings 3 Type the passcode using the keypad 4 Touch OK Note Repeat steps 3 and 4 of the procedure to access each service that is passw...

Страница 14: ...ault settings installed options network settings including IP address and font settings Use the information on this page to help you configure network settings for your printer and to view page counts...

Страница 15: ...5 Touch Panel Lock then touch Change Passcode Note This feature is available only when Panel Lock is enabled 6 At the prompt enter a four digit passcode then touch OK 7 At the prompt enter the new pas...

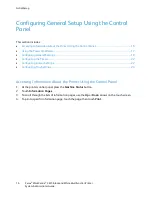
Страница 16: ...put Settings 22 Configuring Tray Settings 24 Accessing Information About the Printer Using the Control Panel 1 At the printer control panel press the Machine Status button 2 Touch Information Pages 3...

Страница 17: ...then use the keypad d To enter the date touch Day then use the keypad e To enter the year touch Year then use the keypad f Touch OK 10 To set the time a Touch Time b To select the format touch 12 Hour...

Страница 18: ...the SMTP login name g Touch OK h Enter the password i Touch OK j Touch Next The printer runs a test on the SMTP mail server 18 To enter the From email address use the keypad 19 Touch Next 20 Enter the...

Страница 19: ...eneral settings of the printer For example time to Energy Saver mode alarm settings and so on Accessing the General Settings Menu 1 At the printer control panel press the Machine Status button 2 Touch...

Страница 20: ...t the format touch 12 Hour or 24 Hour c To enter the hour touch Hour then use the keypad d To enter the minutes touch Minute then use the keypad 8 Touch OK 9 To return to the General menu touch the Ba...

Страница 21: ...le when the Device Memory option is installed 5 To specify the amount of memory to allocate to the RAM Disk file system touch Plus or Minus 6 Touch OK Setting the Startup Page 1 At the printer control...

Страница 22: ...ompt touch Close Configuring the Timers Use the Timers menu to set the timeouts for the control panel touch screen for faults and for jobs being sent to the printer To configure the timers 1 At the pr...

Страница 23: ...f every copy Front and Back Directs the printer to insert a banner page before the first page and after the last page of every copy c Touch OK d To select the tray used to print the banner page touch...

Страница 24: ...and Use Driver Settings for Print Job To select a paper or envelope size touch Size touch the Up or Down arrows to navigate then touch a size To select a paper type touch Type touch the Up or Down arr...

Страница 25: ...treWare Internet Services click Properties 3 To expand the menu in the Properties pane next to the General Setup folder click the plus symbol Viewing Printer Information 1 At your computer open a Web...

Страница 26: ...must be the same model and have the same version of firmware Note Before you copy the address book verify that the address book of the target printer is empty To clone the printer settings 1 From the...

Страница 27: ...which the printer is connected If you do not know the IP Address or DNS Name of the SMTP server click Auto Detect SMTP Server Note Before clicking Auto Detect SMTP Server to save any entries that you...

Страница 28: ...Tray Management 2 Select a bypass tray option To allow the print driver settings to specify the bypass tray mode under Tray Settings select Bypass Tray Use Driver Settings For Print Job To allow the...

Страница 29: ...ff On Printer 5 To restart the printer without resetting any of the default settings next to Power Off On the Printer click Power Off On Printer Configuring CentreWare Internet Services Display Settin...

Страница 30: ......

Страница 31: ...46 Configuring SMB 47 Configuring Bonjour 48 SNMP 49 Updating the Address Book 52 LDAP Server 53 LDAP User Mappings 54 FTP Client 55 SMB Client 56 Email Settings 57 HTTP 58 Proxy Server 59 SNTP 60 Ai...

Страница 32: ...for your router for information on IP addressing Configuring TCP IP Settings 1 At your computer open a Web browser in the address field type the IP address of the printer then press Enter or Return N...

Страница 33: ...ssigned addresses can be routed e For Link Local Address ensure that the Link Local Address that the printer has assigned to itself appears A Link Local address cannot be routed f For Gateway Address...

Страница 34: ...d is a valid address and does not start with 127 or a number from 224 through 254 A value of all zeros indicates that no server is configured If both primary and secondary name servers are undefined t...

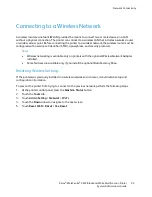
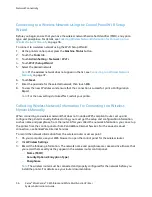
Страница 35: ...ters with the optional Wireless Network Adapter installed Some features are available only if you install the optional Data Memory Drive Resetting Wireless Settings If the printer was previously insta...

Страница 36: ...mation for Connecting to a Wireless Network Manually When connecting to a wireless network that does not include a WPS compliant router set up and configure the printer manually Before starting you mu...

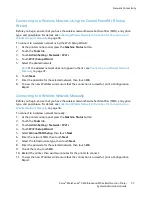
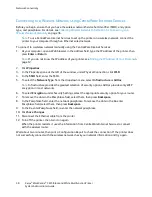
Страница 37: ...connection is successful print a Configuration Report Connecting to a Wireless Network Manually Before you begin ensure that you have the wireless network Service Set Identifier SSID encryption type a...

Страница 38: ...SSID 5 To select the Network Type from the drop down menu select Infrastructure or AdHoc Note Infrastructure provides the greatest selection of security options AdHoc provides only WEP encryption in m...

Страница 39: ...Mode to use for the connection Dual Stack Allows the router to assign IPv4 and IPv6 IP addresses as needed IPv4 Directs the router to assign an appropriate IPv4 address only IPv6 Directs the router to...

Страница 40: ...Windows Use Safari to import certificates from Macintosh 2 Configure the digital certificate Purpose for wireless LAN server or root certificate For details see Configuring the Digital Certificate Pur...

Страница 41: ...address of your printer see Finding the IP Address of Your Printer on page 12 2 Click Properties Protocols LPR 3 Select Enable LPR 4 For Connection Timeout type the amount of time to wait before the c...

Страница 42: ...2 Click Properties Protocols Port 9100 3 Select Enable Port 9100 4 For Port Number type a port number or TCP IP socket number 5 For Connection Timeout type the amount of time to wait before the conne...

Страница 43: ...er see Finding the IP Address of Your Printer on page 12 2 Click Properties Protocols IPP 3 Select Enable IPP 4 To verify the URL of the printer for Network Path view the path 5 For Connection Timeout...

Страница 44: ...Protocols WSD 3 Select Enable WSD Print or Enable WSD Scan 4 For Port Number type a port number or TCP IP socket number 5 For Data Receive Timeout type the amount of time to wait before the data recei...

Страница 45: ...er open a Web browser in the address field type the IP address of the printer then press Enter or Return Note If you do not know the IP address of your printer see Finding the IP Address of Your Print...

Страница 46: ...e address field type the IP address of the printer then press Enter or Return Note If you do not know the IP address of your printer see Finding the IP Address of Your Printer on page 12 2 Click Prope...

Страница 47: ..._ 7 For Maximum Number of Sessions verify the maximum number of connections 8 To send the host name and workgroup name in unicode characters during SMB transmission for Unicode Support select Enabled...

Страница 48: ...njour 4 For Host Name type a name The host name can include up to 63 alphanumeric characters and can include hyphens If blank multicast DNS determines the name 5 To specify a printer service name for...

Страница 49: ...printer then press Enter or Return Note If you do not know the IP address of your printer see Finding the IP Address of Your Printer on page 12 2 Click Properties Protocols SNMP 3 Select Enable SNMP...

Страница 50: ...a name 6 For up to four configurations do the following a For Trap Address Type select an option b For Trap Destination Address type an IP address IPv4 address format is x x x x where x represents a...

Страница 51: ...administrator account password The authentication password is used when sending authenticated SNMPv3 messages 5 For Privacy Password type and retype a password The privacy password is used when sendin...

Страница 52: ...or Return Note If you do not know the IP address of your printer see Finding the IP Address of Your Printer on page 12 2 Click Properties Protocols Update Address Book 3 Select Enable Update Address B...

Страница 53: ...encryption is enabled under Secure Settings Before you click the SSL link save any changes on the LDAP Server page 4 To enable LDAP SSL TLS click SSL 5 Configure the optional LDAP server information...

Страница 54: ...rowser in the address field type the IP address of the printer then press Enter or Return Note If you do not know the IP address of your printer see Finding the IP Address of Your Printer on page 12 2...

Страница 55: ...you do not know the IP address of your printer see Finding the IP Address of Your Printer on page 12 2 Click Properties Protocols FTP Client 3 For Connection Timeout type the amount of time to wait be...

Страница 56: ...b browser in the address field type the IP address of the printer then press Enter or Return Note If you do not know the IP address of your printer see Finding the IP Address of Your Printer on page 1...

Страница 57: ...save your entries click Save Changes 4 For SMTP Server enter the IP Address or DNS Name of the SMTP server If you do not know the IP Address or DNS Name of the SMTP server click Auto Detect SMTP Serv...

Страница 58: ...now the IP address of your printer see Finding the IP Address of Your Printer on page 12 2 Click Properties Protocols HTTP 3 For Port Number type the TCP IP port number used by CentreWare Internet Ser...

Страница 59: ...he IP address of your printer see Finding the IP Address of Your Printer on page 12 2 Click Properties Protocols Proxy Server 3 If your network uses a proxy server next to Use Proxy Server select Enab...

Страница 60: ...SNTP 3 Select Enable SNTP 4 For IP Address Host Name type the appropriately formatted IP address or host name for the time server 5 For Connection Timeout type the time in seconds that the printer wai...

Страница 61: ...browser in the address field type the IP address of the printer then press Enter or Return Note If you do not know the IP address of your printer see Finding the IP Address of Your Printer on page 12...

Страница 62: ...printer then press Enter or Return Note If you do not know the IP address of your printer see Finding the IP Address of Your Printer on page 12 2 Click Properties Protocols Google Cloud Print 3 Click...

Страница 63: ...ecurity Settings Using CentreWare Internet Services 64 Configuring Secure Settings Using the Control Panel 74 Managing Certificates 78 4 Security Xerox WorkCentre 3615 Black and White Multifunction Pr...

Страница 64: ...ngs 71 Configuring IPsec Settings 71 Configuring 802 1x Settings 72 Configuring SMTP Domain Filtering 73 Use security settings to configure administrative settings authentication user access and privi...

Страница 65: ...er Panel lock requires a user to enter a passcode at the control panel Network authentication requires the user to enter a user name and password that is valid for that network Note To enable Network...

Страница 66: ...py select Enable 12 To set the USB menu to pop up when a USB Flash drive is inserted for USB Services Show USB Pop Up Menu select Enable 13 To select when the USB Memory appears for USB Services Displ...

Страница 67: ...they can access the printer The printer compares the user credentials to the information stored on an authentication server To prove their identity users can type their user credentials at the contro...

Страница 68: ...rox Secure Access Server setting If prompted to set these fields manually you can set the IP Address Host Name and Path fields as specified in your authentication server documentation 4 For IP Address...

Страница 69: ...for homeDirectory when the user account is created 5 Click Save Changes Configuring the Authentication System 1 At your computer open a Web browser in the address field type the IP address of the pri...

Страница 70: ...s menu click Kerberos Windows 7 Click Kerberos Server 8 For IP Address Host Name and Port type the IP address or the network host name for the Kerberos server then enter the port number 9 For Domain N...

Страница 71: ...n is still used for your connection over HTTP even if LDAP is not encrypted 6 For SMTP SSL TLS Communication select an option STARTTLS if Available This option scans for STARTTLS compatibility and if...

Страница 72: ...er as X X X X P where X is a number from 0 through 255 14 For Specify Destination IPv6 Address enter the IP address and port exactly as it appears for the destination server 15 To specify how the prin...

Страница 73: ...ies 3 In the Properties pane to expand the menu click the plus symbol next to the Security folder 4 Click SMTP Domain Filtering 5 To enable domain filtering next to Domain Filtering select Allow Domai...

Страница 74: ...he Machine Status button 2 Touch Tools Admin Settings 3 Use the Up or Down arrows to navigate then touch Secure Settings Managing Panel Lock The Panel Lock password limits access to the Admin menu To...

Страница 75: ...t be enabled before setting the service locks To set the service locks 1 From the Secure Settings menu to navigate to the menu with the service listed use the Up or Down arrows 2 Touch a service name...

Страница 76: ...the prompt touch Yes Delete 7 To change the encryption key for Device Memory Data encryption touch Encryption Key then enter the passphrase At the prompt touch Yes Delete 8 Touch the Back arrow to ret...

Страница 77: ...ress or host name to appear on the control panel screen or to hide the network information touch Display Network Information Touch an option then touch OK 6 To configure the Device Memory Data Encrypt...

Страница 78: ...nabled To use these settings enable data encryption and set up an encryption key Note All stored data is deleted after you change the Data Encryption Settings To configure the Data Encryption Settings...

Страница 79: ...igned certificate Certificate Management appears in the Security menu Importing a Digital Certificate 1 At your computer open a Web browser in the address field type the IP address of the printer then...

Страница 80: ...urpose 1 At your computer open a Web browser in the address field type the IP address of the printer then press Enter or Return 2 Click Properties 3 In the left navigation panel scroll to Security the...

Страница 81: ...This chapter includes Changing the Default Copy Settings 82 Limiting Access to Copying 85 5 Copying Xerox WorkCentre 3615 Black and White Multifunction Printer 81 System Administrator Guide...

Страница 82: ...ividual job You can modify the default copy settings To change the default copy settings 1 At the printer control panel press the Machine Status button 2 Touch the Tools tab 3 Touch Service Defaults 4...

Страница 83: ...ntage to reduce or enlarge copies a For Reduce Enlarge select Custom b For Custom Reduce Enlarge type a percentage 7 To specify the size of the original document for Original Size select an option 8 T...

Страница 84: ...d copy options for 2 Sided Copying select an option 4 To rotate the image on side 2 by 180 degrees for Rotate Side 2 select On 5 To copy a single page multiple times onto one or both sides of the pape...

Страница 85: ...s to copying by requiring a passcode or a user name and password to use the Copy function You can also turn off copying For details about limiting access see Security on page 63 Xerox WorkCentre 3615...

Страница 86: ......

Страница 87: ...This chapter includes Setting Up Scanning 88 Changing the Default Scan Settings 96 6 Scanning Xerox WorkCentre 3615 Black and White Multifunction Printer 87 System Administrator Guide...

Страница 88: ...To scan to an FTP server on the FTP server set the correct folder permissions then add the FTP server to the Address Book in CentreWare Internet Services To scan to an email address in CentreWare Inte...

Страница 89: ...emory option Print from USB Limits the ability to print from a USB Flash drive that is inserted in the printer ID Card Copy Limits the ability of copying ID cards front and back USB Services Restricts...

Страница 90: ...and verify that all permissions are enabled 7 Click OK Note Remember the Share name for later use 8 Click OK again 9 Click Close Sharing a Folder Using Macintosh OS X Version 10 5 and Later 1 From the...

Страница 91: ...ord Re enter Password Enter your login password again Name of Shared Directory Enter a name for the directory or folder For example if you want the scanned files to go in a folder named scans type sca...

Страница 92: ...ur network with read and write access privileges Scanning to a Home Directory Note If LDAP Network Authentication is configured Home appears as an option on the Scan To screen 1 Load the original on t...

Страница 93: ...n name for the FTP server 10 Type and confirm the password for the FTP server 11 For Name of Shared Directory type the name of the destination folder on the FTP server For example to save scanned file...

Страница 94: ...eature is not used select No Authentication Note When you select SMTP AUTH Auto the printer automatically supports Plain Login CRAM MD5 SMTP AUTH Auto works for most SMTP servers 8 To verify the statu...

Страница 95: ...ons Xerox 2 Select your printer from the list 3 Double click Express Scan Manager 4 To accept the default Destination Path folder click OK 5 To navigate to another folder click Browse 6 Press OK Xerox...

Страница 96: ...Changing the Default for Quality File Size 98 Changing File Name 98 Creating a Folder 98 Changing the Default Scanning Settings in CentreWare Internet Services 98 The printer uses the default scan set...

Страница 97: ...Original Size 1 Touch Original Size 2 Touch the document size 3 Touch OK Changing the Default for 2 Sided Scanning 1 Touch 2 Sided Scanning 2 Touch to print 1 sided or 2 sided copies by default 3 If y...

Страница 98: ...ging the Default for TIFF File Format Note TIFF files created by this printer can fail to open properly in some computer applications 1 Touch TIFF File Format then select an option 2 Touch OK Changing...

Страница 99: ...for Lighten Darken select an option 10 To specify the sharpness of the scanned image for Sharpness select an option 11 To specify the contrast of the scanned image for Contrast select an option 12 To...

Страница 100: ......

Страница 101: ...This chapter includes Configuring Fax Defaults and Settings 102 Editing the Fax Address Book 112 7 Faxing Xerox WorkCentre 3615 Black and White Multifunction Printer 101 System Administrator Guide...

Страница 102: ...m margin of each transmitted page Identity of the business or individual sending the fax Telephone number of the sending machine Date and time of the transmission Proper configuration of the fax requi...

Страница 103: ...x transmissions for Resolution select an option 4 For 2 Sided Scanning select 1 Sided or 2 Sided 5 To have side 2 of the transmitted fax pages rotated to flip on the long edge for Rotate Side 2 select...

Страница 104: ...an option 6 In the Incoming Defaults section enter information a To specify the Receive Mode select an option b To specify the Ring Tone Volume select an option c To specify how long the printer waits...

Страница 105: ...or the Forward to Email and Print and Email functions to operate configure the Email Settings with a valid SMTP server To forward incoming faxes to a server select Forward to Server To print incoming...

Страница 106: ...n To print a report of the transmission results after sending a fax to multiple destinations for Fax Broadcast select an option To print a fax protocol report to help troubleshoot fax problems for Fax...

Страница 107: ...is Required message to save the settings and restart the printer click Yes Save Note If you are setting up fax for the first time to view the remaining menu items restart the printer 6 At the printer...

Страница 108: ...s a Touch Junk Filter then touch On b Touch OK c At the Restart System prompt touch Close d To return to the previous menu touch the Back arrow 8 To configure Secure Receive see Security on page 63 9...

Страница 109: ...the received documents do not match the printer sheets a Touch Discard Size b To have the printer print oversized faxes on two sheets of paper select Off c To have the printer reduce the size of the i...

Страница 110: ...tempts a Touch Redial Interval then enter a number from 1 15 for the delay in minutes b Touch OK c At the Restart System prompt touch Close 7 To change the interval between resend attempts a Touch Int...

Страница 111: ...previous menu or press the Services Home button to return to Service Home Configuring Fax Reports from the Control Panel 1 At the printer control panel press the Machine Status button 2 Touch Tools A...

Страница 112: ...Web browser in the address field type the IP address of the printer then press Enter or Return 2 Click Address Book 3 Under Fax click Fax Address Book 4 To add or edit a contact next to the contact c...

Страница 113: ...2 Touch Tools Admin Settings Fax Address Book Groups 3 To add a group touch an unused group then touch Edit To edit a group touch an existing group then touch Edit 4 Touch Enter Group Name type a name...

Страница 114: ......

Страница 115: ...Setting Up the Email Address Book 116 Configuring Smart eSolutions 117 Assigning the Printer IP Address 121 8 Administrator Tools Xerox WorkCentre 3615 Black and White Multifunction Printer 115 Syste...

Страница 116: ...ick Add or Edit 5 Type a name and email address 6 Click Save Changes Adding or Editing Groups in the Email Address Book 1 At your computer open a Web browser in the address field type the IP address o...

Страница 117: ...atically counts all metered impressions printed on network printers then submits them to Xerox This process eliminates the need to collect and report meter read information manually SuppliesAssistant...

Страница 118: ...ext to Server Name type the name for the proxy server 9 Next to Port Number type the port number of the proxy server 10 If your proxy server requires authentication next to Authentication select Enabl...

Страница 119: ...he printer and to print Billing Meter reports The current total number of impressions appear on the Billing Meters screen You can send Billing Meters data to up to five email addresses for billing adm...

Страница 120: ...ge 26 To set up email notifications for supplies data 1 At your computer open a Web browser in the address field type the IP address of the printer then press Enter or Return Note If you do not know t...

Страница 121: ...If both IPv4 and IPv6 are disabled you cannot access CentreWare Internet Services To set an IP address use the control panel Changing the IP Address Using CentreWare Internet Services To change the I...

Страница 122: ...the Printer To install the print drivers for a network connected printer you need the IP address of your printer You also need the IP address to access the settings of your printer through CentreWare...

Страница 123: ...its IP address dynamically To avoid having the IP address reassigned give the printer an address at the higher end of the range allowed by the router or device For example if your computer has IP addr...

Страница 124: ...Phaser 3610 Black and White Printer Assigning the IP Address Automatically 1 At the printer control panel press the Menu button Note To navigate through the menu use the up or down arrow buttons 2 Nav...

Страница 125: ...it using CentreWare Internet Services To assign a static IP address to the printer you need the following information An IP address properly configured for your network The Network Mask address The de...

Страница 126: ...inter control panel displays a reminder that the printer must be turned off and then restarted before the changed setting is applied You can restart the printer after all the settings have been modifi...

Отзывы: