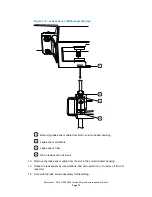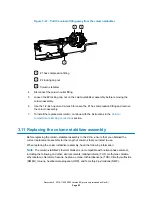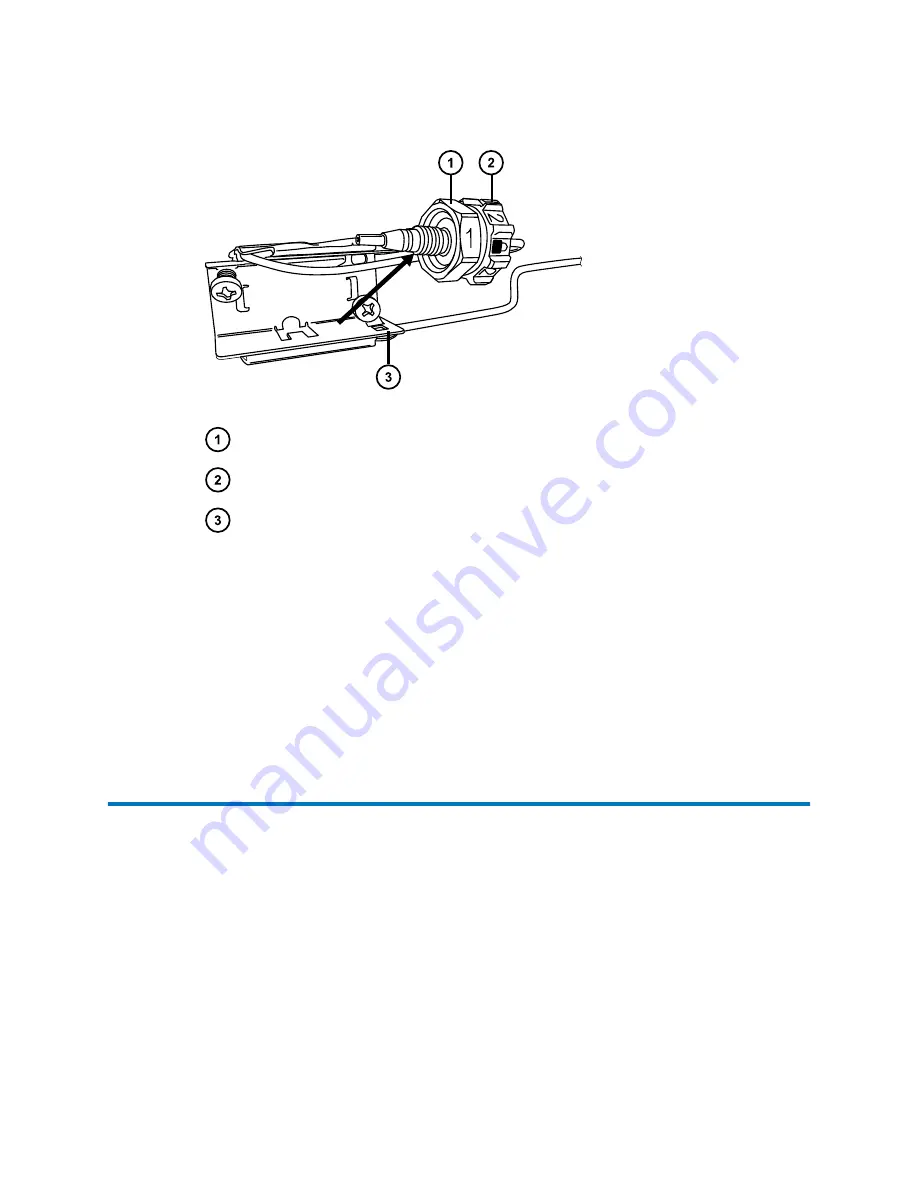
Figure 3–12: Pull the column fitting away from the column stabilizer
#1 hex compression fitting
#2 locking cap nut
Column stabilizer
4.
Disconnect the column outlet fitting.
5.
Loosen the #2 locking cap nut on the column-stabilizer assembly before removing the
column assembly.
6.
Use the 1/2-inch open-end wrench to loosen the #1 hex compression fitting and remove
the column assembly.
7.
To install the replacement column, continue with the instructions in the
compartment plumbing connections
3.11 Replacing the column stabilizer assembly
Before replacing the column-stabilizer assembly in the CH-A, ensure that you obtained the
correct replacement assembly for the length of columns that you intend to use.
When replacing the column-stabilizer assembly, heed the following information:
Note:
The column-stabilizer's thermal blanket is not compatible with normal-phase solvents,
including the following and other, similar solvents: tetrahydrofuran (THF), methylene chloride,
ethyl acetate, chloroform, hexane, heptane, octane, trichlorobenzene (TCB), dimethyl sulfoxide
(DMSO), toluene, hexafluoroisopropanol (HFIP), and N-methly-2-pyrrolidone (NMP).
December 4, 2019, 715005052 Version 02 (previously released as Rev.B)
Page 82


