


-2- USE INSTRUCTIONS TFS 100
33/38
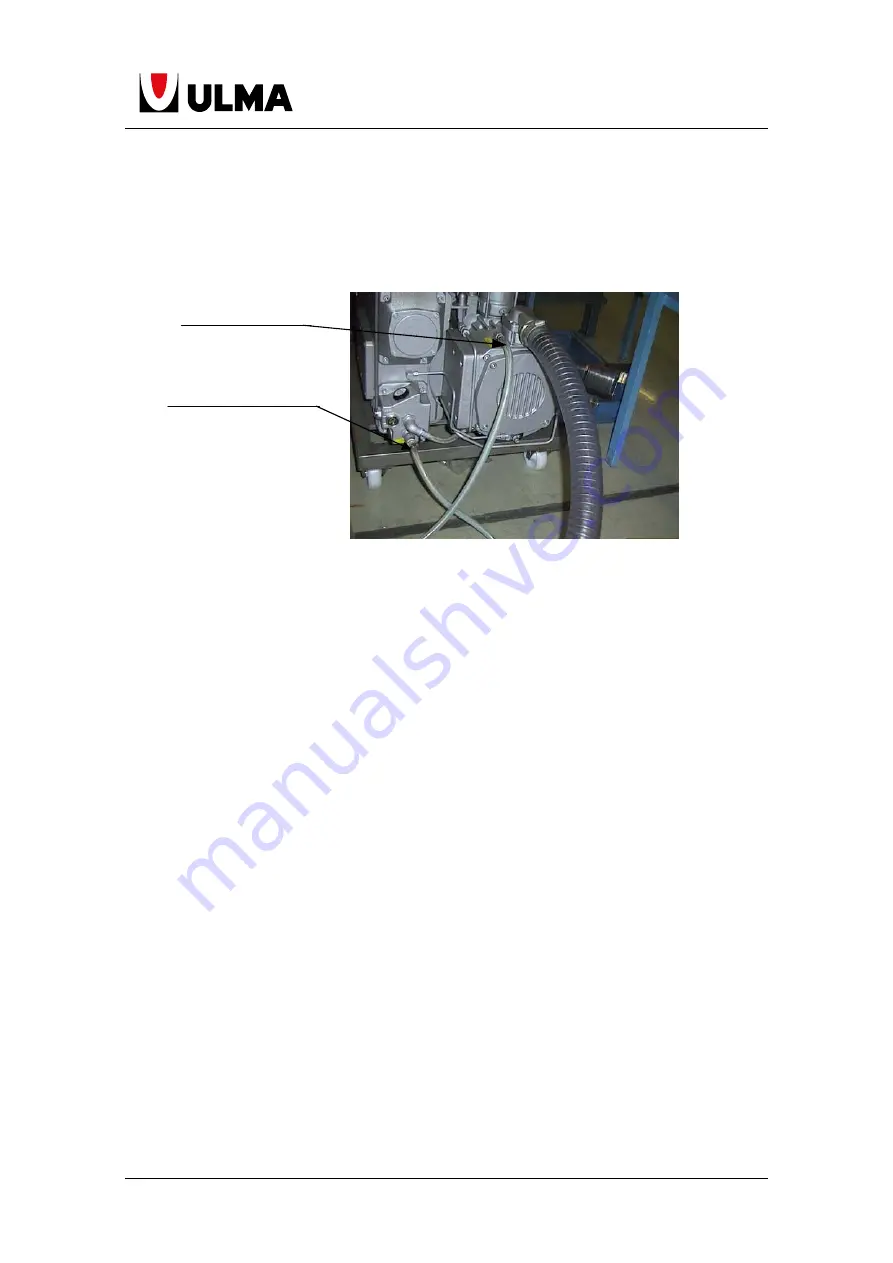
7.4 VACUUM PUMP
Pump cooling
Busch vacuum pumps do not need water cooling, except the
EVA CB250 80 A
pump. Use the cooling circuit of the machine to cool the pump. All the pumps need to
be lubricated with oil.
Anti-emulsion oil cleaning
When working with high moisture products, it is important to get back the pump
lubricant for it not to lose its properties. This is why condensed water vapour must be
separated from oil inside the crank. An anti-emulsion lubricant will be necessary when
working with high moisture products.
In order to keep lubricant in good working condition, we recommend the
following (strongly recommended if working with high moisture products):
1-
Pump must be started (without making cycles) 30 minutes before
packaging is started, so it can reach a temperature of 75ºC.
2-
Once the production completed, leave the pump still working for 30-40
minutes more in order to separate water and oil.
3-
Once the oil has been separated, water must be purged after two
hours’ stop. We recommend to do this the day after, before starting producing
and after making a preheating. The purge can be made by slightly opening the
oil emptying plug for water to come out and close it when oil starts coming out.
Cleaning of the oil in the oxygen pump
The following must be done (there are different cases):
1-
If oil contains a small quantity of water, you only have to let the pump
work for an hour for water to evaporate.
2-
If oil contains a big quantity of water, we recommend to take all the oil
out of the pump in a transparent container.
We also recommend to take off the filter and clean it from oil in order to obtain
as much oil as possible (this oil being very expensive).
Let the oil in the container. The oil in the oxygen pump is heavier than water
and so it will go to the bottom of the recipient. Take out the water and put the filter and
WATER EXIT
WATER INLET
Содержание TFS100
Страница 2: ......
Страница 4: ......
Страница 14: ......
Страница 16: ......
Страница 18: ...2 USE INSTRUCTIONS TFS 100 2 38 8 1 FILM COIL STORAGE AND TRANSPORT 37 8 2 INSERTION OF PRODUCTS IN TRAYS 38...
Страница 26: ...2 USE INSTRUCTIONS TFS 100 10 38...
Страница 28: ...2 USE INSTRUCTIONS TFS 100 12 38 3 8 ELECTRONIC CABINET...
Страница 40: ...2 USE INSTRUCTIONS TFS 100 24 38...
Страница 48: ...2 USE INSTRUCTIONS TFS 100 32 38 GREASERS 9372726 GREASE CUP Lubrication points...
Страница 56: ......
Страница 58: ...3 SCREEN PP45 2 29...
Страница 82: ...3 SCREEN PP45 26 29...