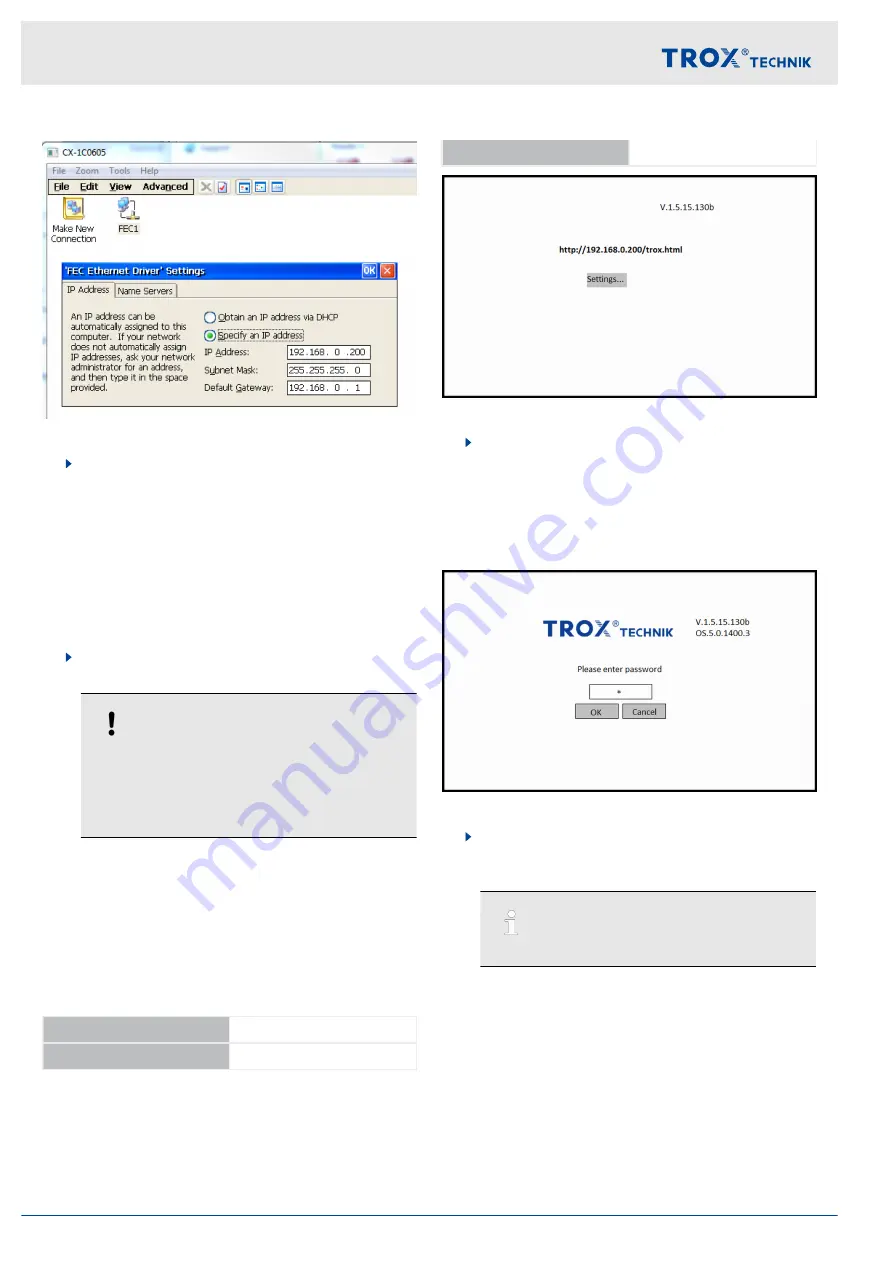
Fig. 53
7.
In the next window select
‘FEC1’
.
The
‘'FEC Ethernet Driver Settings'’
window
opens.
Select
‘Specify an IP address’
and enter the
required network settings.
Confirm your entries with
‘OK’
and close the
‘Control Panel’
window.
The new settings are immediately active; you
need not restart the computer.
8.
Remove the network cable from port X000 and
connect the touch panel again.
NOTICE!
Touch panel address
The IP address applies to both ports, i.e. X000
and X001. If you change the IP address, you
have to enter the new address also on the
touch panel.
Connect the BMS computer or another X-CUBE
unit to port X001.
Setting the IP address for the touch panel
Personnel:
HVAC technician
Factory set network address for the touch panel
IP address
192.168.0.199
Subnet mask
255.255.255.0
Standard gateway
192.168.0.1
Fig. 54: Starting screen
1.
After you have changed the network settings you
need to restart the computer. To do so, switch off
circuit breaker 11Q1 in the switch cabinet. Wait
until all LEDs on the computer are OFF. Switch
the circuit breaker on again in order to restart the
computer.
On the starting screen select
‘Settings...’
.
Fig. 55: Password entry
2.
Touch the entry field (
*
) to display the keyboard.
Enter the password
+-+-
(PlusMinusPlusMinus)
and confirm your entry with
‘OK’
.
Use the shift key to enter
+
(plus).
Installation
Connecting the controls to your PC or local network > X-CUBE controller CX9020
Air handling unit X-CUBE
52


