


Preparation before Use
2-54
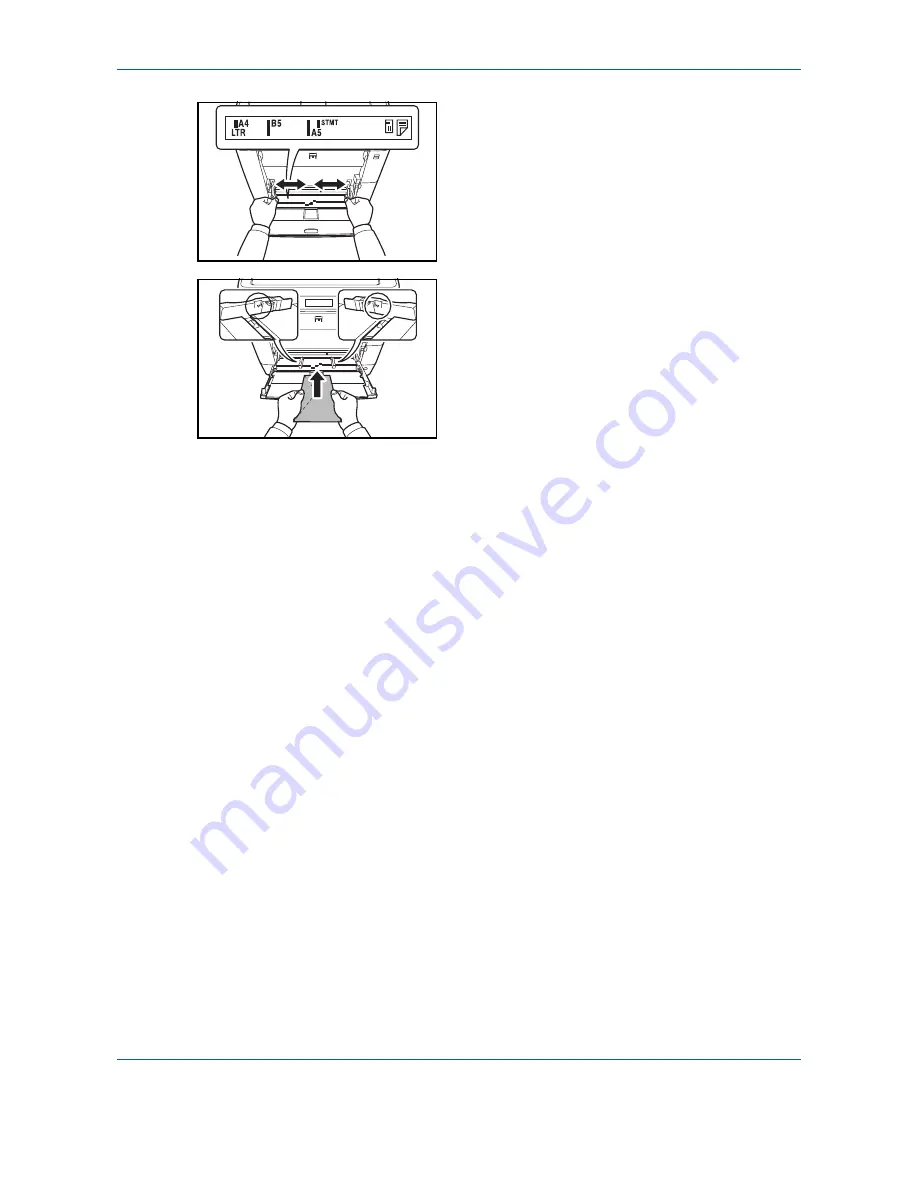
3
Adjust the position of the paper width guides on the
Multi Purpose tray.
4
Align the paper with the paper width guides and
insert as far as it will go.
5
For landscape form envelopes, close the flap.
Insert the envelope all the way along the width
guides, keeping the printing side face-up and the
edge with the flap left.
For portrait form envelopes, open the flap. Insert
the envelope all the way along the width guides,
keeping the printing side face-up and the edge with
the flap facing the front side.
Содержание P-C2660
Страница 36: ...xxxiv...
Страница 98: ...Preparation before Use 2 56 Paper stopper To use the sheet ejection stopper open as shown below Example Legal...
Страница 110: ...Preparation before Use 2 68...
Страница 147: ...Basic Operation 3 37 3 2 Click Advanced settings 3 Click Inbound Rules 4 Click New Rule 5 Select Port and click Next...
Страница 158: ...Basic Operation 3 48...
Страница 184: ...Copying Functions 4 26...
Страница 234: ...Document Box 6 20...
Страница 472: ...Default Setting System Menu 8 216...
Страница 502: ...Troubleshooting 10 22...
Страница 577: ......


