


CHAPTER 4 |
48
APPENDIX
We’ll come back and set up Destinations in a moment. Next thing to do is set up a studio in VX. See the Studio section of
this manual where we discuss the individual studio configuration pages. For this example, we have Studio A with 2 selectable
channels configured:
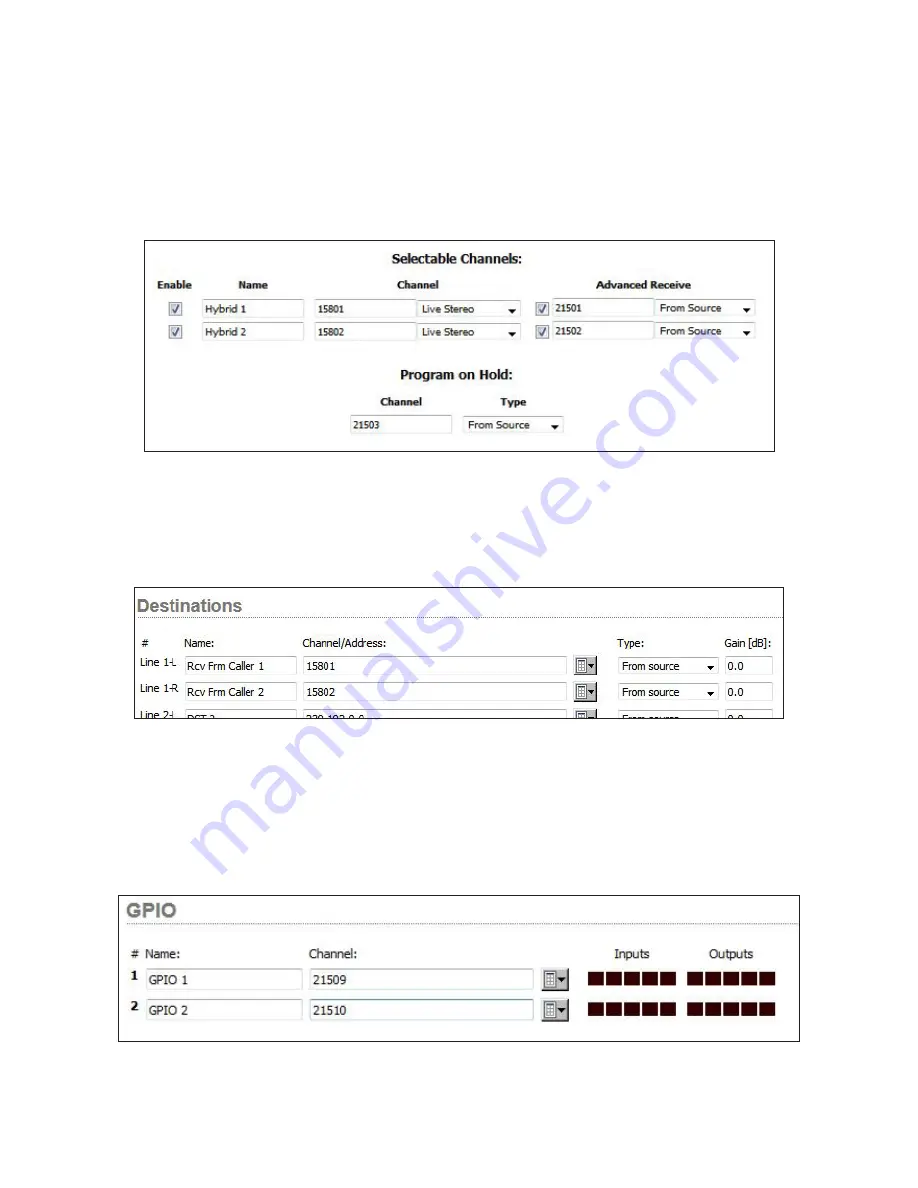
In the Selectable Channel section of the VX Studio, there is an
ADVANCED RECEIVE
column that will need to be activated and
used for this setup. Click the check box under
ADVANCED RECEIVE
and enter the channel numbers we just assigned to the
xNodes Source (input) page. Finally, Enter the Program on Hold channel in the appropriate field and apply your changes.
Finally, go to the xNode’s
DESTINATIONS
page and insert the VX Studio’s channel numbers into the appropriate
DESTINATION
(output) fields in the xNode config:
Once these changes are applied, the VX Studio is ready to receive and send audio to callers via the xNode. The sources and
destinations pages tell you which jack the audio will be sent to or received from. In this case, caller I/O is channel 1 L & R and
POH input for the studio is the Left side of input channel 2. This configuration can be repeated / enlarged until the VX will no
longer support any additional channels. xNodes can be added as needed.
If GPIO indications and actions are needed, go to the GPIO xNodes configuration page or the Simple Setup page of the Mixed
Signal xNode and assign the ports available LW channels. Note that GPIO LW channels do not advertise to the network, so you
will not see them in the browse window. In this example, we will continue with the numbering scheme we started earlier:


